Finished Lid - But what about the sides?
Well, it has been an interesting 6 weeks since my last post with several ups and downs, but lets start with the ups.
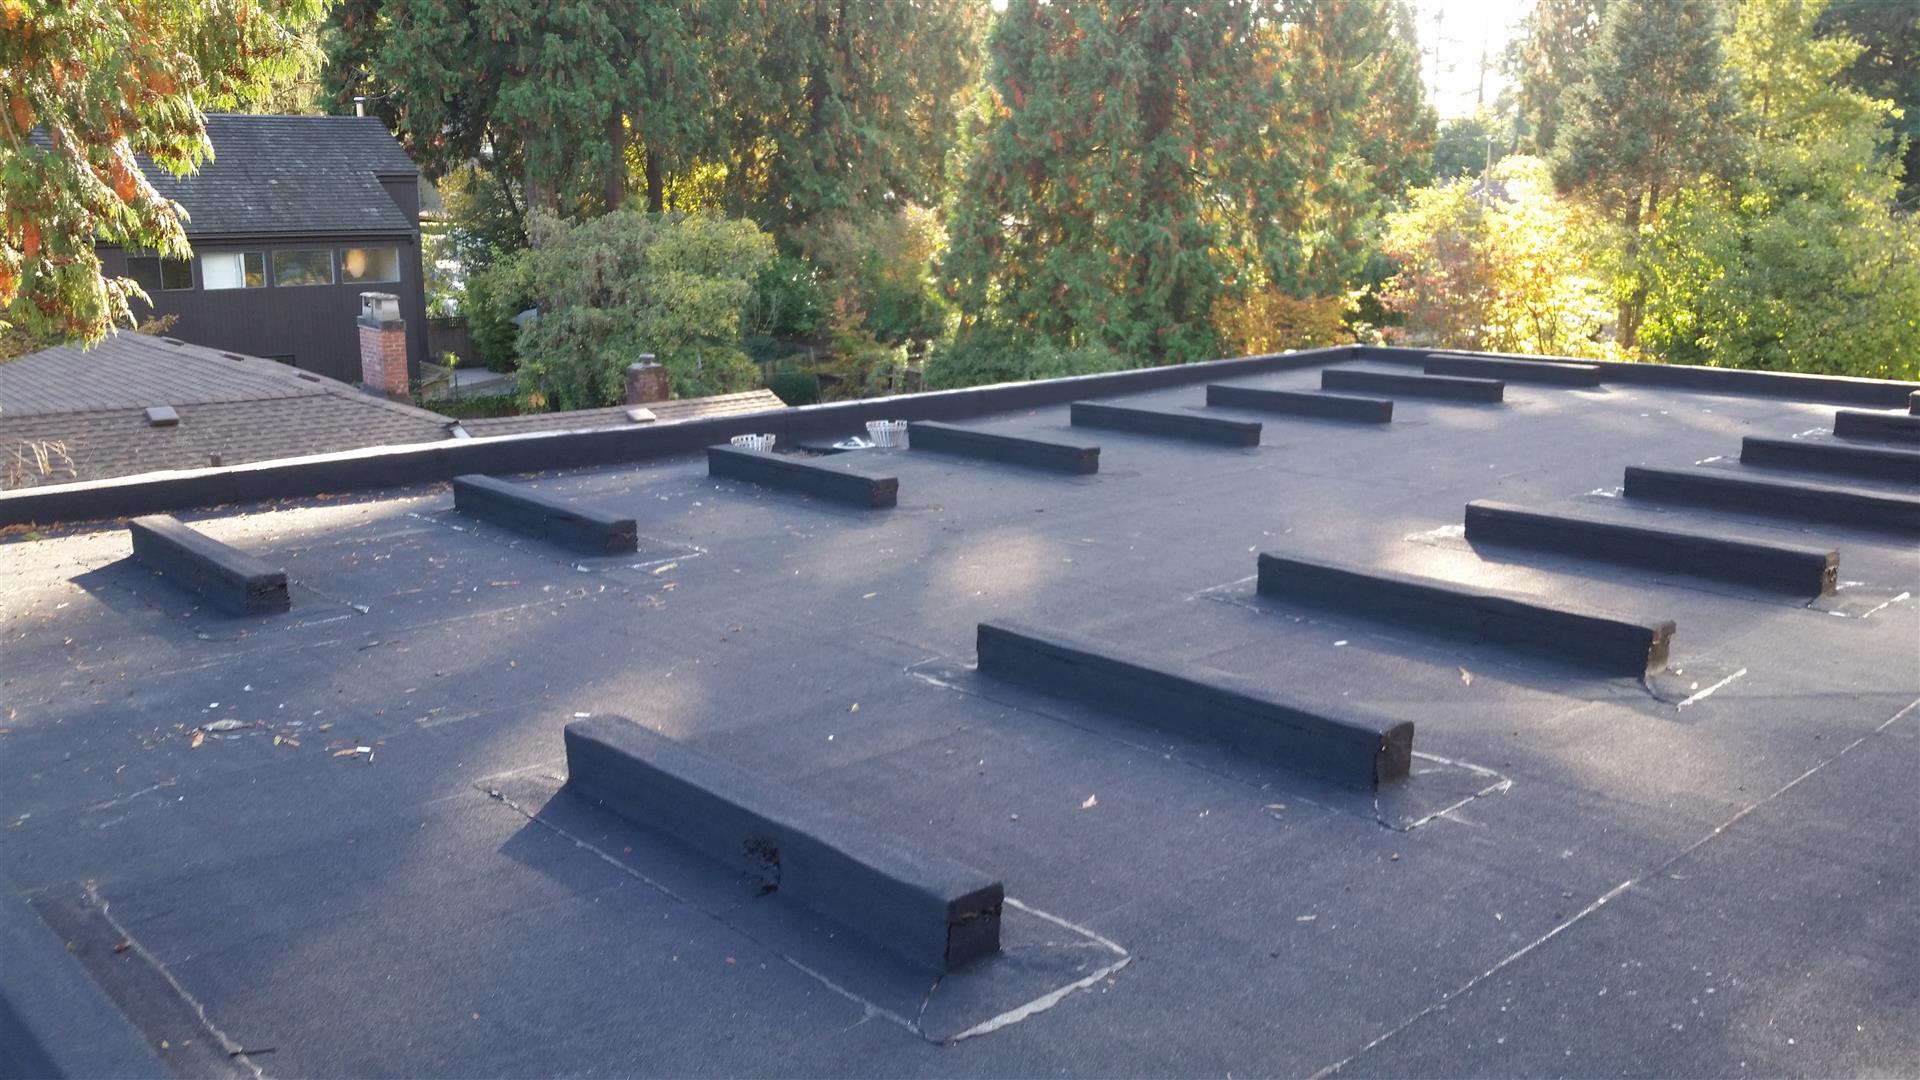
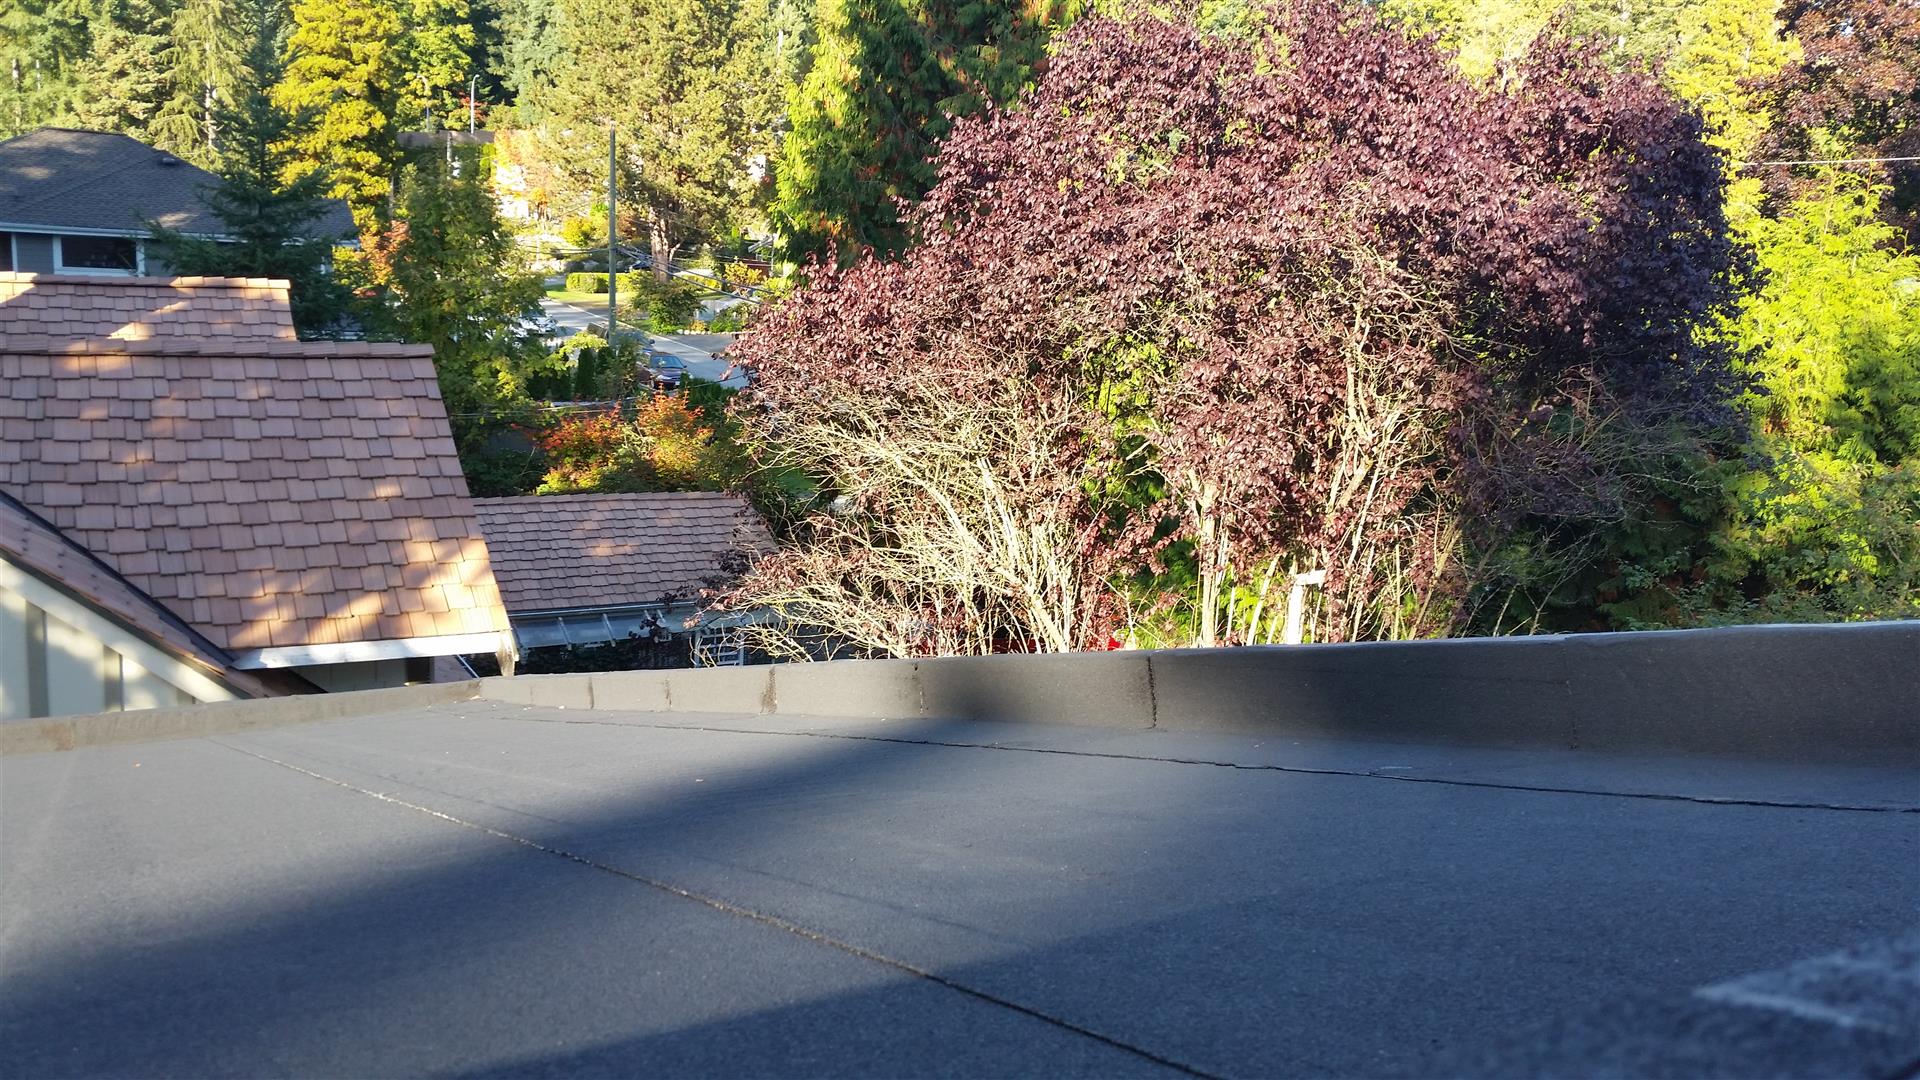
Total, after a total of 6 Saturday’s, Geoff and his crews finished installing the final cap sheet of the roofing today. I still will need to install the fascia covering panels along with the fascia parapet cap flashing, but that will not effect the water tightness of the dwelling. My apologies to Geoff for misrepresenting the complexity of my roofing system. When I first contacted him, I mischievously sold these roofs as 4 simple ‘shed style’ roofs with no valleys. It was not till later after he had committed to the job that I explained all of the PV curbs and raised fascia parapet curbs that the project entailed. As each of the roofers would crest the ladder to the upper south roof, I would hear a gasp or nervous laughter as they saw all the curb work that was needed. I think there was over 8 man days in roofing just the one south roof with all of the PV curbs. This marks the end of this milestone and takes a huge stressor off my list. I can now rest assured that this winter, I will not have any issues with rain or snow and have no tarp to manage – as I write this I am kicking myself in-case I am somehow jinxing myself :-). I still have some touch ups on the roof where I need to embed some granules into areas with too much bleed out or where the membrane got to hot, in order to prevent UV degradation, but this can probably wait till spring.
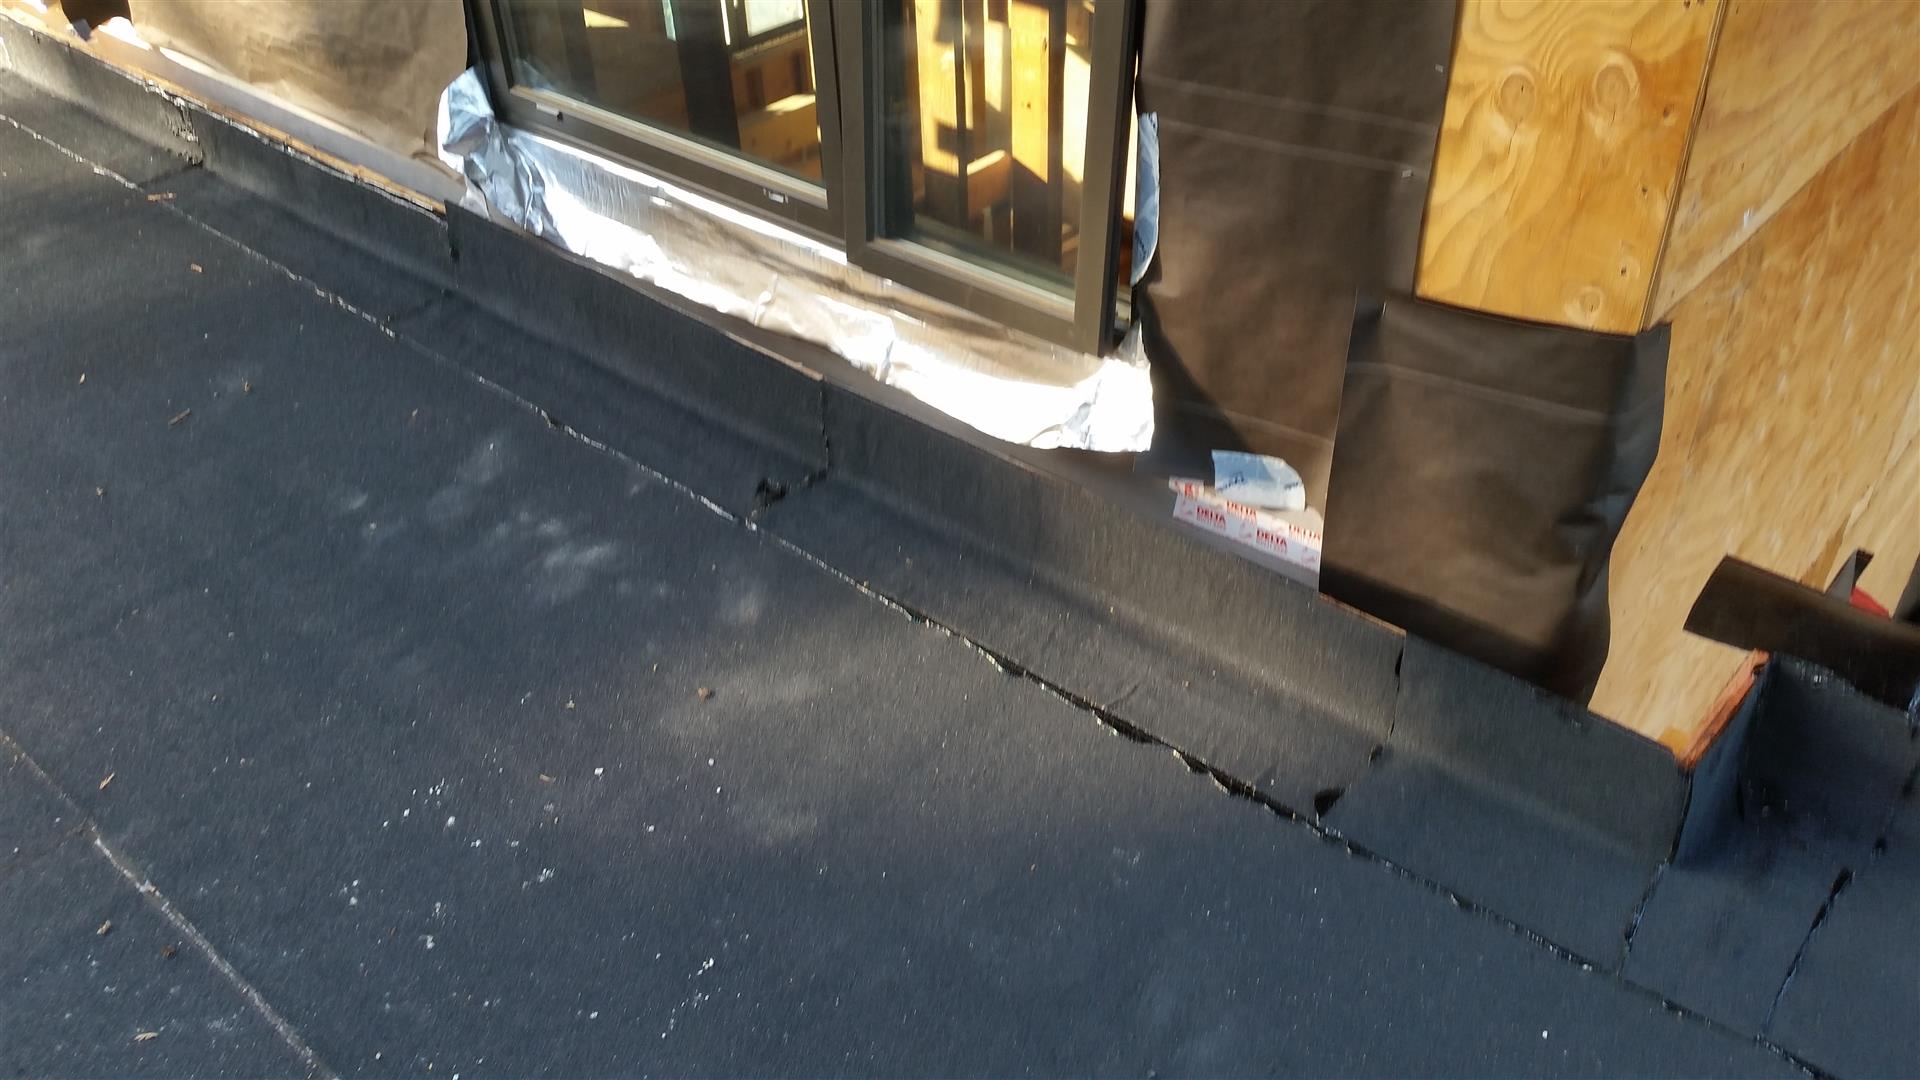
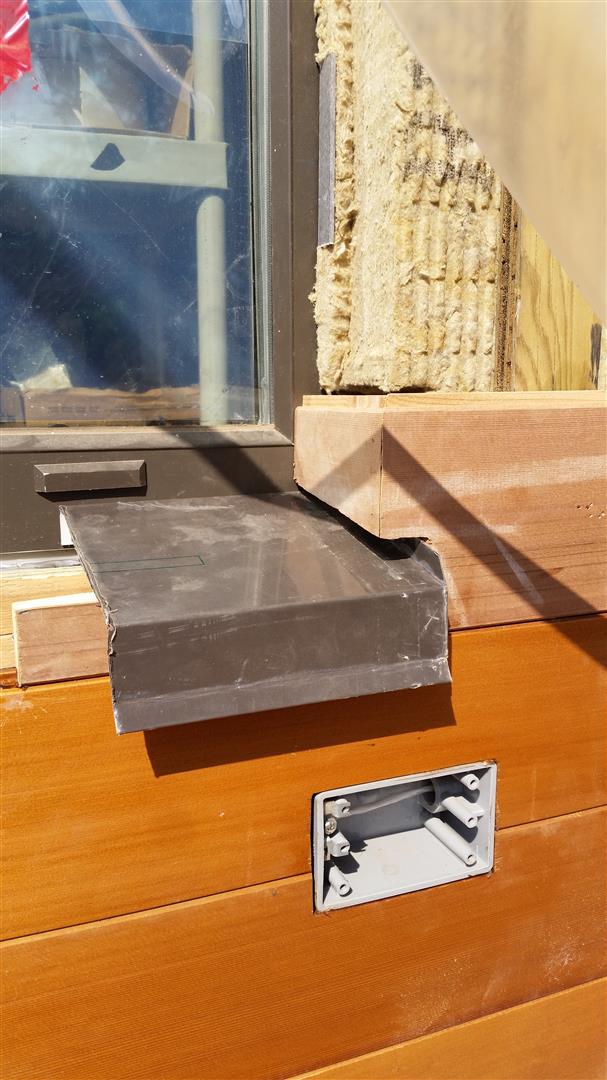
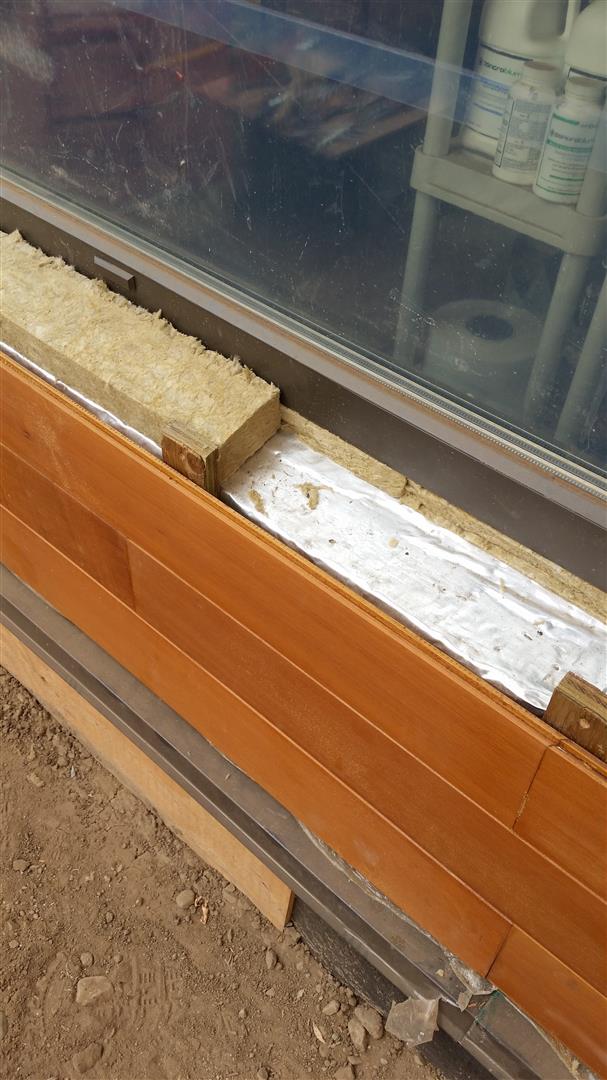
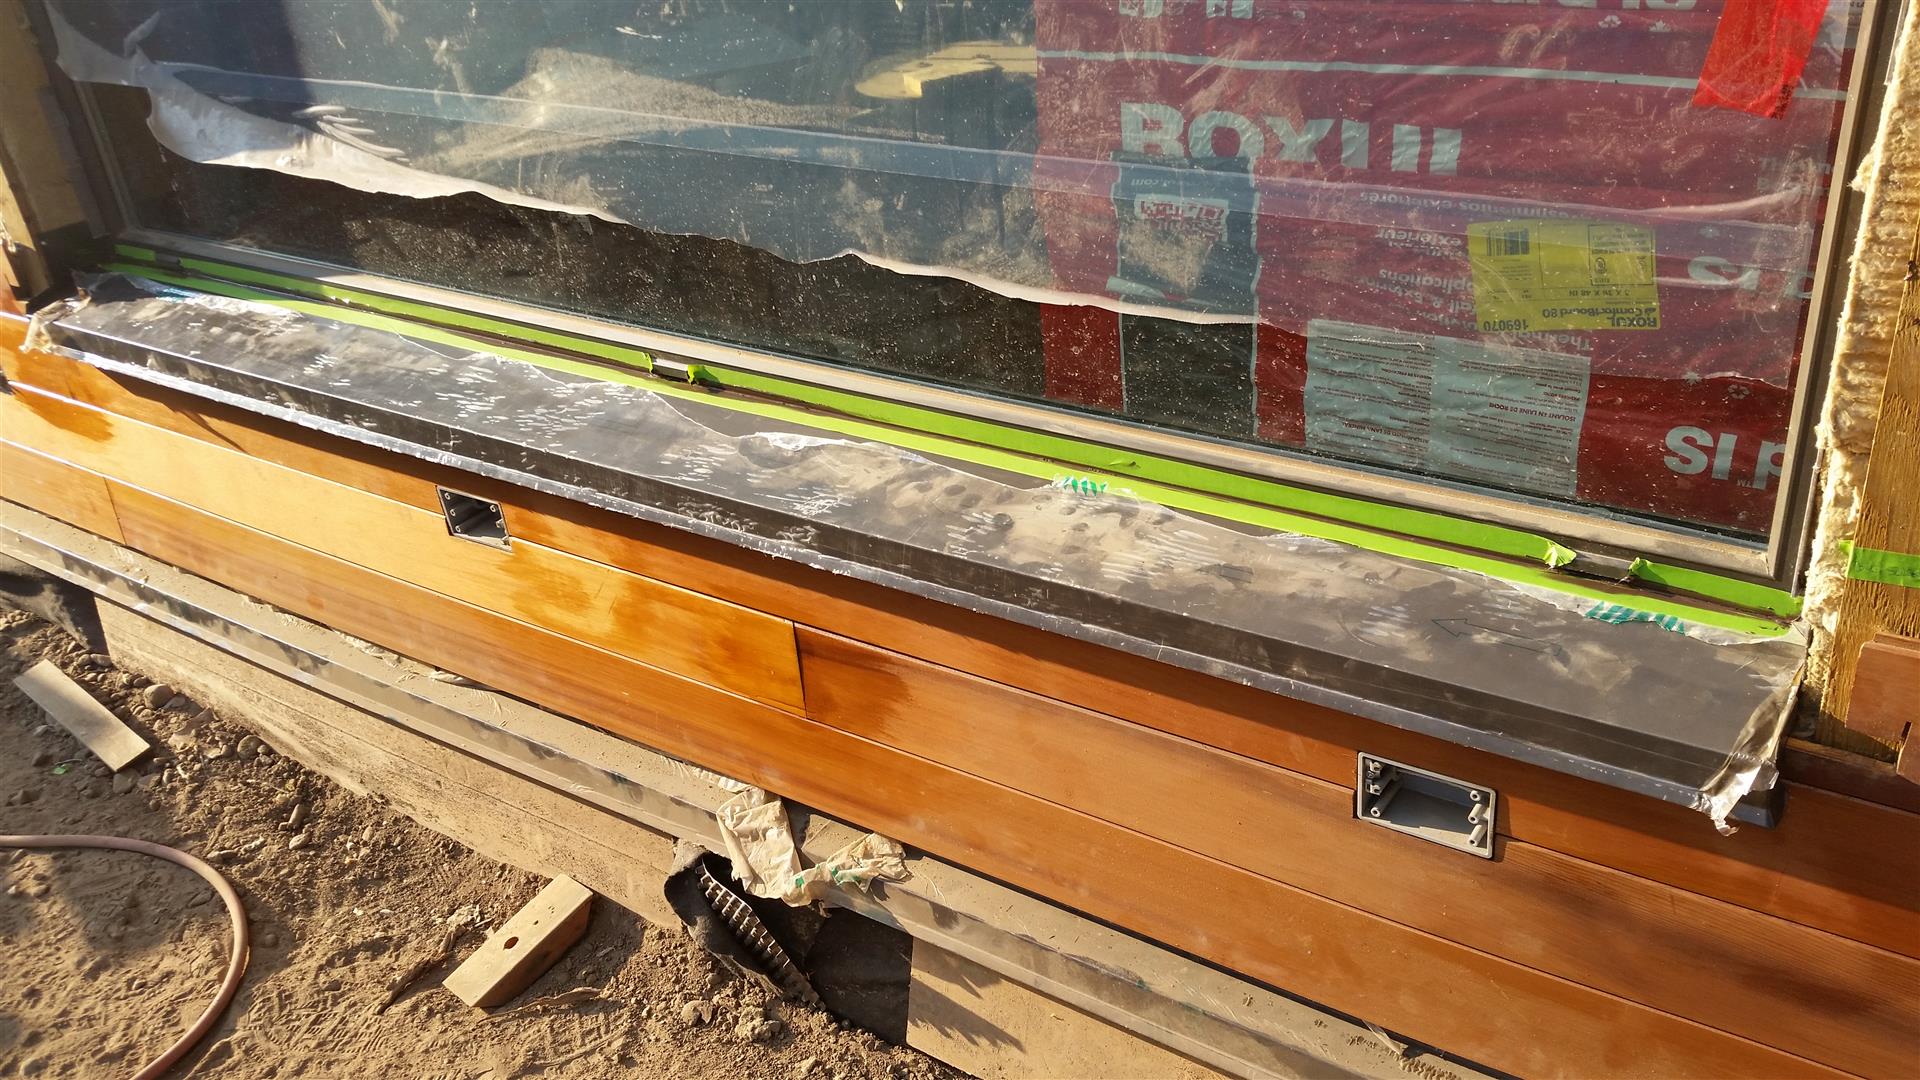
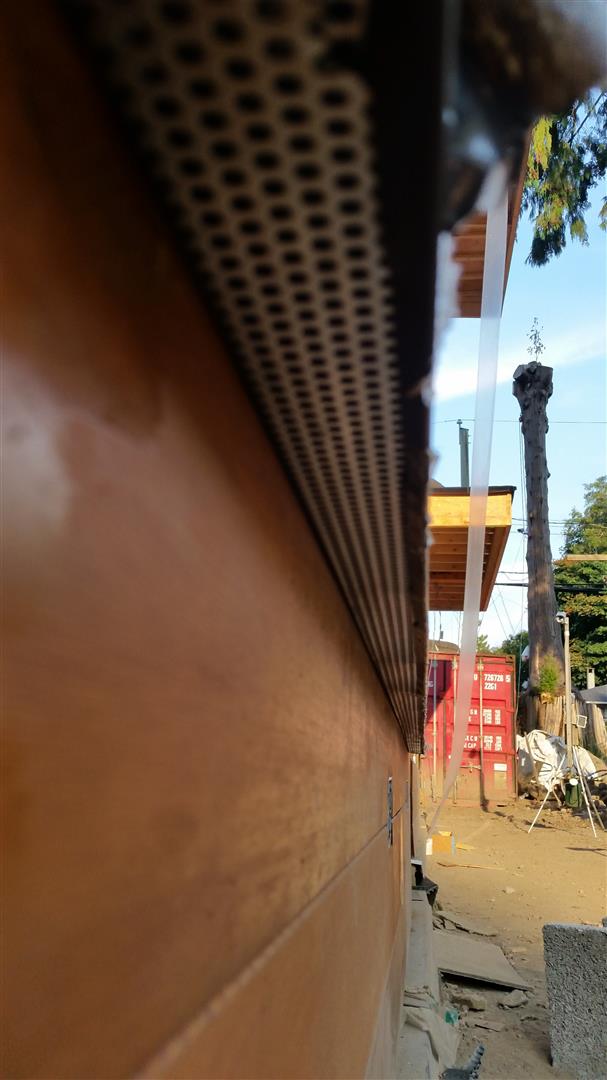
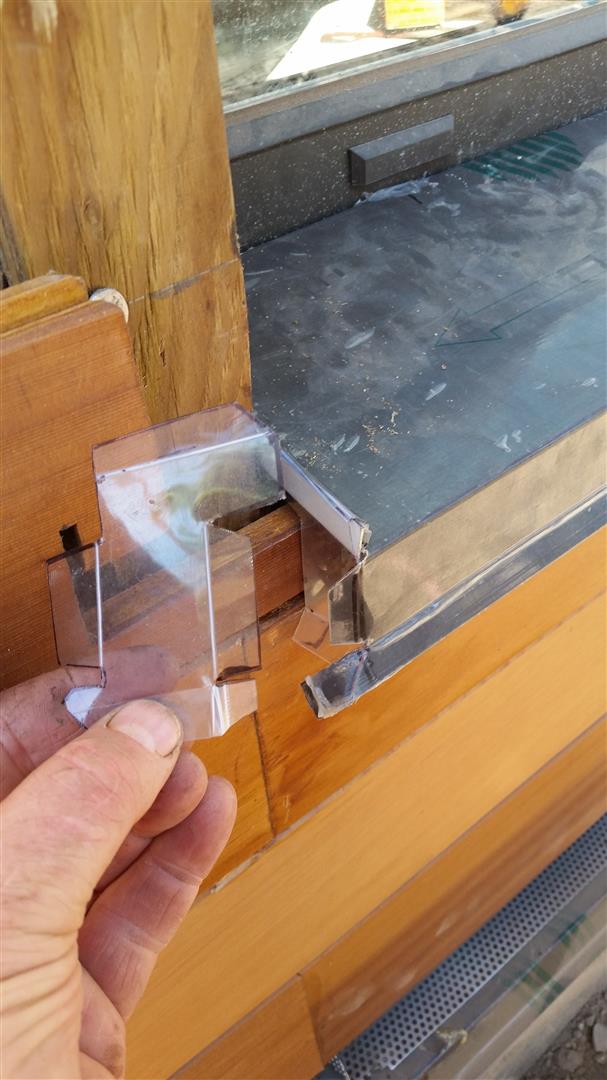
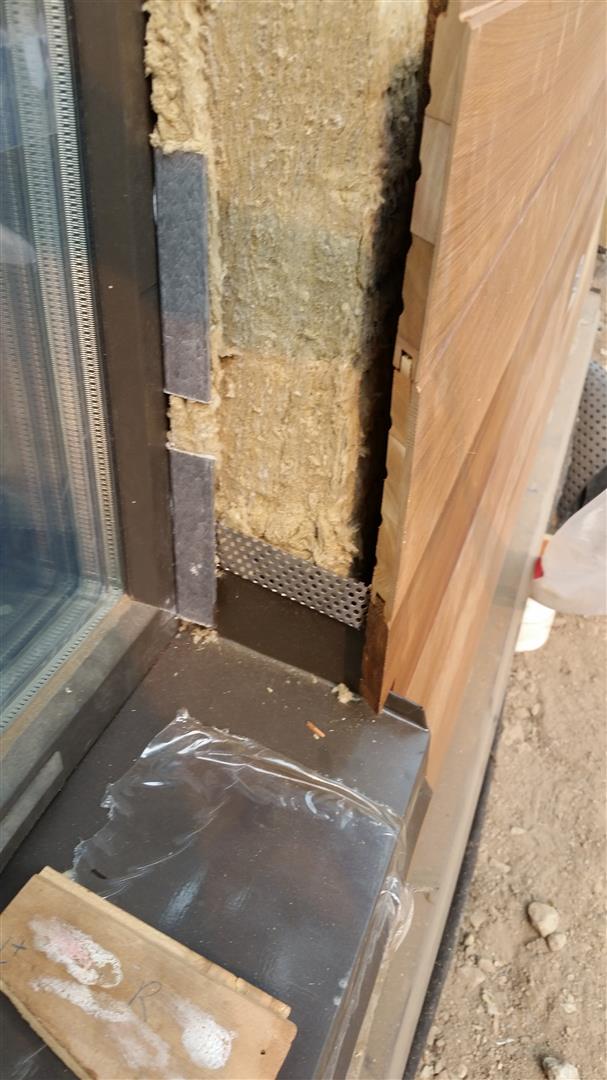
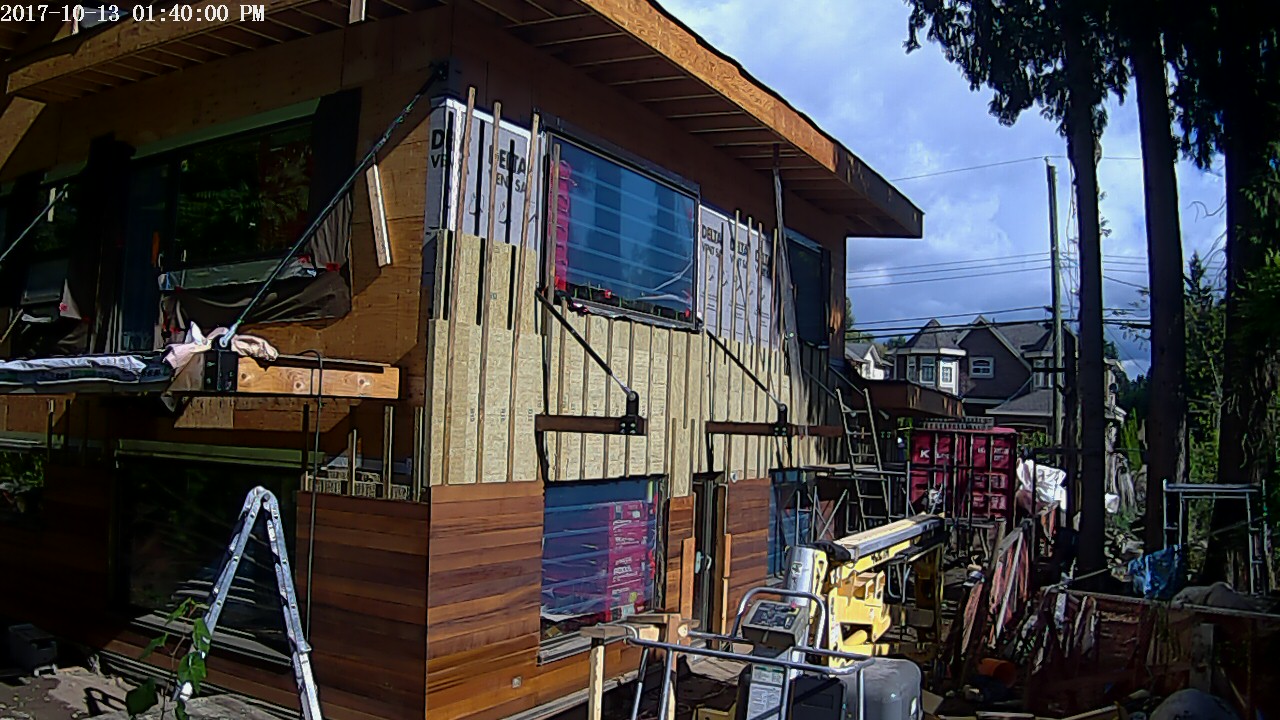
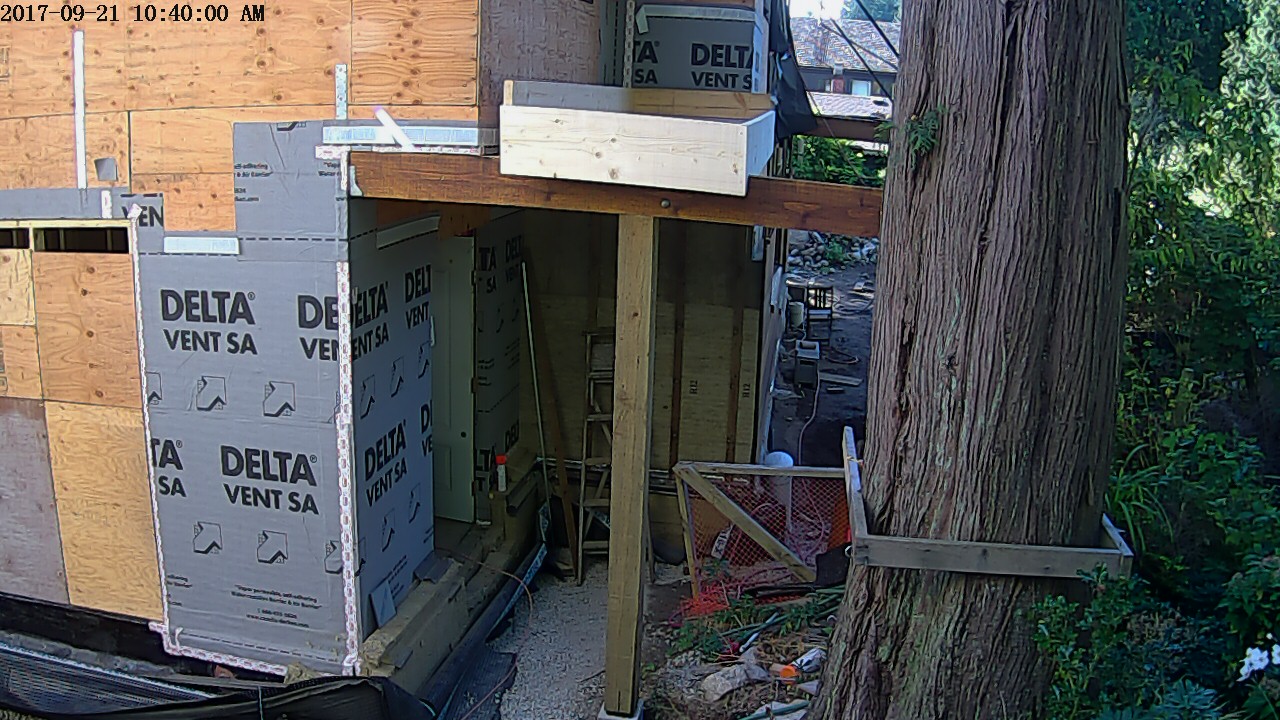
I have also been able to progress somewhat on the exterior installation of membrane, insulation, and siding. When I left you last, I had stalled out installing the window sill flashing. What I designed on paper was not buildable because once I had the siding course level with the flashing installed, I was no longer able to bend up the flashing high enough to attach its back downward facing leg to the window frame. So I modified the plan to install that course in three pieces instead of one. The first piece was installed below the flashing and had the bug screen attached to it. I then installed the flashing and slid in siding pieces from each side of the flashing. The seam between the three pieces is hiding below the flashing.
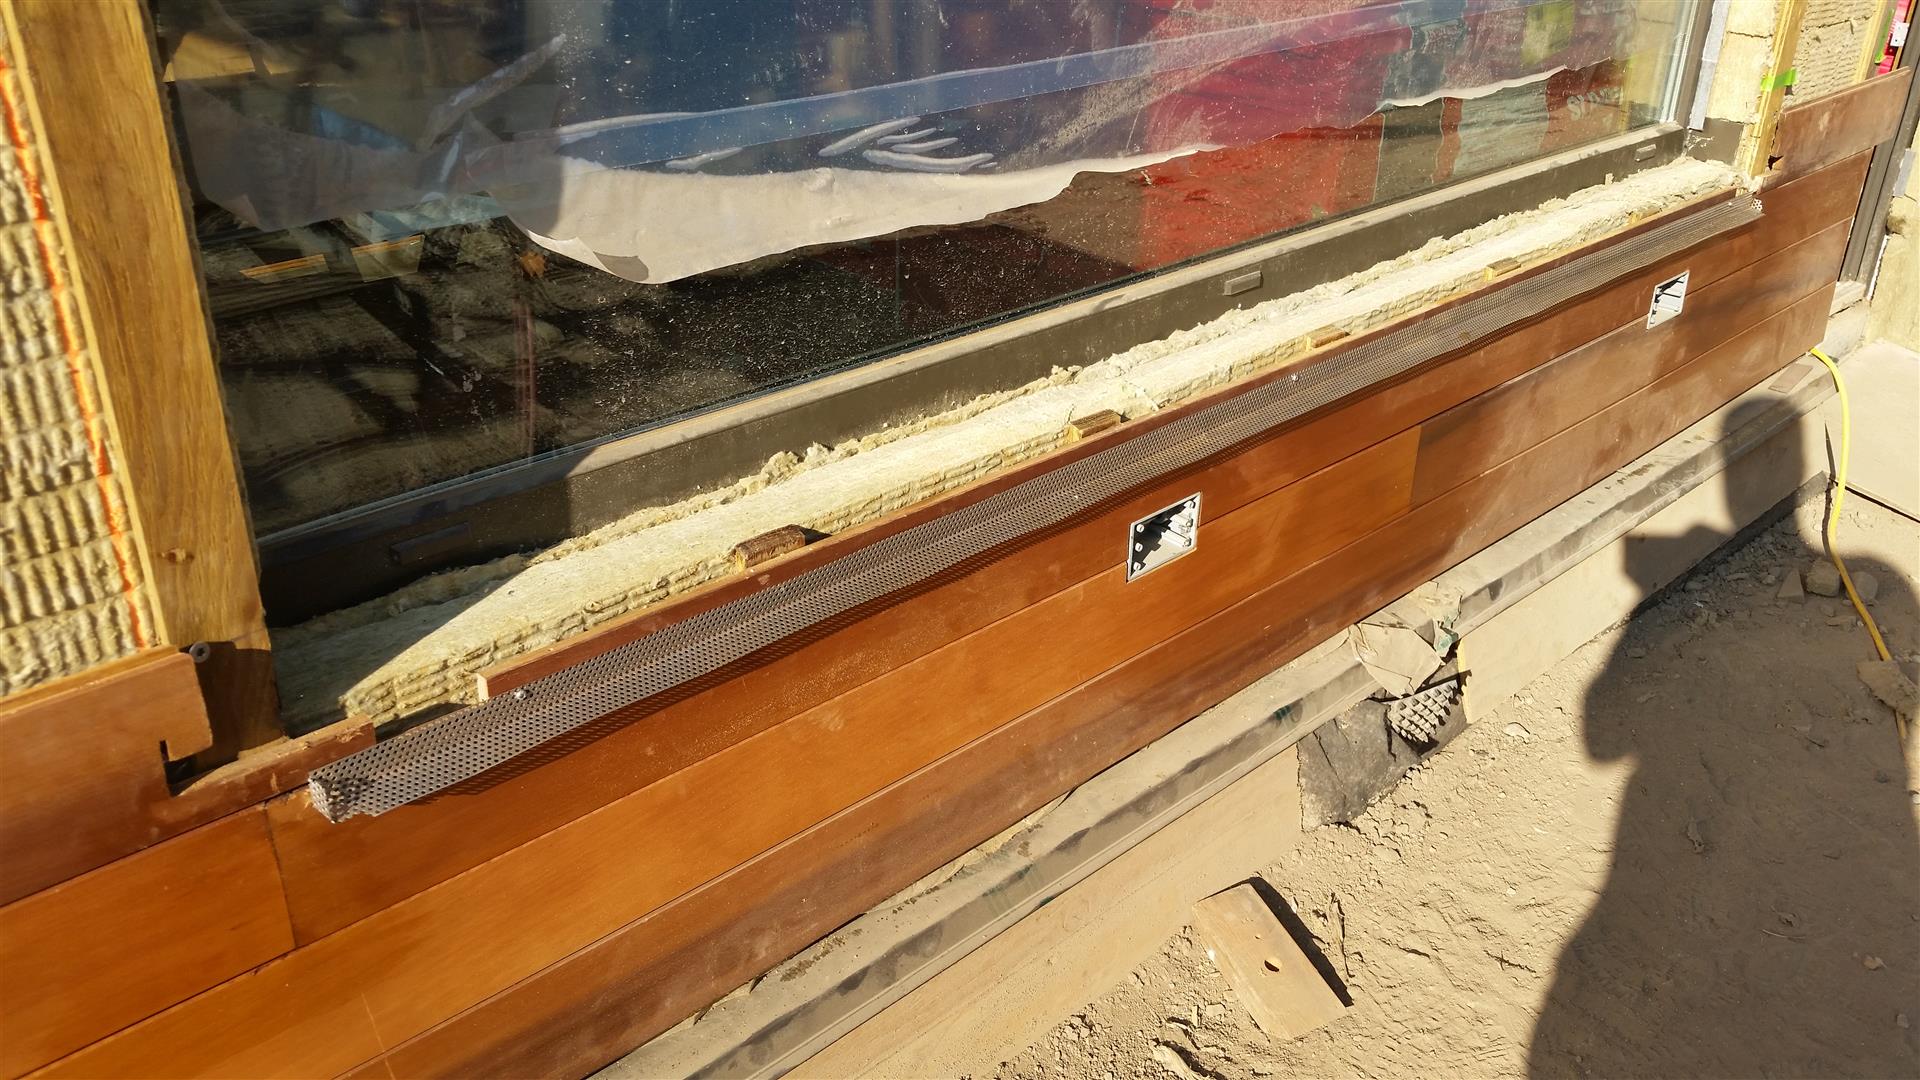

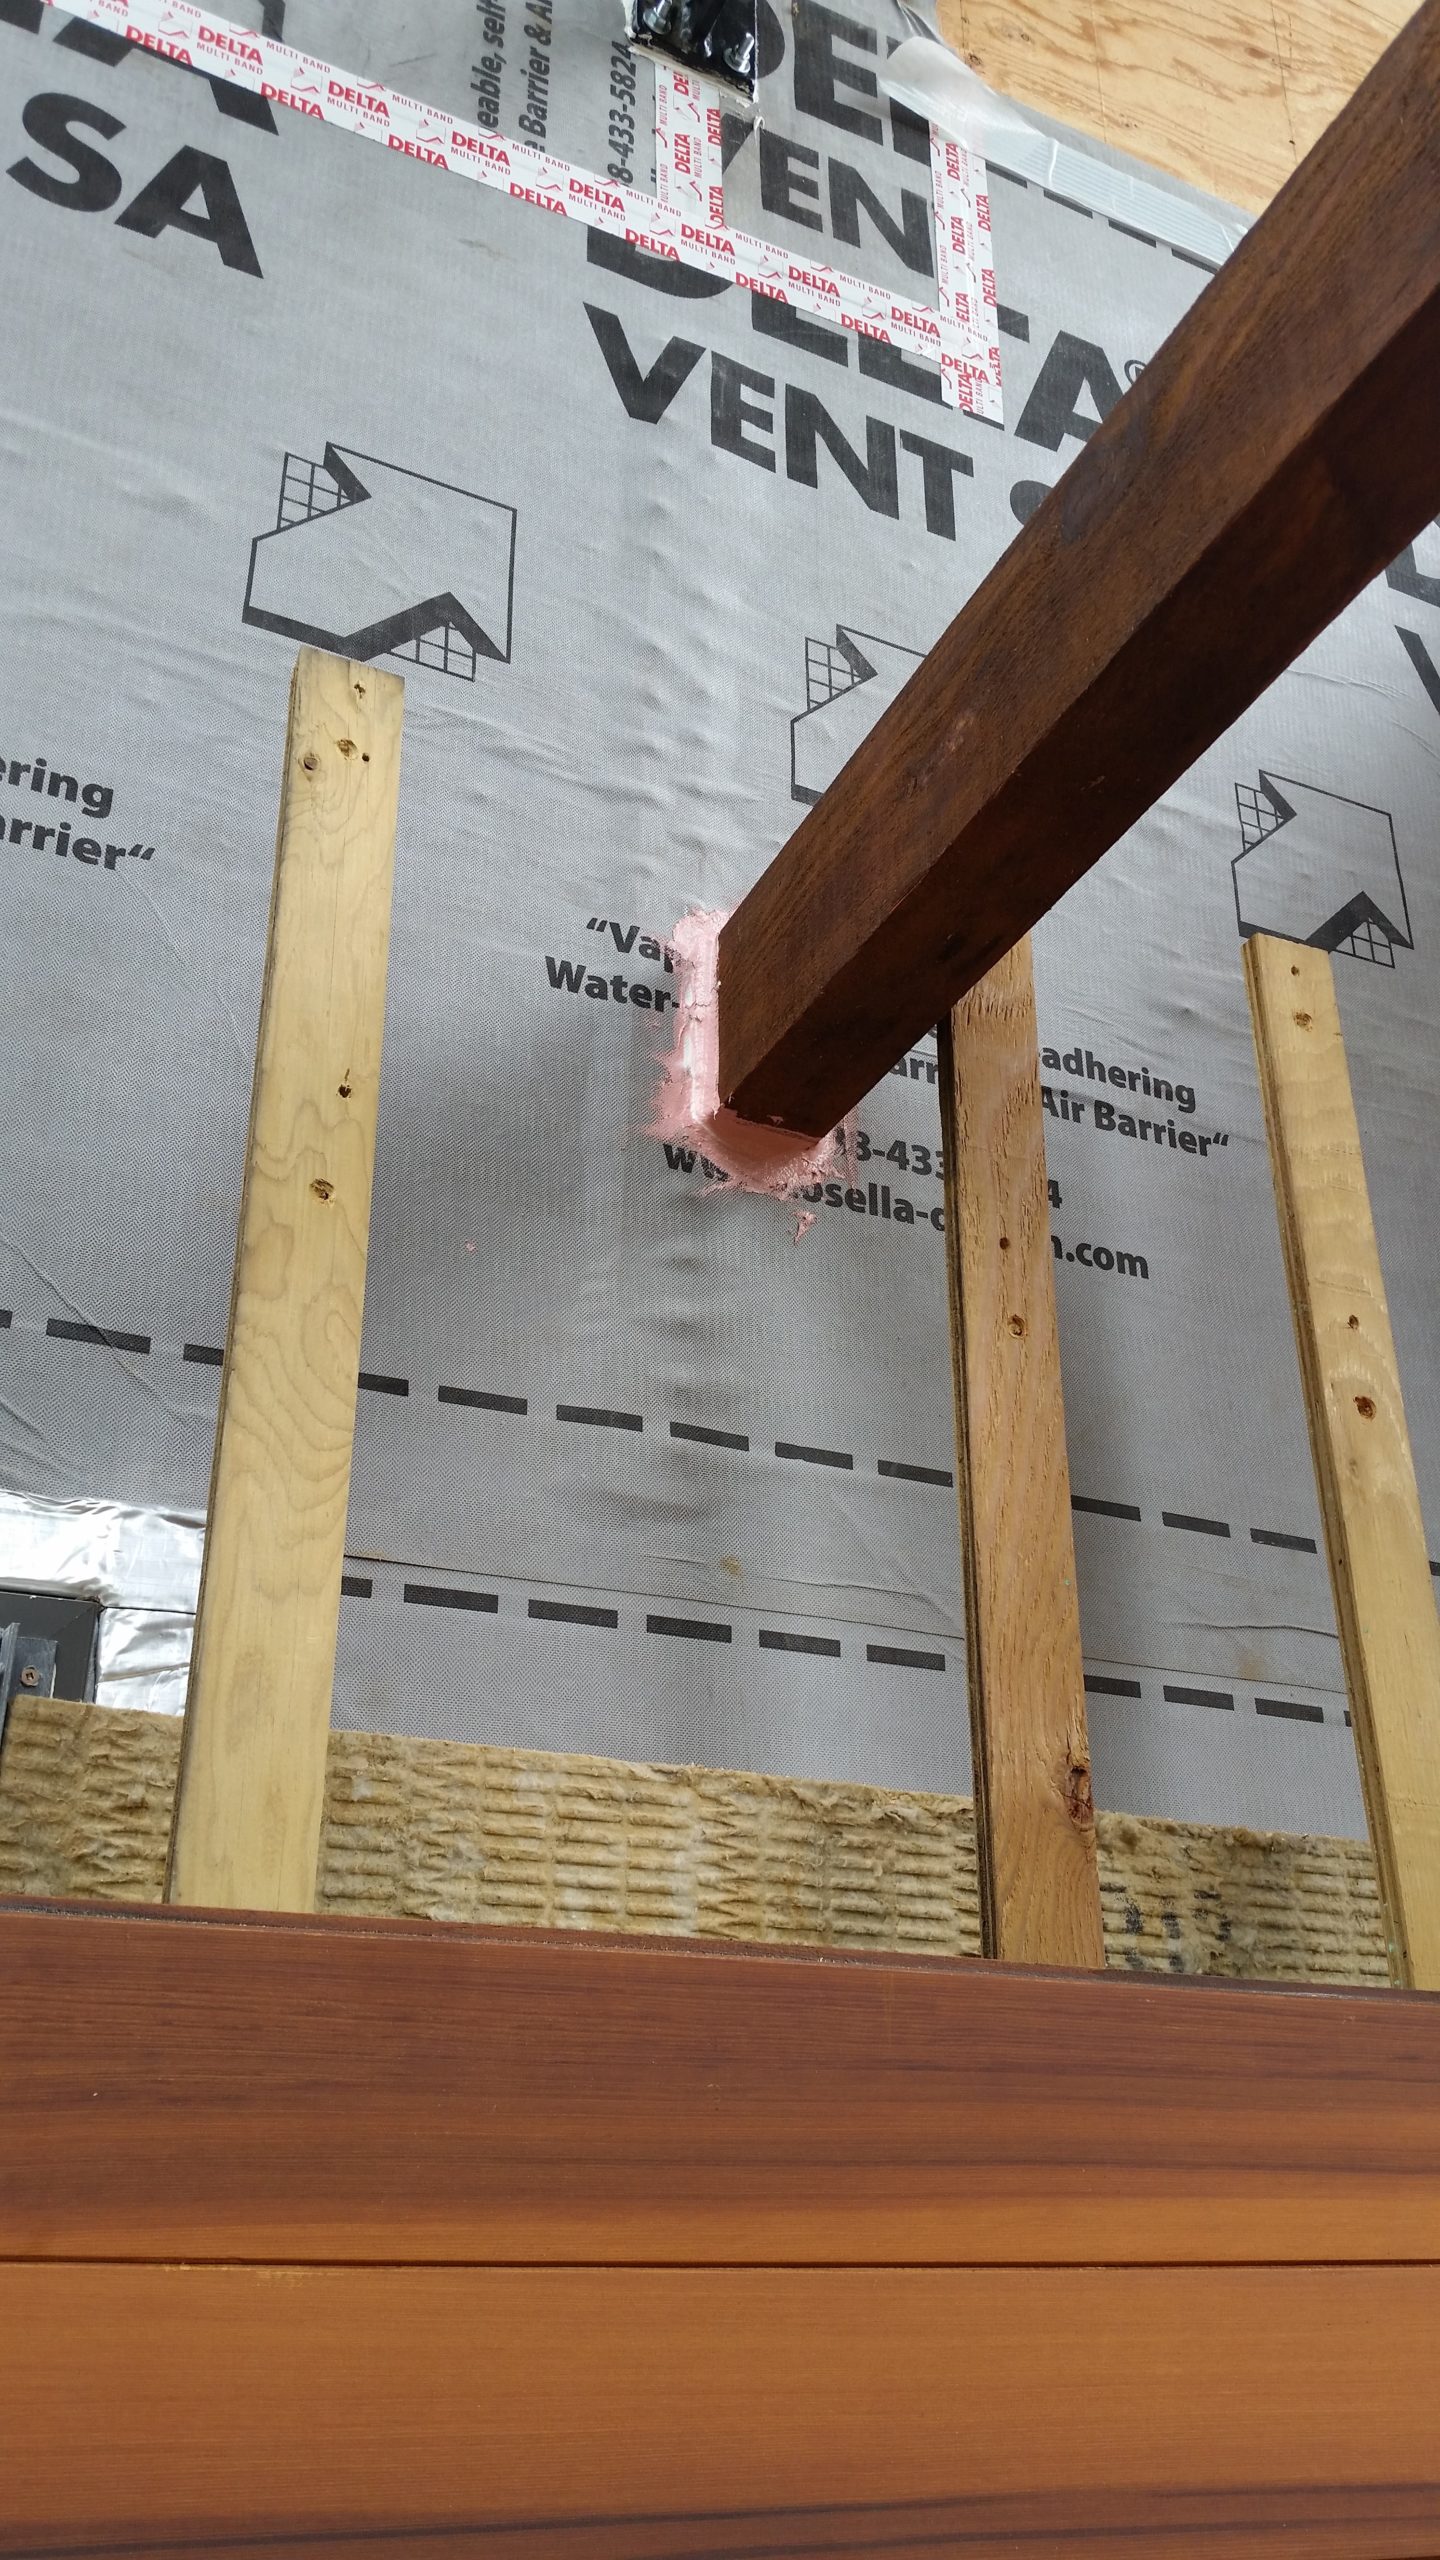
One of the hardest parts about installing this level of exterior insulation is ensuring the screws securing the rain screen furring strips find a stud. If you covered the whole wall with the insulation or even just the WRB membrane, this requirement would be next to impossible to achieve. I found the easiest way was to mount my furring strips very early in the process.

I mounted these temporary ‘headers’ on 6″ blocks (to represent thickness of insulation) at exactly 8′ above where I wanted the bottom of my furring strips to start (which are 8′ long). I measured off of the top of my windows rough opening which are all the same height above my interior floor. The headers were mounted using a digital level to ensure perfectly flat. This is a crucial step, as there is no point on the exterior side of the wall to measure from once the insulation has been installed at base of wall. I then attached the furring strips with the top side flush with the top of the temporary header and placed them perpendicular to the stud. This is easily achievable as the nail line attaching the sheathing to stud is still visible above the sheathing membrane. I then used a level to ensure the furring strip hung down from the header perfectly plumb and secured from rotating out of plumb with a second screw. Now I had furring strips hanging from above that were perfectly aligned with the studs, and as long as I installed the screws perpendicular with the surface of the insulation and furring strips, I was guaranteed to hit studs. And so far I have only mist a half dozen times (after installing well over a hundred screws). I generally leave the misses in place and install a second screw close by the first. This prevents a hole in your air barrier that would be left by a removed screw.
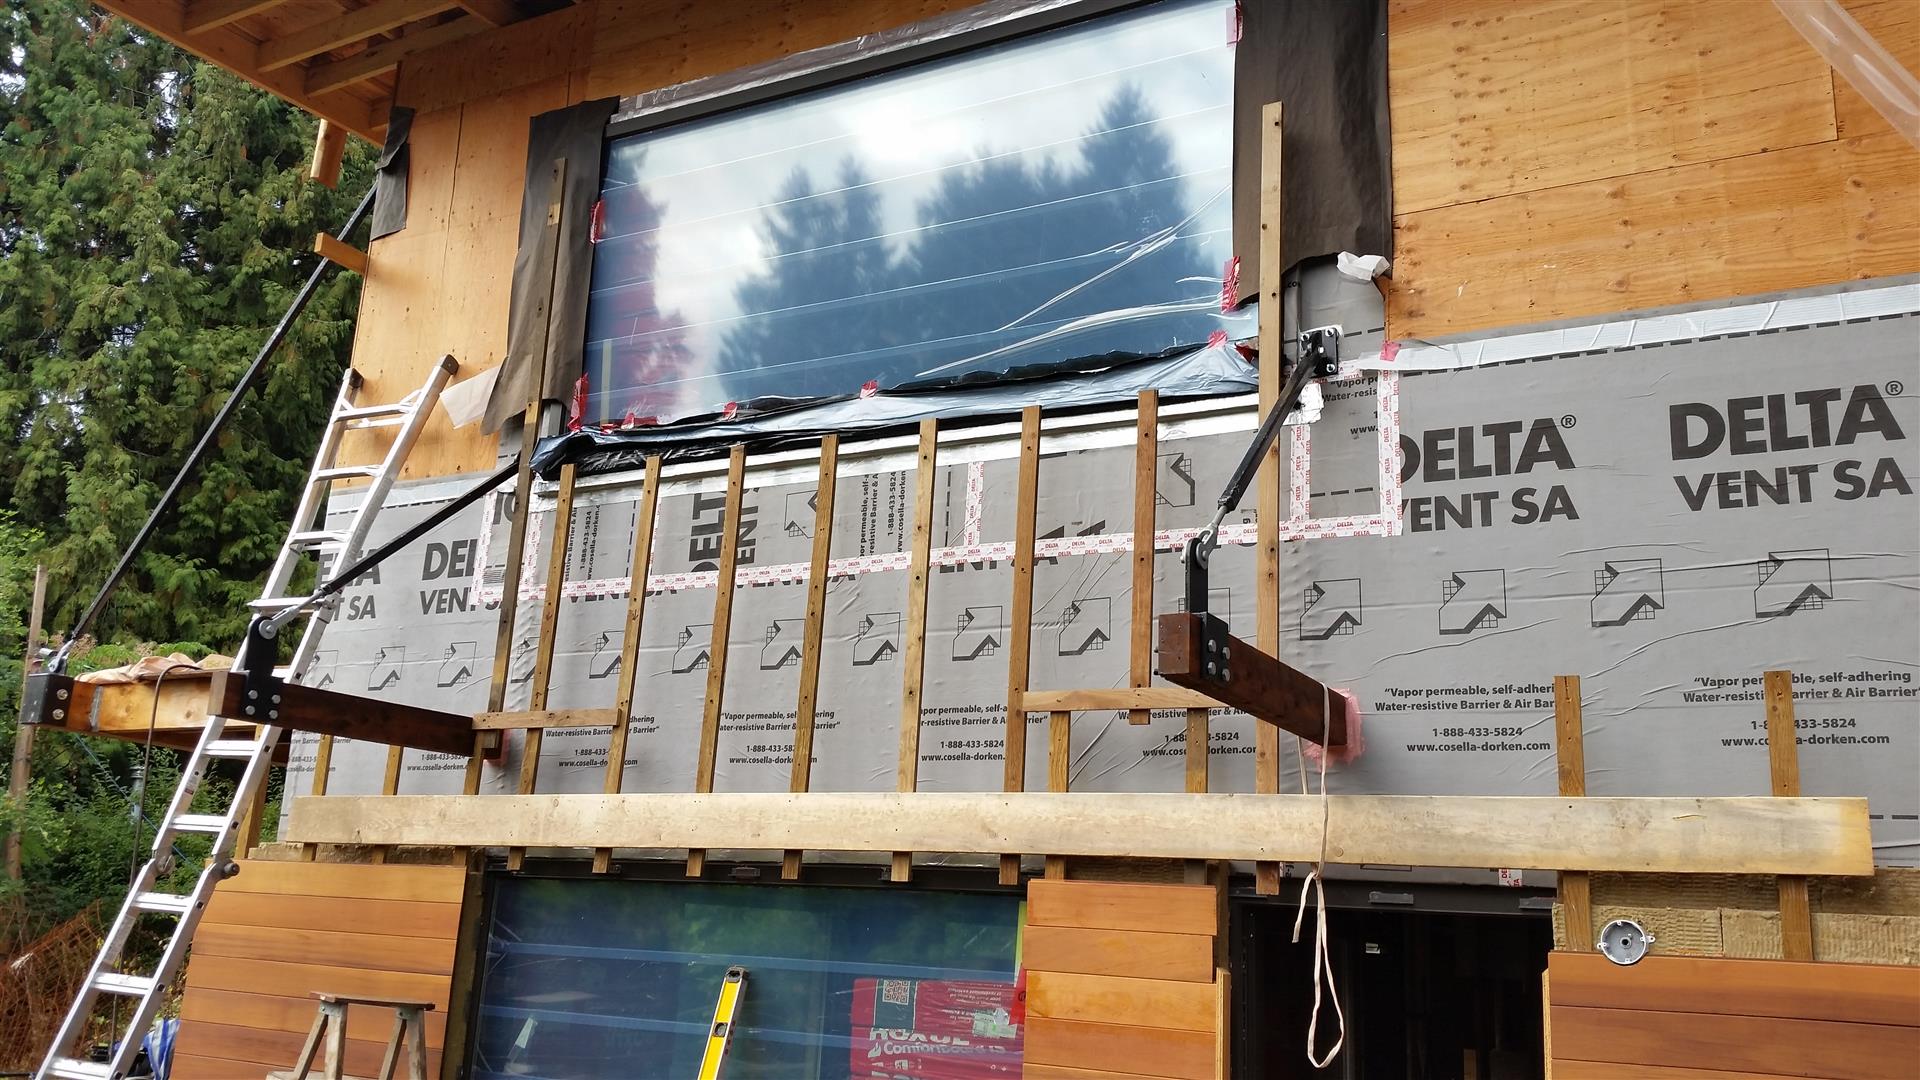
This system of temp headers greatly sped up the installation of the furring strips and pretty much guaranteed my ability to hit the studs through 6″ of exterior insulation.
In the above photo you can also see two of the four recently installed sun shade beams. These will hold up 20′ long 2×6 cedar boards that will sit on their edge on top of these beams, spaced about 6″ apart with blocking (See drawing S11 for full details). This will provide a sun shade that blocks a majority of the summer sun (preventing overheating) but allow the low angle fall and winter sun to stream through the windows below (providing free solar heating).
I also was able to frame up a very small roof that extends the covered exit off the rear mud room. This is about a 4′ wide roof which is again set off from the main structure to allow for continuous wall insulation.
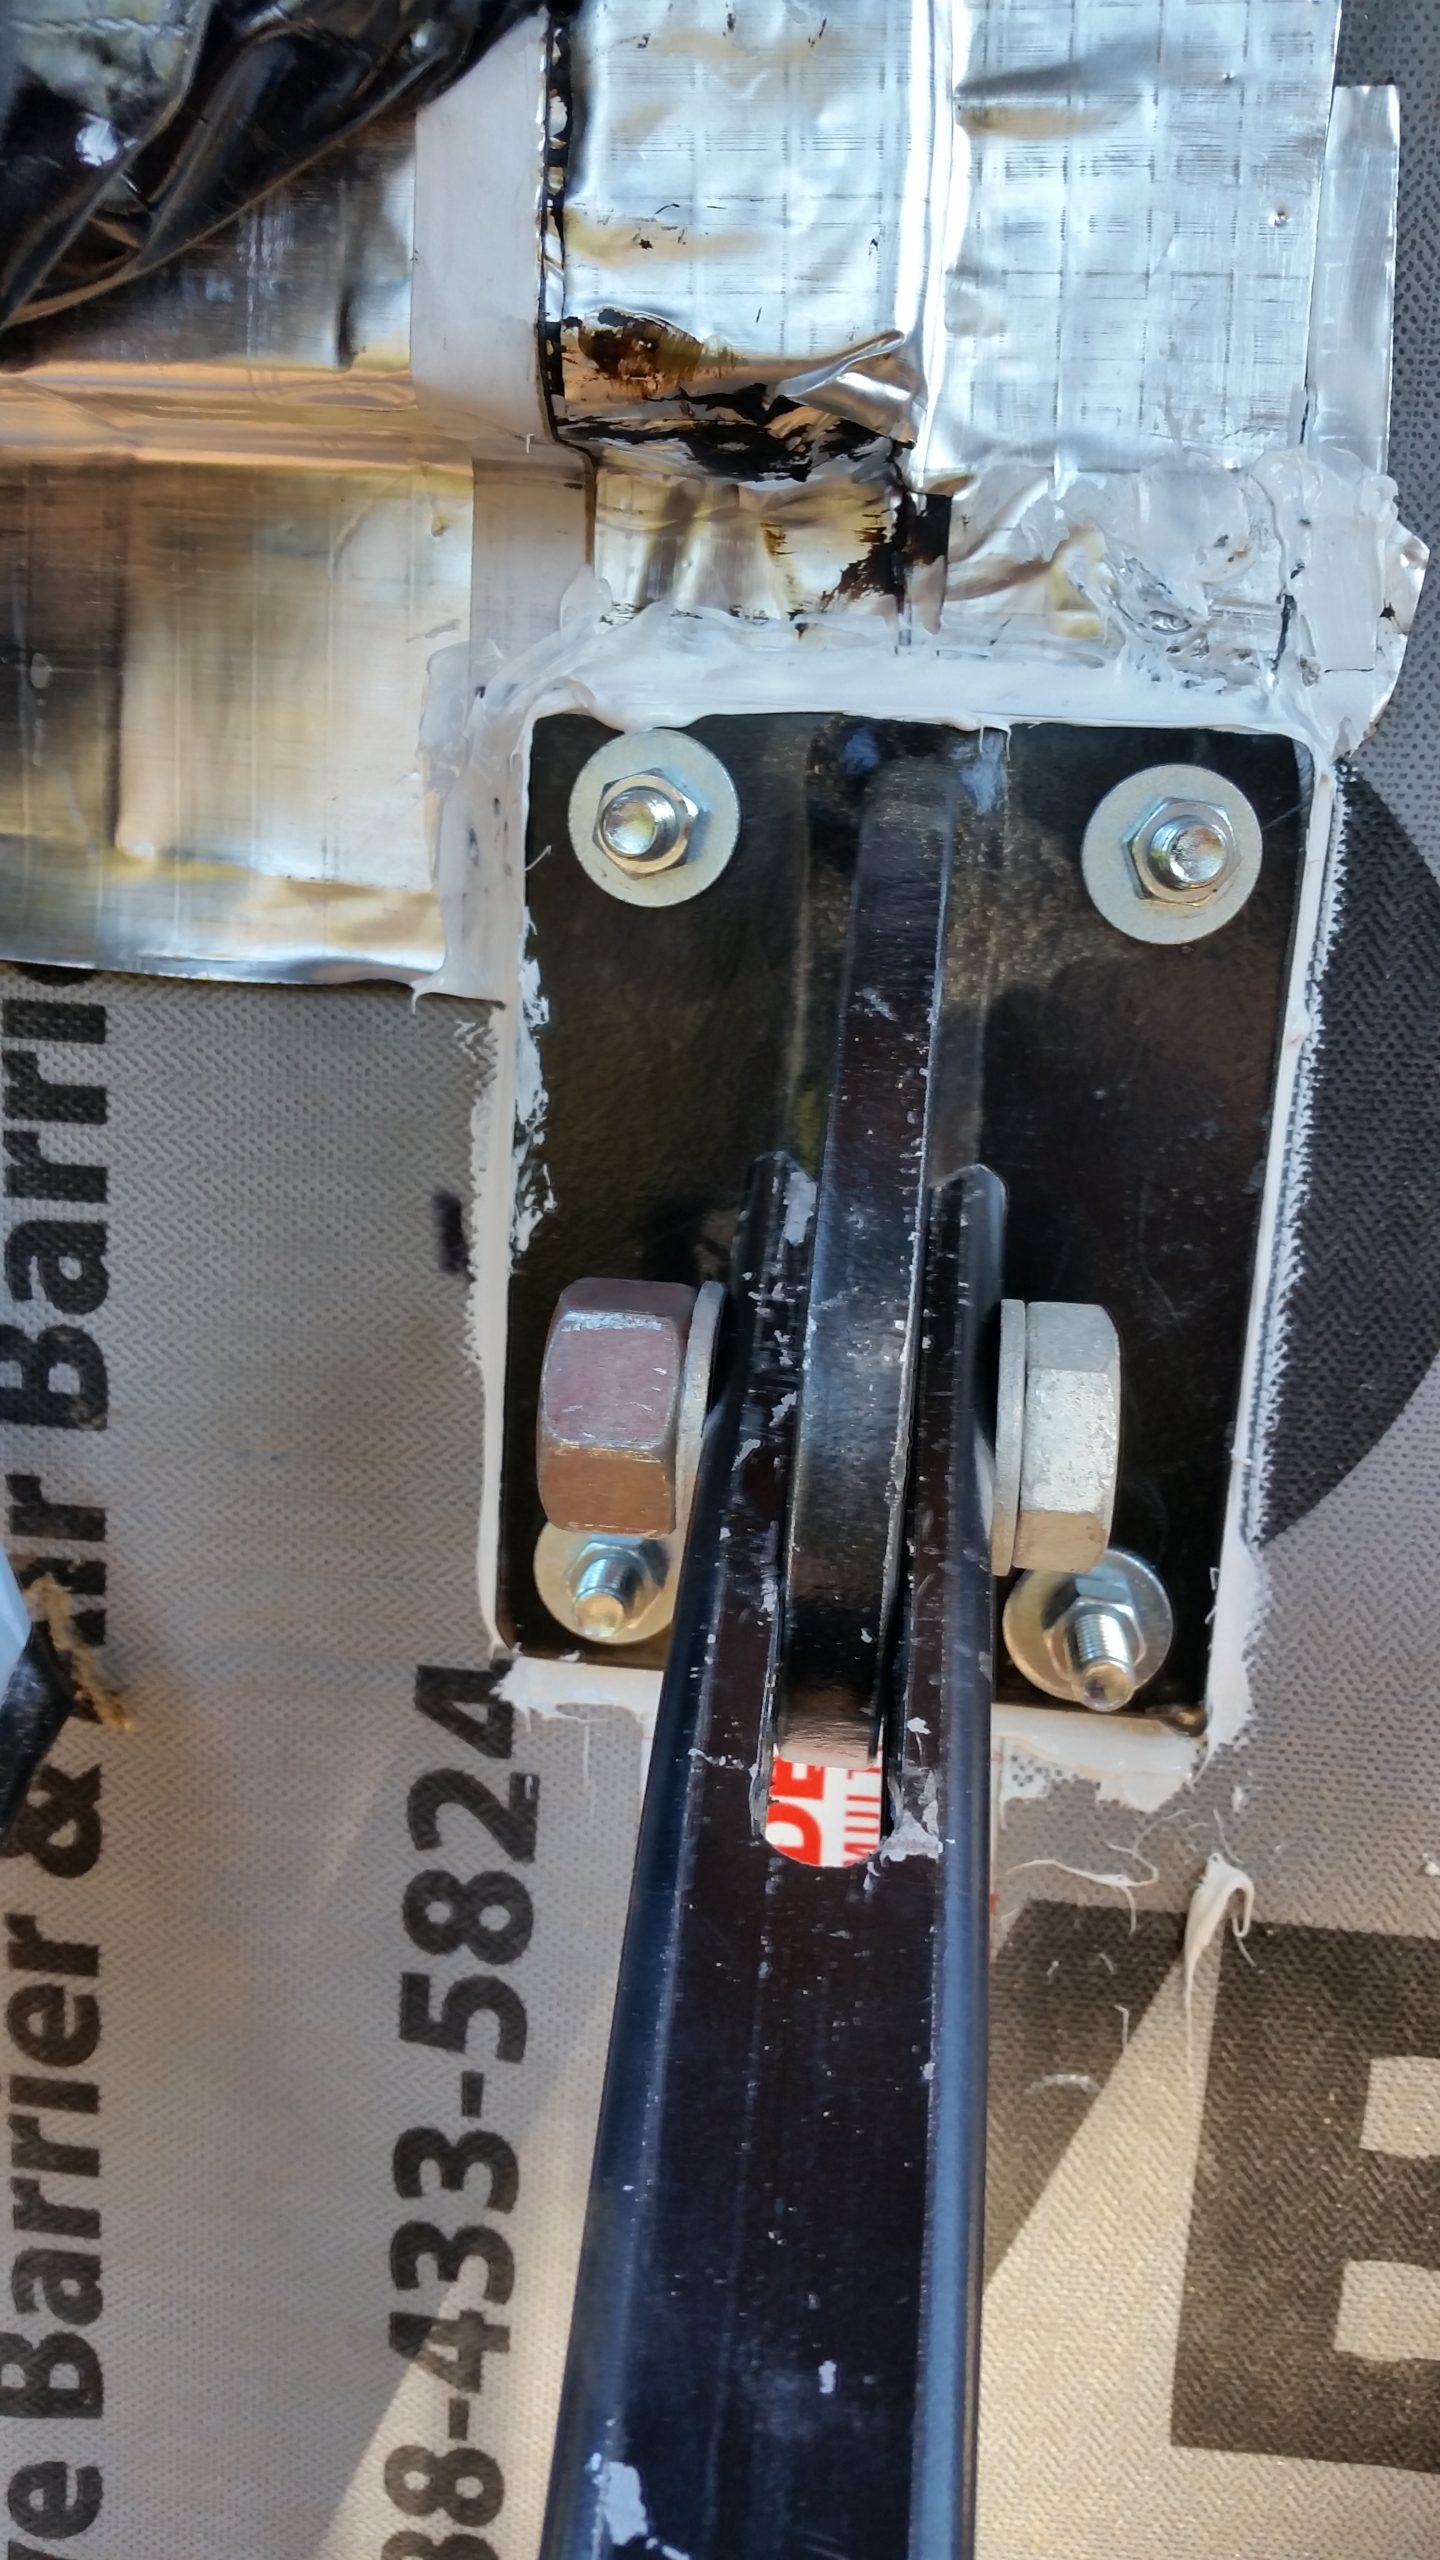
Another recently completed project was the design and then installation of a guard rail I had fabricated by Vancouver Metals. This is installed on the top of the foundation forming the opening for my basement exterior walk-up. I was originally looking to have made out of steel, but the fabricator convinced me that Aluminum was strong enough and would prevent rusting down the road. After fabrication the rail was powder coated at Superior Powder Coatings. I was quite pleased at the result. (Tyvek membrane in back is just a temp cover over sheathing).

With this guard in place, I was able to take off the temp roof that was covering this opening and now have full access to the north elevation walls. This will allow me to finish the foundation waterproofing in the stair well and start detailing the WRB and insulation on the above grade walls.
It was about this time that the ‘downs’ started. After installing this railing last Sunday, I got pretty sick and have been down for the week. Started out as a bad cold but quickly became a sinus and chest infection. Poor!
Then part way through the week, things got really bad. I had a nagging feeling there was a municipal inspection between the sheathing inspection (which I had performed by my engineer on the approval of the Municipality) and being able to install siding. I went through all the paper work and sure enough there was supposed to be what is called a ‘paper’ inspection. This was to include an inspection of the sheathing membrane (WRB or Water resistant barrier) and all flashing in place. But this is not really possible because all of the exterior components (WRB , insulation, siding, and flashing) are all interdependent (as you have seen above) on this kind of construction with exterior insulation. Further the WRB membrane cannot be exposed for more that 50 days and this envelope is clearly going to take a lot longer, and as such I need to install it in lifts and then cover with insulation.
So I emailed my inspector and explained the situation and asked for him to come to site to come up with a plan. He asked me to book an inspection and informed me that if they were busy they would waive the inspection (indicating I would be able to proceed without an inspection of this element). Well, the reality was far from this remote promise. Within five minutes of the inspector arriving I knew things were going south quickly. It became obvious that the style of construction was not in the inspectors comfort zone. When I advised the insulation and furring strips were being applied per an engineered guide prepared by RDH and published by the Province and City of Vancouver (R22+ effective Walls), he advised he was aware of guide but not very familiar. This is concerning as the code will require exterior insulation at the next code cycle and this guide has been published as a prescriptive instruction to the building community. You would think that the Municipality inspectors would be very familiar with this by now. It was April 2014 all over again when they refused to accept a house designed to Part 9 earthquake code and instead wanted the whole structure inspected! There were also comments of discomfort at the inset windows, lack of jamb and head flashing, sun shade penetrations, etc. After some back and forth, the inspector advised that the building inspectors and managers would have a meeting and get back to me.
Sure enough, the next morning, I was advised that they were not going to take responsibility to inspect the building envelope and that I had to have the envelope ‘designed, inspected, and signed off’ by an engineer. When I referred to the upcoming code changes and that the District needed to step up in order to inspect dwellings built to the new code, I was informed that both the Municipality of North and West Vancouver were going to introduce Bylaws stating all dwellings required a building envelope engineer. While this could be good news for better quality buildings (only if they get the right engineer, some engineers still believe a wall needs vapour diffusion ports and are totally ignorant of good building science), this is not the intent of the building code and residential construction and will add thousands of dollars to the costs.
I did not wait for the next morning’s follow up. As soon as the inspector left, I informed my mentor at RDH that this had gone down and that I was going to have to hire them to inspect and sign off my envelope. This should be a relatively efficient process and they have generally already vetted all of the details of my build, as they are the ones who have been my advisors and mentors through this process.
The only saving grace is that because I was so sick and suffering from a fever, I really did not have the energy to get upset. I just buckled down and spent the next day providing RDH documentation of what the full design was and what had been completed to date. Now I just need to wait for them to get back to me (they are all very busy and this could take a while). I am going to try to go back to work tomorrow even though I have not significantly recovered yet. I will work on the basement waterproofing in the stair well and base of wall transition. Hopefully by the time this is complete, I will have heard back from the engineer that all is good and that I can continue on the envelope.
Wish me well!
“Problems can become opportunities when the right people come together. ” —Robert Redford (born 1936) Actor, Producer, Director, Environmentalist
“Hard work spotlights the character of people: some turn up their sleeves, some turn up their noses, and some don’t turn up at all.” —Sam Ewing (born 1949) Former Professional Baseball Player
“Mistakes are the portals of discovery.” —James Joyce (1882-1941) Irish Novelist And Poet
“Real integrity is doing the right thing, knowing that nobody’s going to know whether you did it or not.” —Oprah Winfrey (born 1954) American Television Host, Publisher