So long B.A.T. - you have served me well!
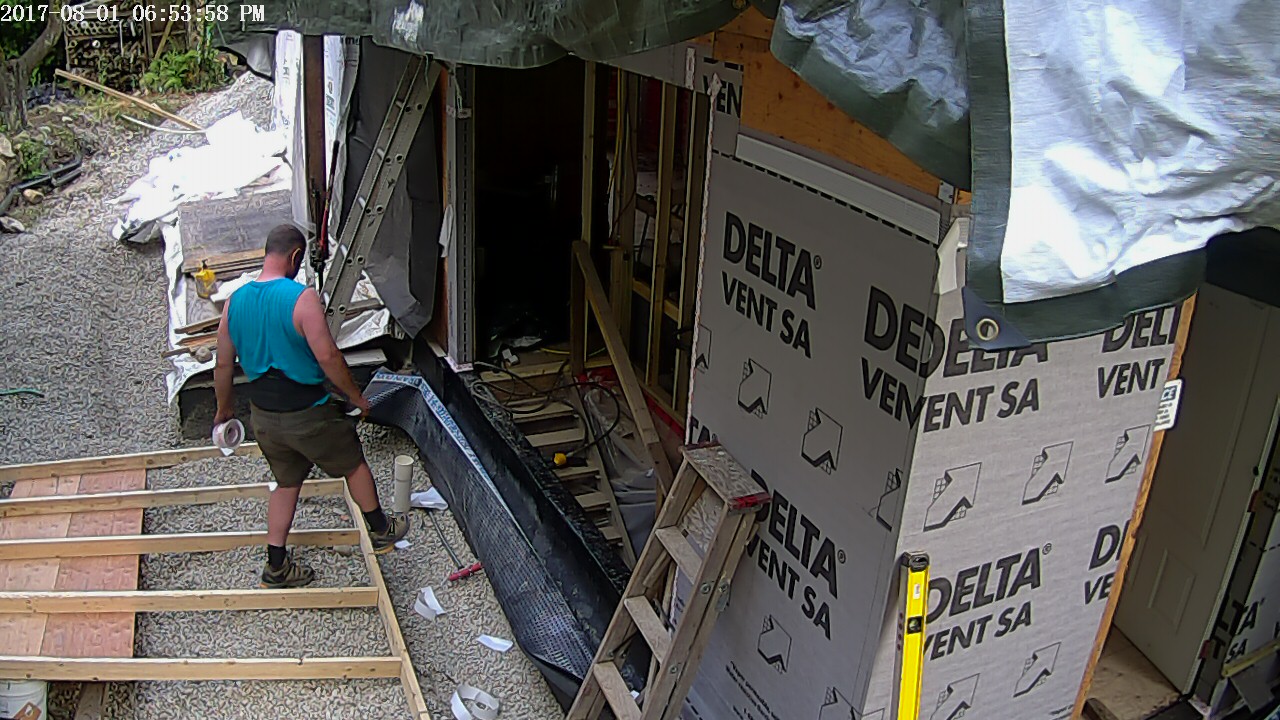
For those of you that visit the projects web cams, you will have seen a major change at theEnclosure. The B.A.T. (Big Ass Tarp) has been retired! On August 1, after 15 months of dedicated service keeping my dwelling dry, the official lowering ceremony commenced and four hours later, B.A.T. was safely bundled onto the garage roof to store until I figure out what I will do with it.
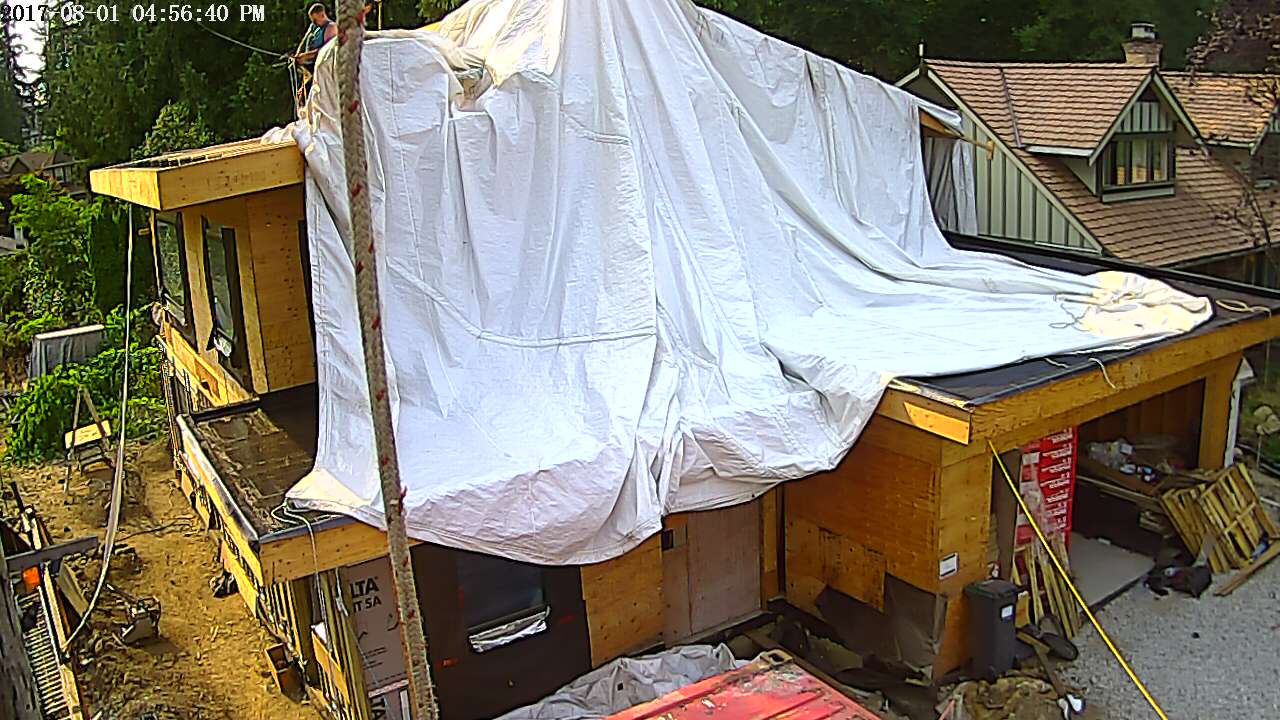
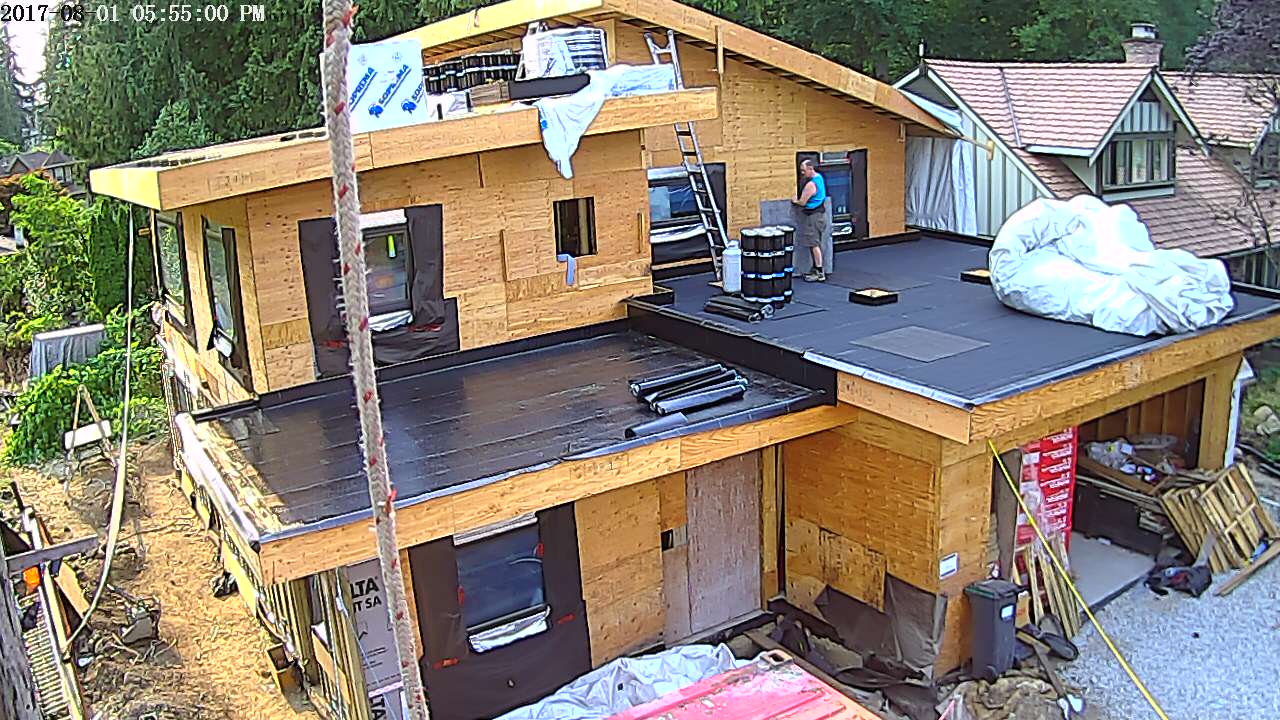
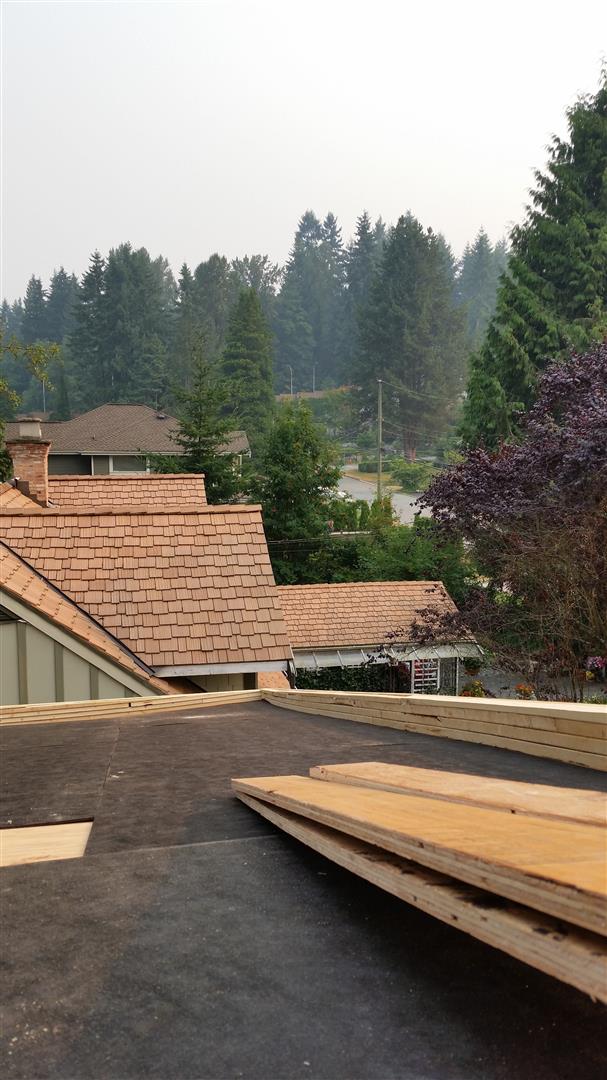
Now if you look at the above photo, you can see why B.A.T. retired. We have the beginnings of a roof!
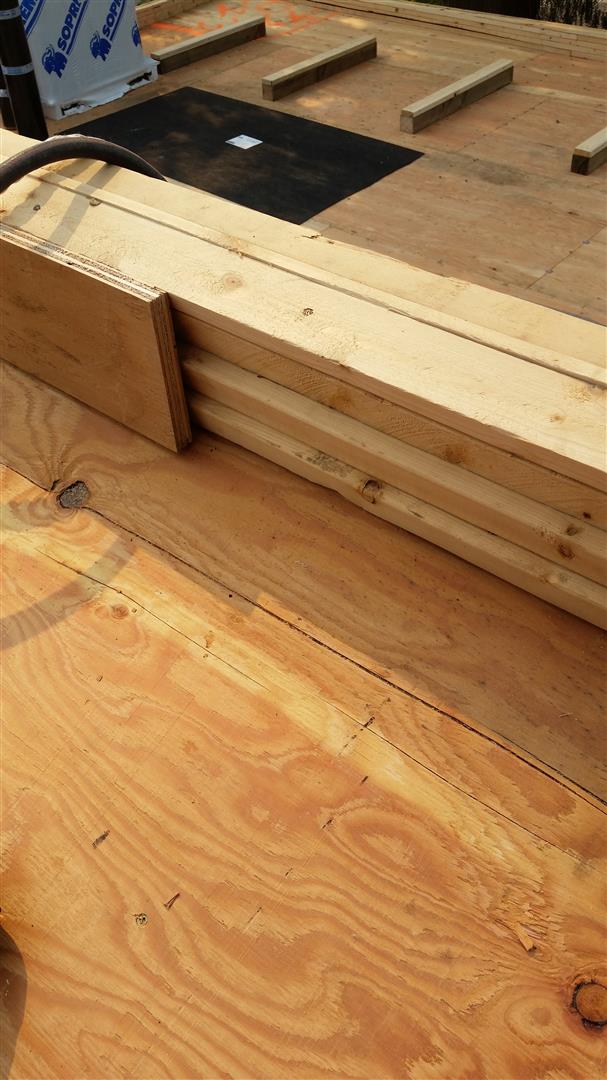
Like most components on theEnclosure, the roof has not been easy. From the enormous amount of time needed to frame the roof deck with the cross purlins, to the fabrication of the parapet fascias that provide for the hidden gutter system, this assembly has occupied a lot of time. I had finished the majority of the roof structure late last December and the fascia assemblies in mid February. At that time I approached a roofing contractor that was heavily recommended for the torch on roofing I required. After several left messages, they called back and advised I was probably looking at late September and that they would see if they could squeeze something sooner in and would drop by the next day to scope out the project. That did not happen, and several more messages were unanswered – I needed another plan.
I was either going to use a Soprema or a Siplast membrane. Both manufactures had approved installers and distributors generally only sell the product to those approved installers. When I approached Siplast for a list of recommended (as approved) installers, able to install a roof this summer, they came back and advised there weren’t any. All of the recommended installers were booked for the year. You see, roofers book re-roofing jobs during the winter for the upcoming summer season. This year, because we had such a wet spring, their re-roofing season kept shrinking into a smaller number of months and as a result, they were hard pressed to meet the commitments they had made over the winter season.
About this time, I met with James Bourget to discuss flashing profiles. James was the primary instructor at the BCIT BLDC 3060 course and has become one of my many mentors in the building science field. James works at RDH (one of my project sponsors) and while meeting with him, he introduced me to Geoff Kirkpatrick, who also works at RDH and was mocking up some wall and roof assemblies for an upcoming training session RDH was hosting. James recommended I consider Geoff for both flashing installation assistance, but more importantly, for installing my roof. Geoff had just left the roofing field on a full time basis, but still worked on weekends for VIP clients. And from that point forward, poor Geoff was now the latest casualty to be embroiled into my project.
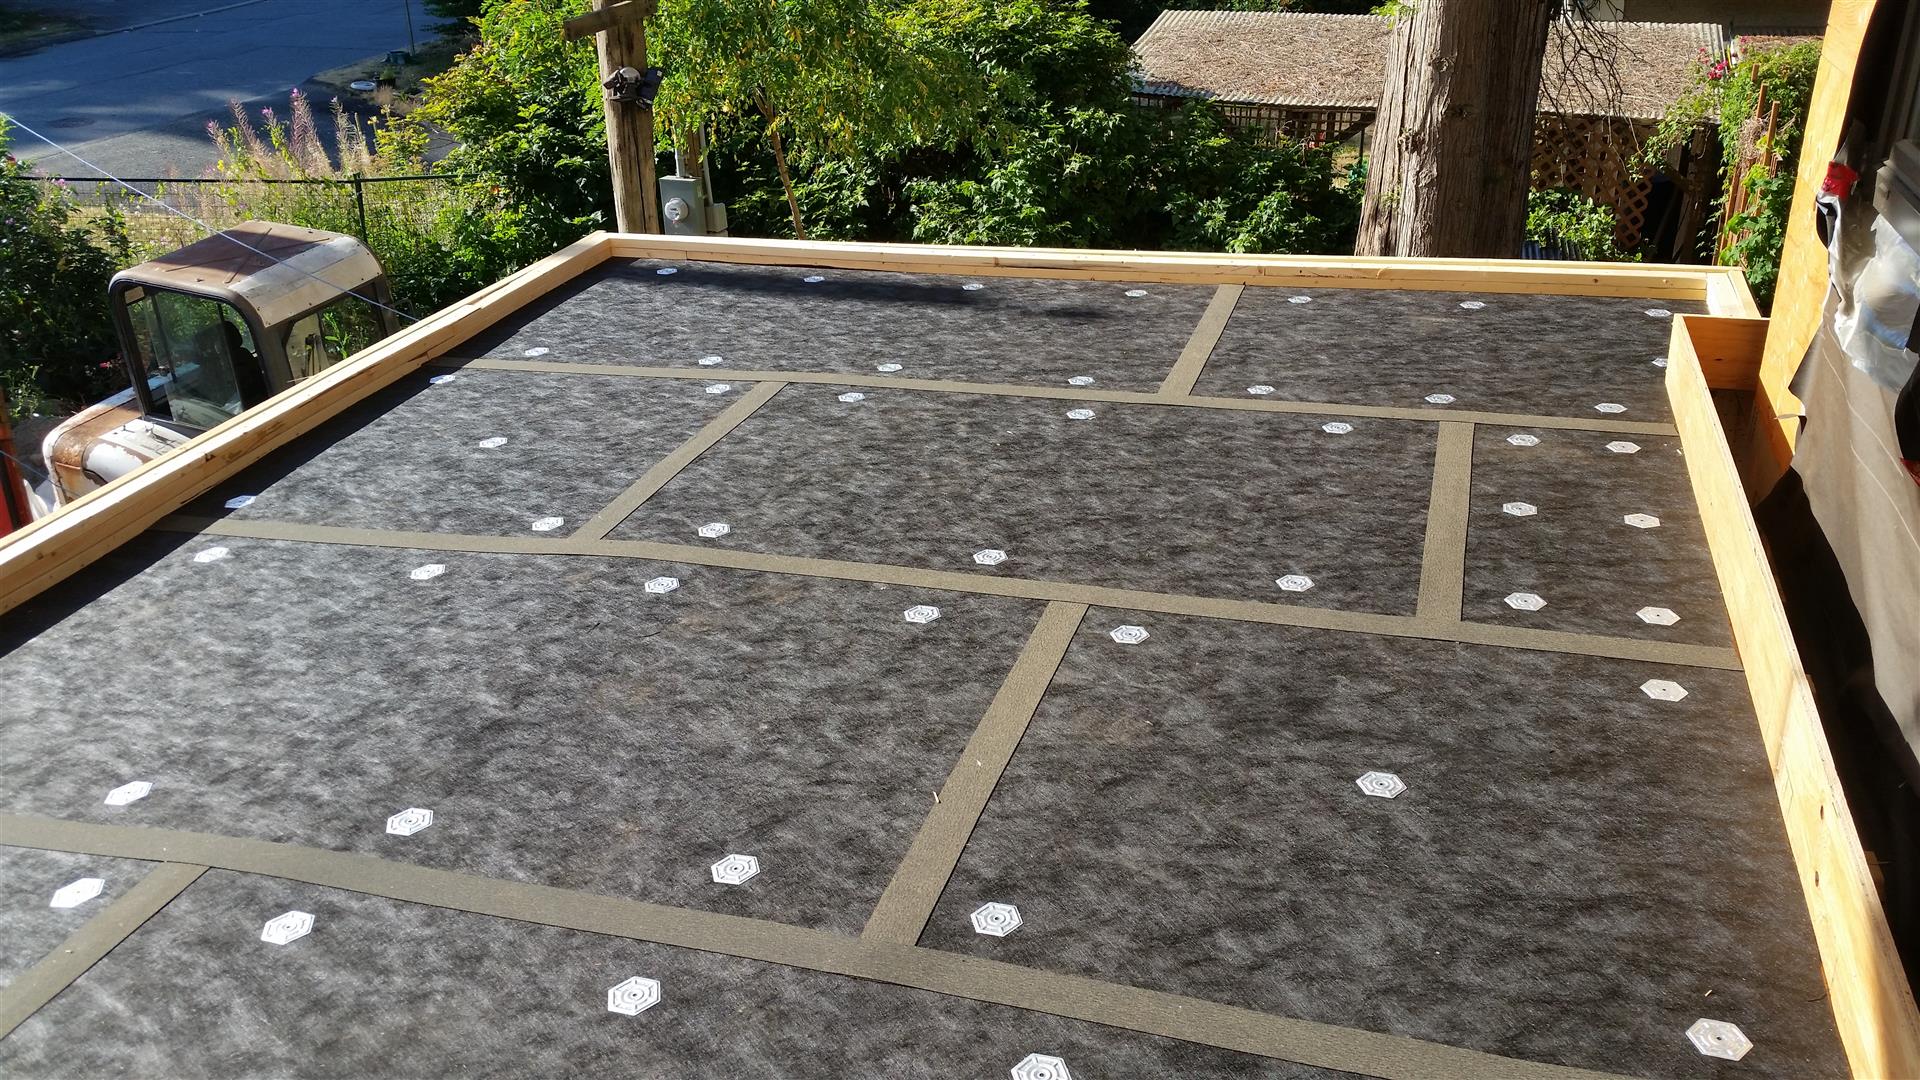
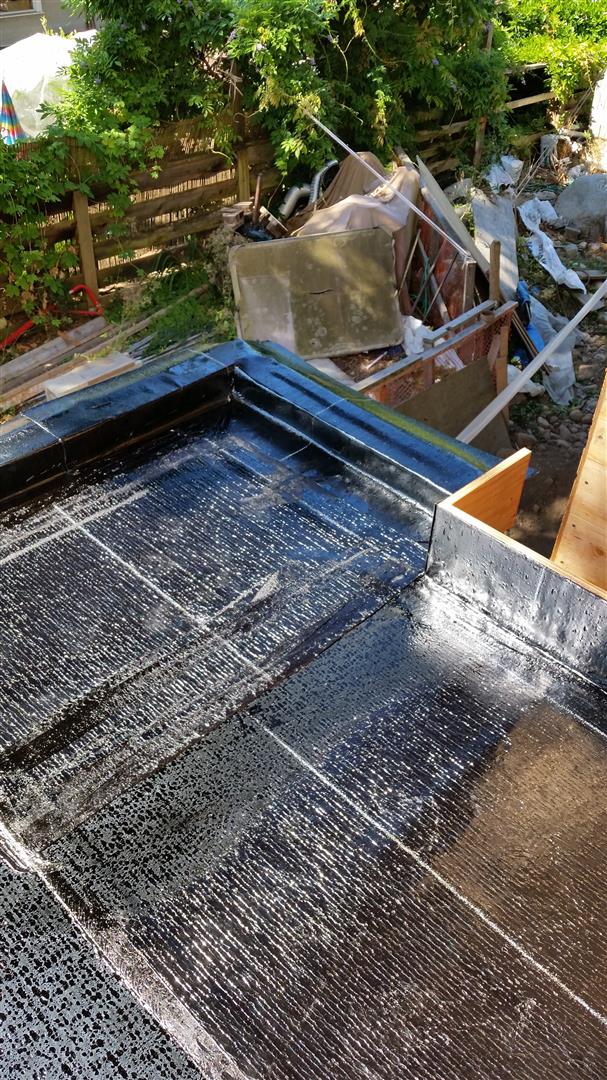
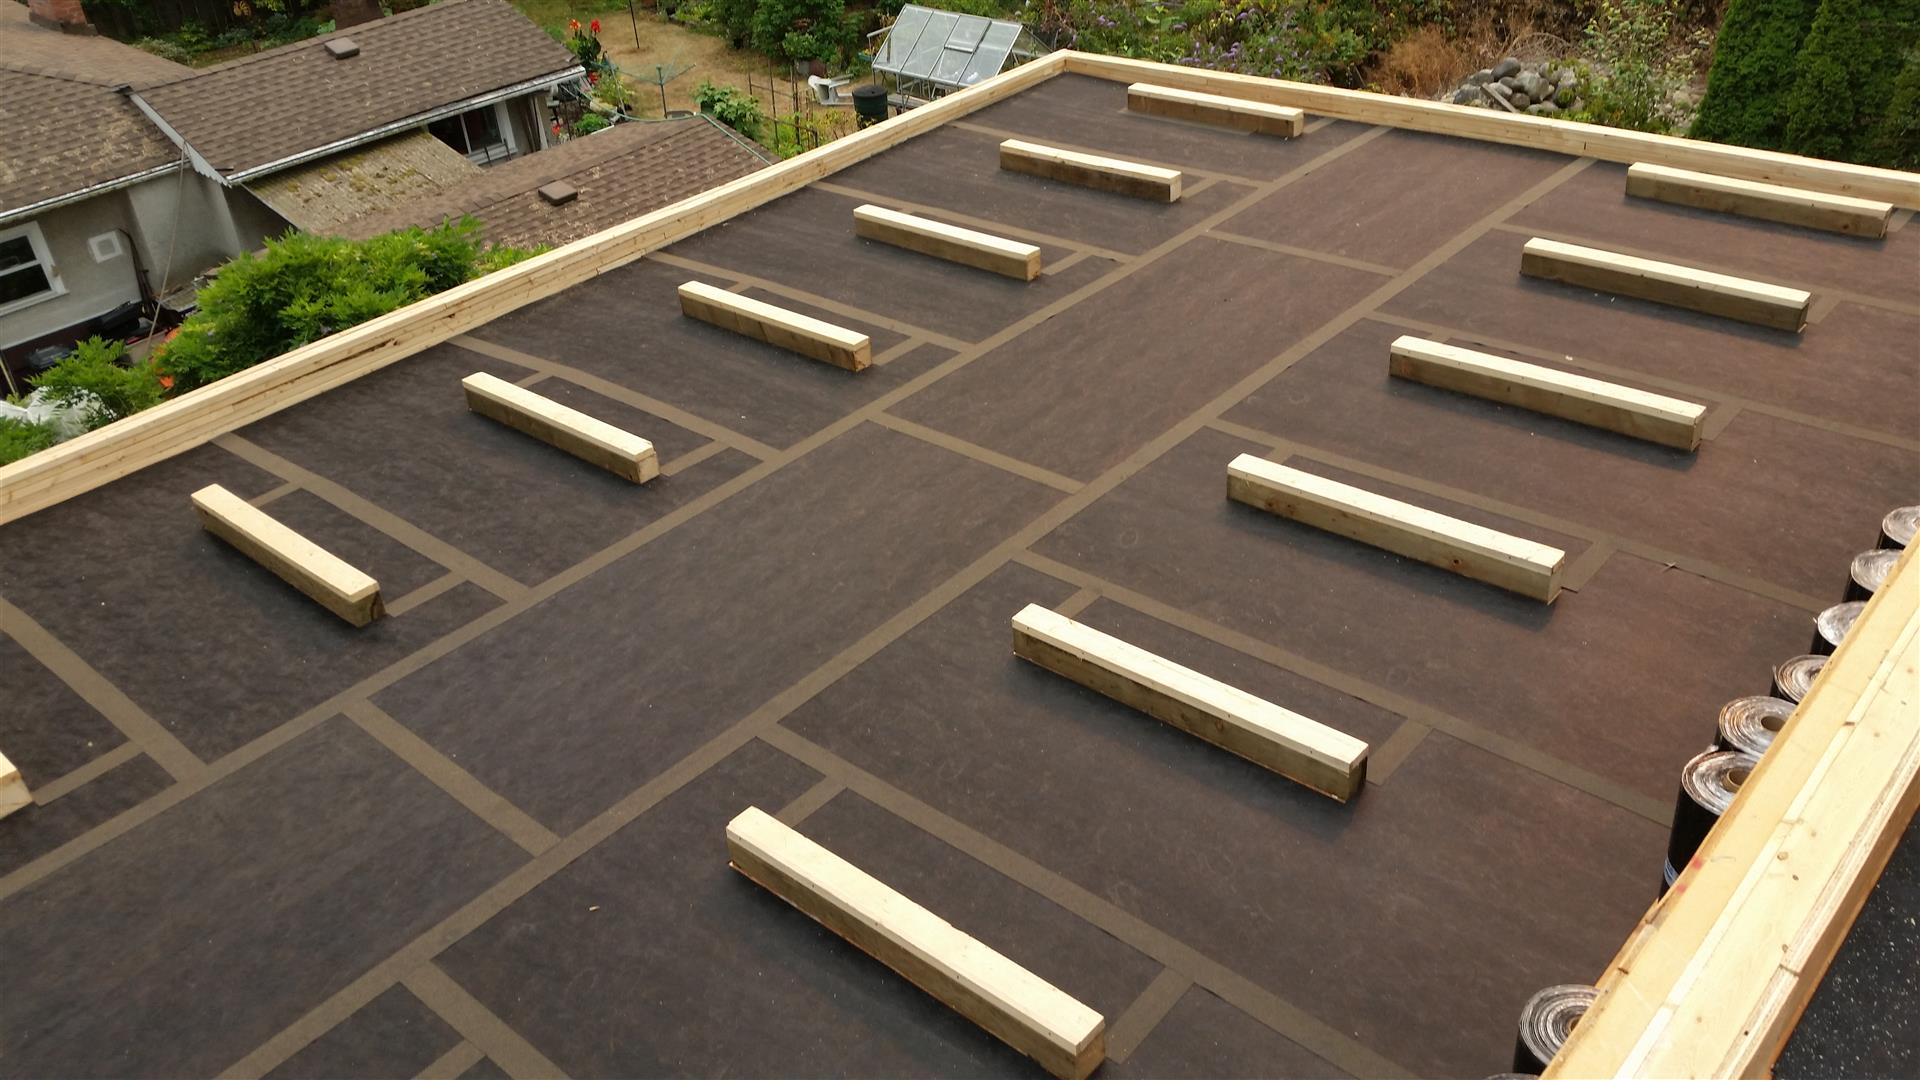
As North Vancouver does not allow construction noise on Sundays, Geoff has graciously agreed to work over a series of Saturday’s to install my roof. We started on July 29 and did another session yesterday. The garage roof has base sheet completed and about 90% of the cap sheet. The office roof and upper north roof have only the base sheet installed and the south upper roof has about 50% of the base sheet installed.
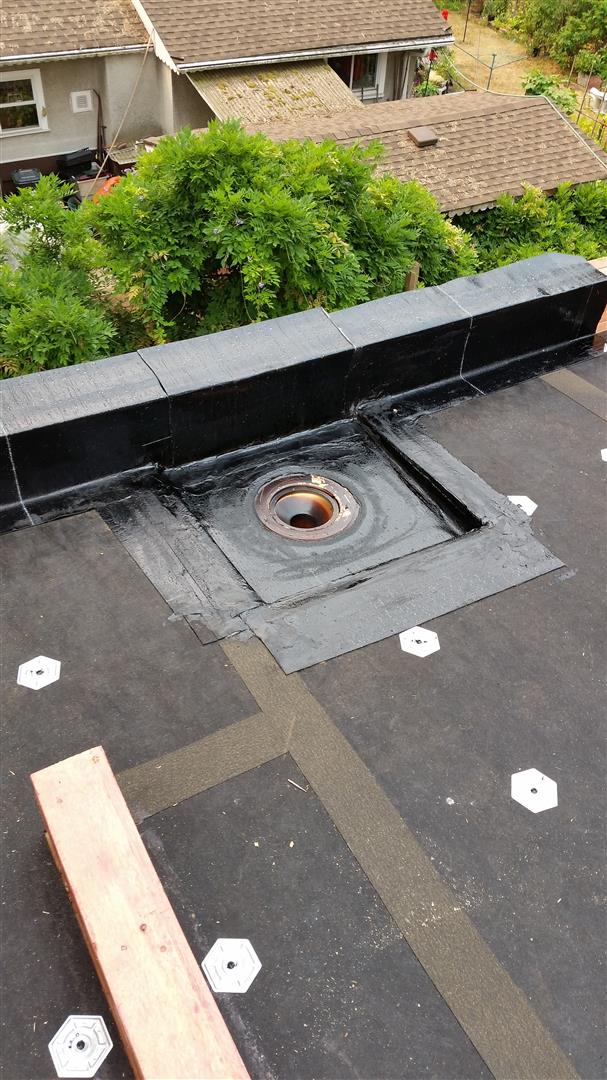
Although these roofs are simple ‘shed’ style roofs with no valleys, they do have a LOT of detail work due to the presence of the parapet fascias, the 8″ backing where the lower roofs meet the top floor walls, and the extensive curbing to support the installation of a PV panel array.
We are expecting another 2 days will be needed to finish off project. So a total of 4 days to install, and this does not count the best part of 8 days I have put into prepping these roofs during the workweeks. I generally have laid down and taped all of the protection board (Geoff’s crews has installed plates and fasteners). I also spent a lot of time reworking the PV curbs and furring out the steps on the 2×3 backing for the fascias as the membrane does not like a lot of transitions.
One very unexpected and wonderful surprise was welcoming SOPREMA as an official project sponsor to theEnclosure. I had approached them to see if I could get a standard contractors discount on the materials needed for the roof as I did not have an account at the distributor. The next day I happened to be at RDH where the RDH staff were being provided a demonstration on the proper installation of a torch-on membrane roofing system. Blair Bennett, the Soprema Director of Sales, was at the event and approached me to advise they were providing a very generous partial sponsorship of the materials needed for my roof in recognition of the exposure my project receives and my blogging and reviews of the products I use. This was awesome news and I am thrilled to work with a company that takes R&D so seriously (they regularly work with RDH on building science investigations). Thanks to Blair & James from Soprema and Dave and Kim from Convoy supply for making this all happen!
I will right up a technical article on what to look for in each step of the installation a little later when the project is complete.
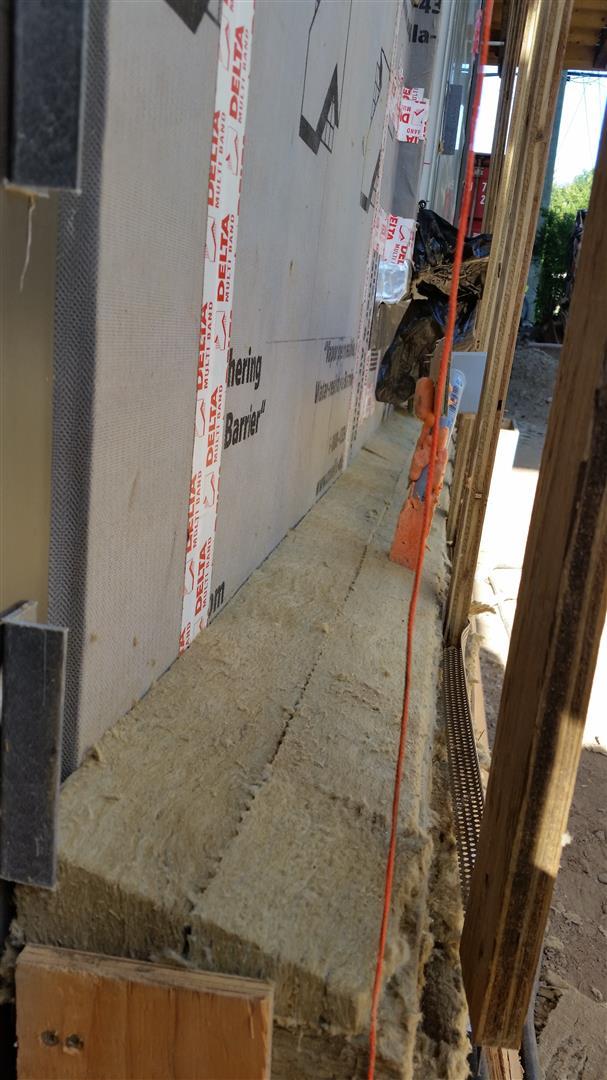
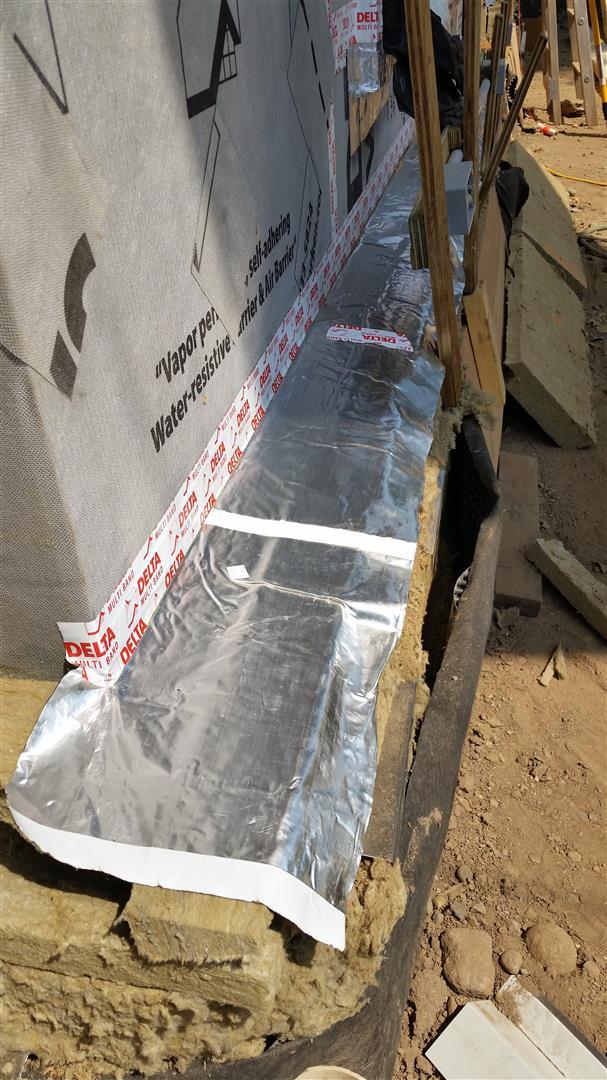
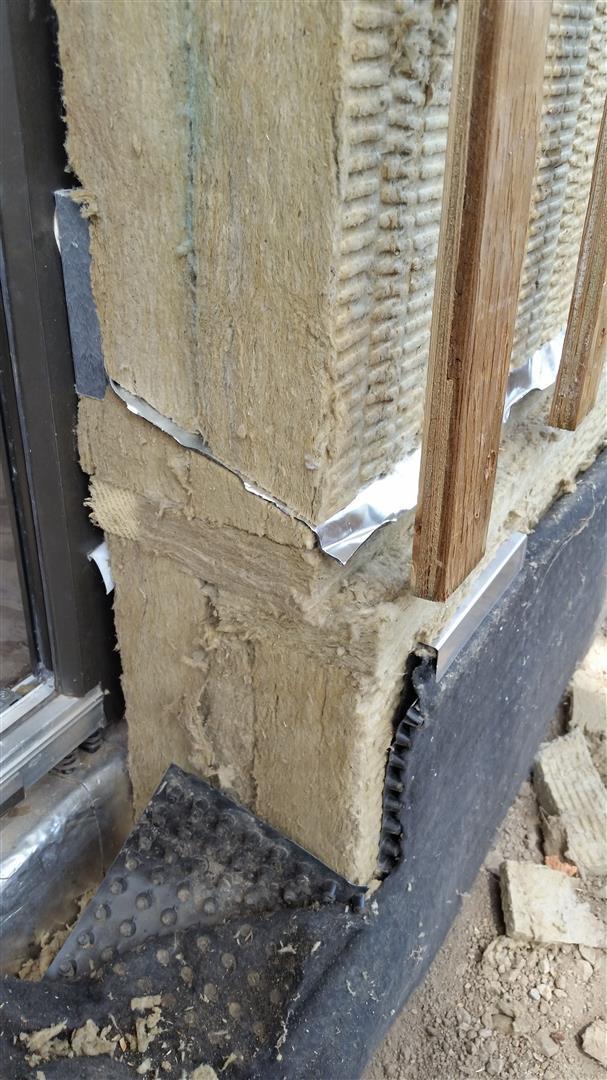
With this switch of gears, not a lot has progressed on the exterior membrane and insulation. Since my last post I did correct my over-site of the forgotten base of wall through-cavity-membrane-flashing. In the end it was easier to just remove all of the insulation and start again. Took 2.5 days to remove, detail membrane, and reinstall.
Thanks for visiting.