Water Leak - ✔
Well, I have not progressed yet to the backfill stage, but a lot has been accomplished.
When I hoped for backfill operations last Friday, I did not account for how many operations had to be completed first and my significantly reduced work days. But enough whining, what did I get done over last week?
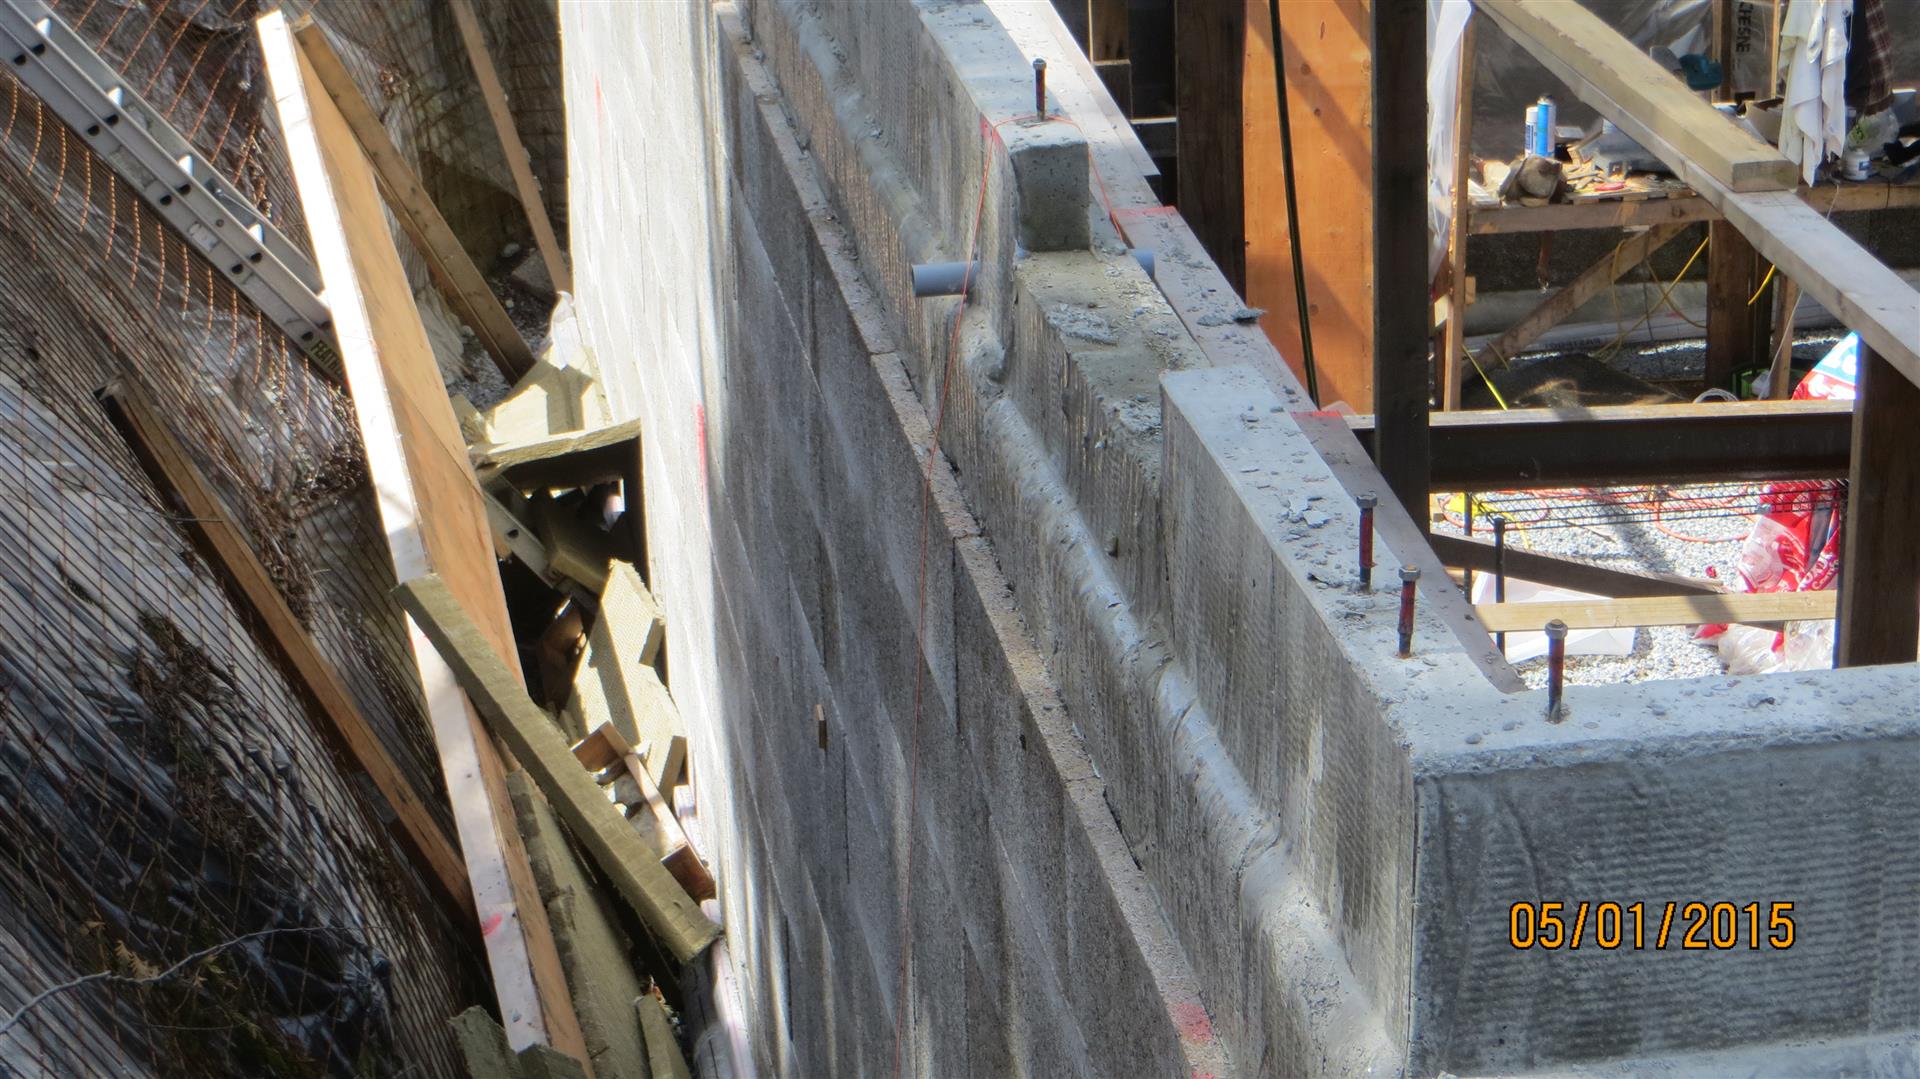
– Top of foundation (formed top curb) was dressed (removed high spots and filled in larger low spots). Concrete was then primed with Elasticol 500.
– Water Injection System designed and installed (more on this in a bit)
– Torch on membrane was installed on top half of foundation at front of house – east wall and south wall
– Additional instruments installed on top curb
– ROCKWOOL Mineral wool installed on top half of foundation at front of house – east wall and south wall
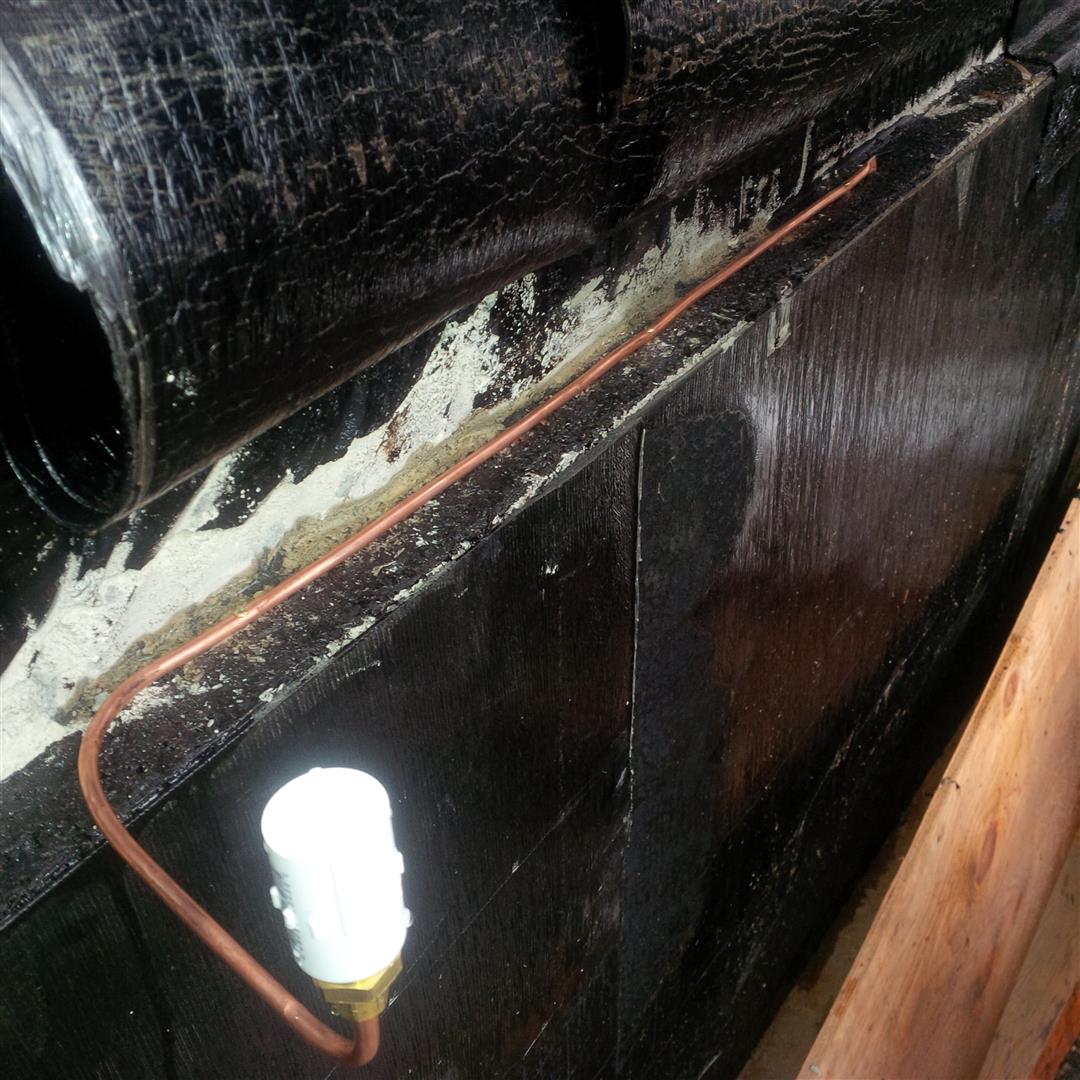
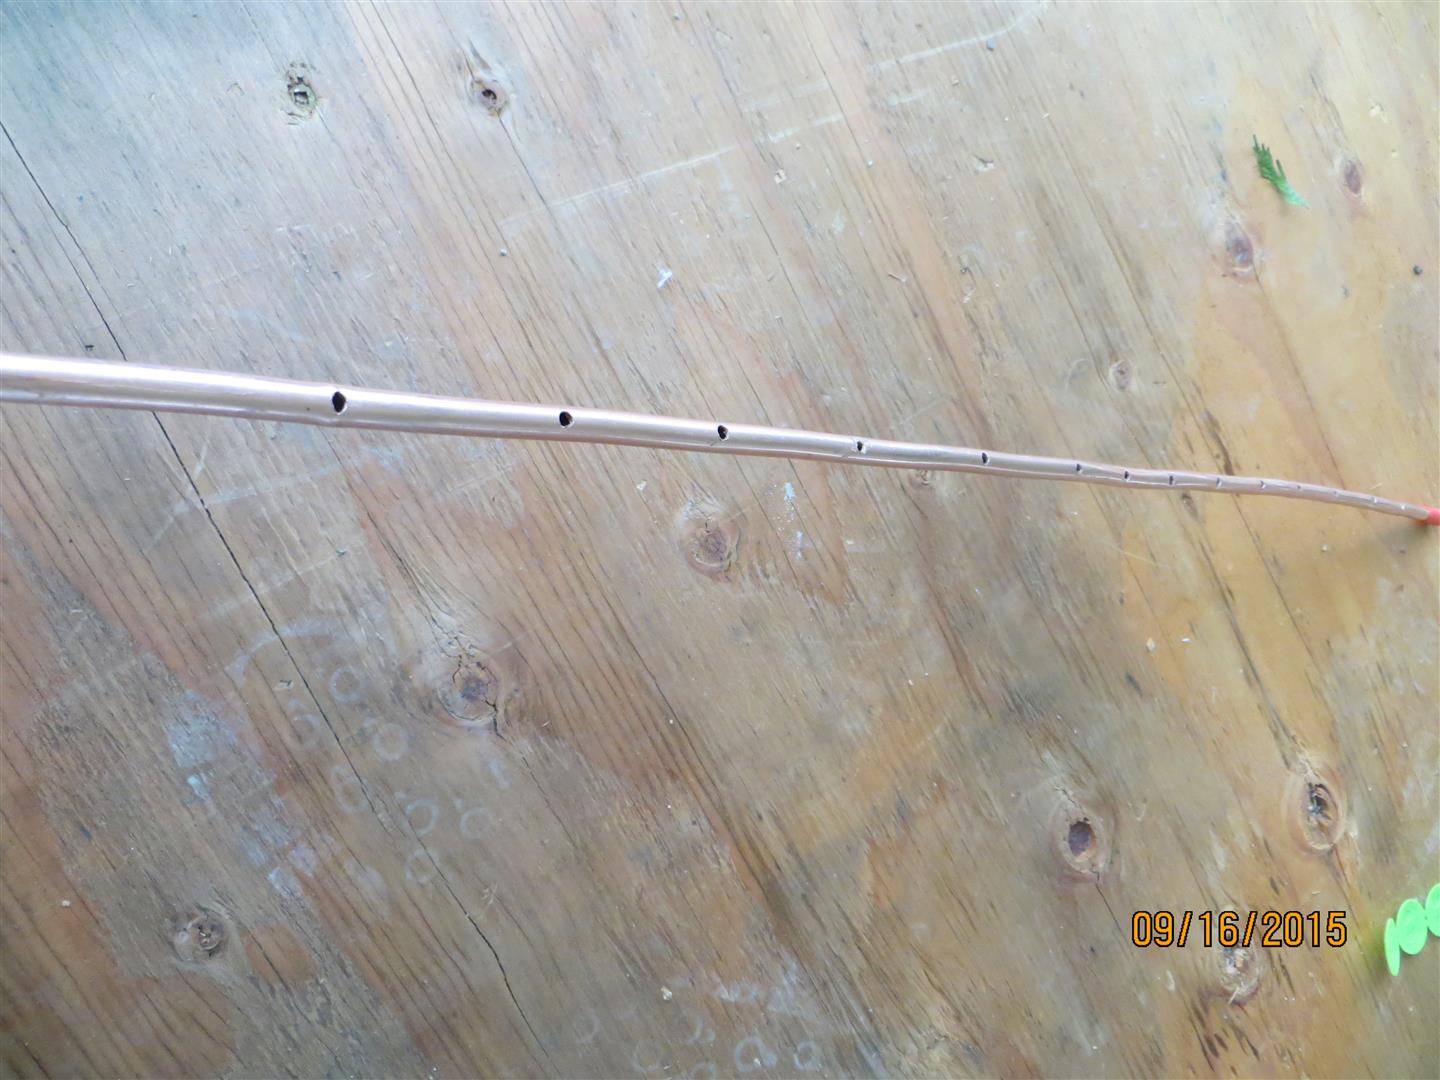
If you look carefully at the above photo, you will see that the area around the coper tube is wet. Why would I create a purposeful leak into my foundation you may ask. This will be part of the foundation building science lab. The lab consists of 6 test columns with the various layers of the columns instrumented for moisture and temperature. The layers tested are the interior stud bay, concrete core, exterior ROCKWOOL insulation, and the backfill soil. There is also instruments in the gravel just above the pit base and later there will be instruments under the floor slab. The purpose of this lab will be to look at the draining characteristics of the various layers in the assembly. As I should have a flood proof torch on membrane, we needed a way to introduce controlled volumes of water and then monitor the assemblies ability to drain and dry out. Hence the injection ports. The copper pipe had a series of small holes and was then covered over with the torch on membrane per the following photo, being careful to not flood the area with bitumen. I will also install injection ports into the ROCKWOOL layer.
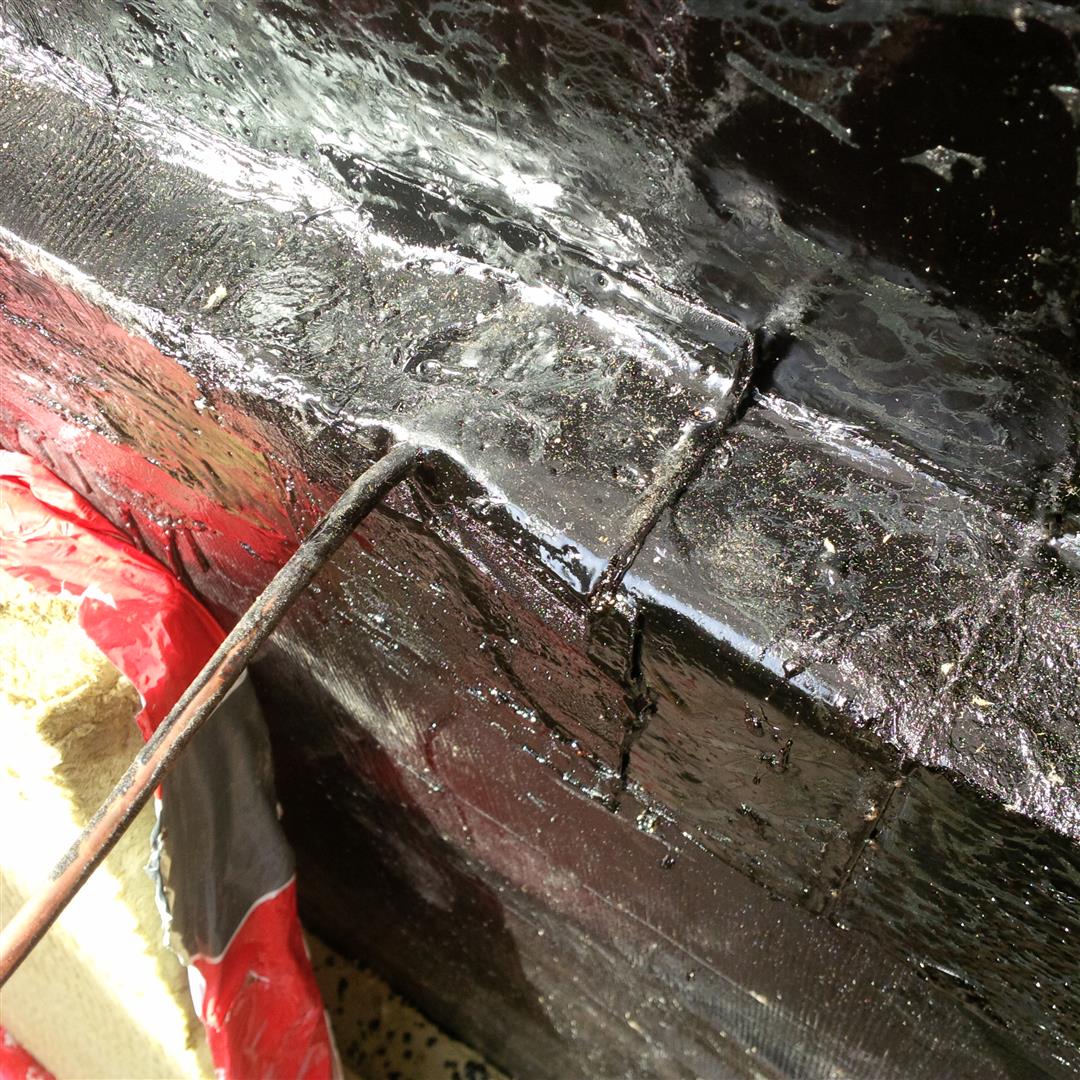
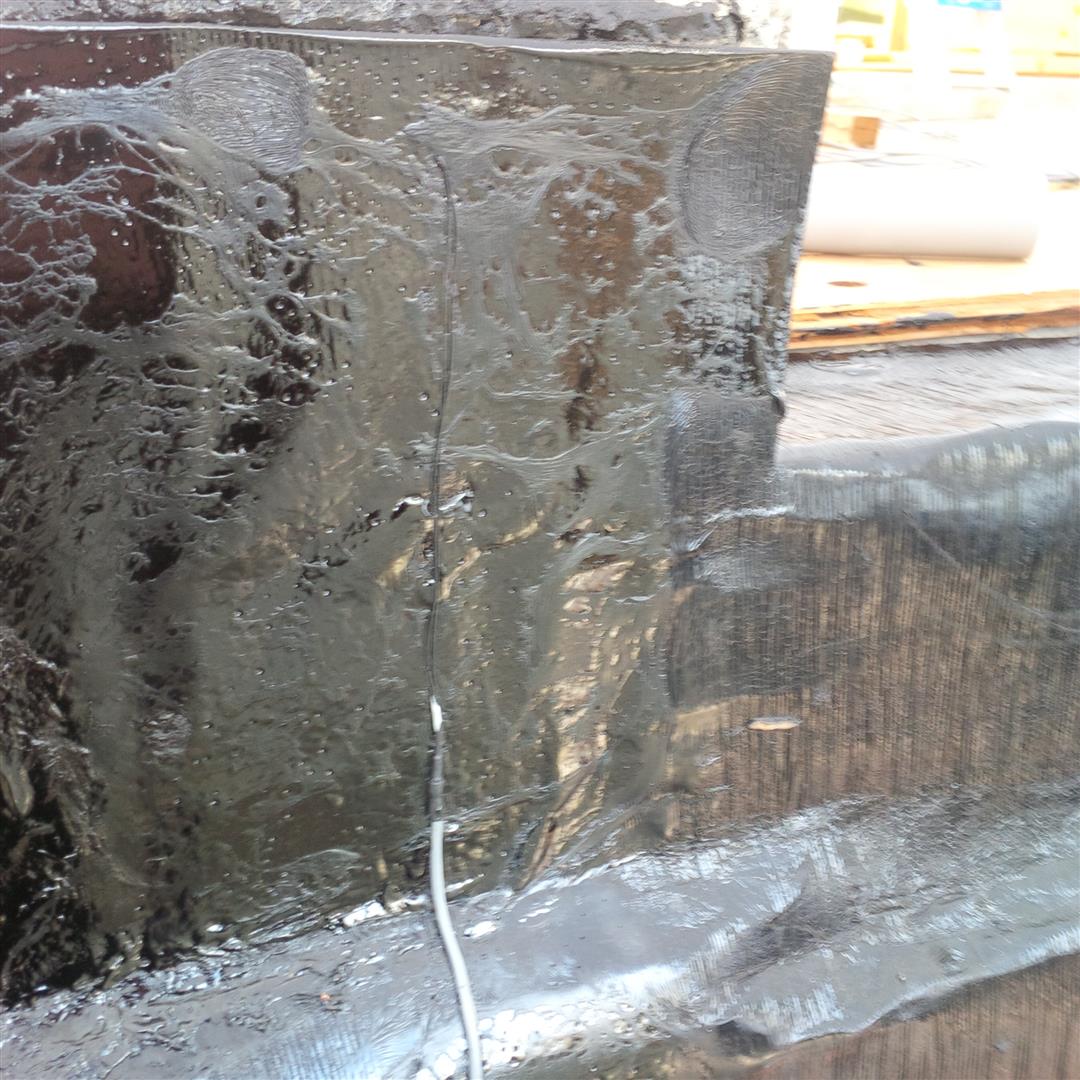
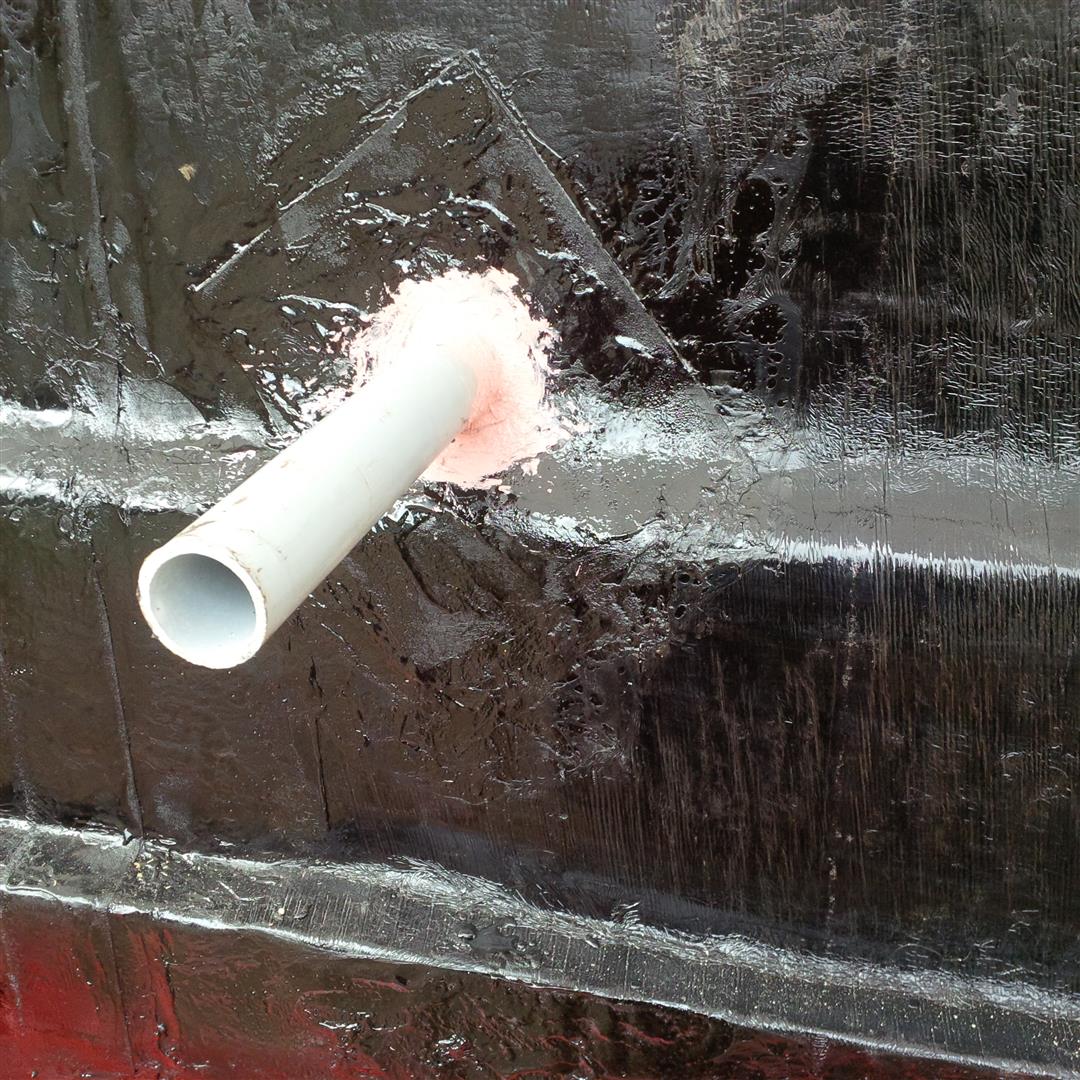
With the Torch on membrane in place, I cut in the holes for the various PVC pipe penetrations. I first detailed these with a square of membrane on the diagonal that I also lightly torched to the pipe. James Bourget of RDH taught me this when taking the BCIT Building Science Lab course. The diagonal ensures that water will not sit on the interface between the two membranes but instead shed away. I then detailed the interface to the pipe with R-Gaurd Joint and Seam from Prosoco. This product is compatible with bitumen based products. Although not formulated for below grade (it is vapour permeable), the seam between the membrane and pvc pipe would be a hairline at worst, so no appreciable amount of water vapour could ever enter, and this will make the connection totally water proof should the PVC expand and contract in the future. This will be the liquid applied flashing that I use above grade as well.
With all of the waterproofing complete, I could get on with finishing the insulation on the top half of the wall. As most of you know, I am using ROCKWOOL ComfortBoardIS. It is a great product to work with and has excellent building science properties.
Remember the rounded profiles shown above that were created by using plastic protected ROCKWOOL panels in my formwork before pouring concrete?
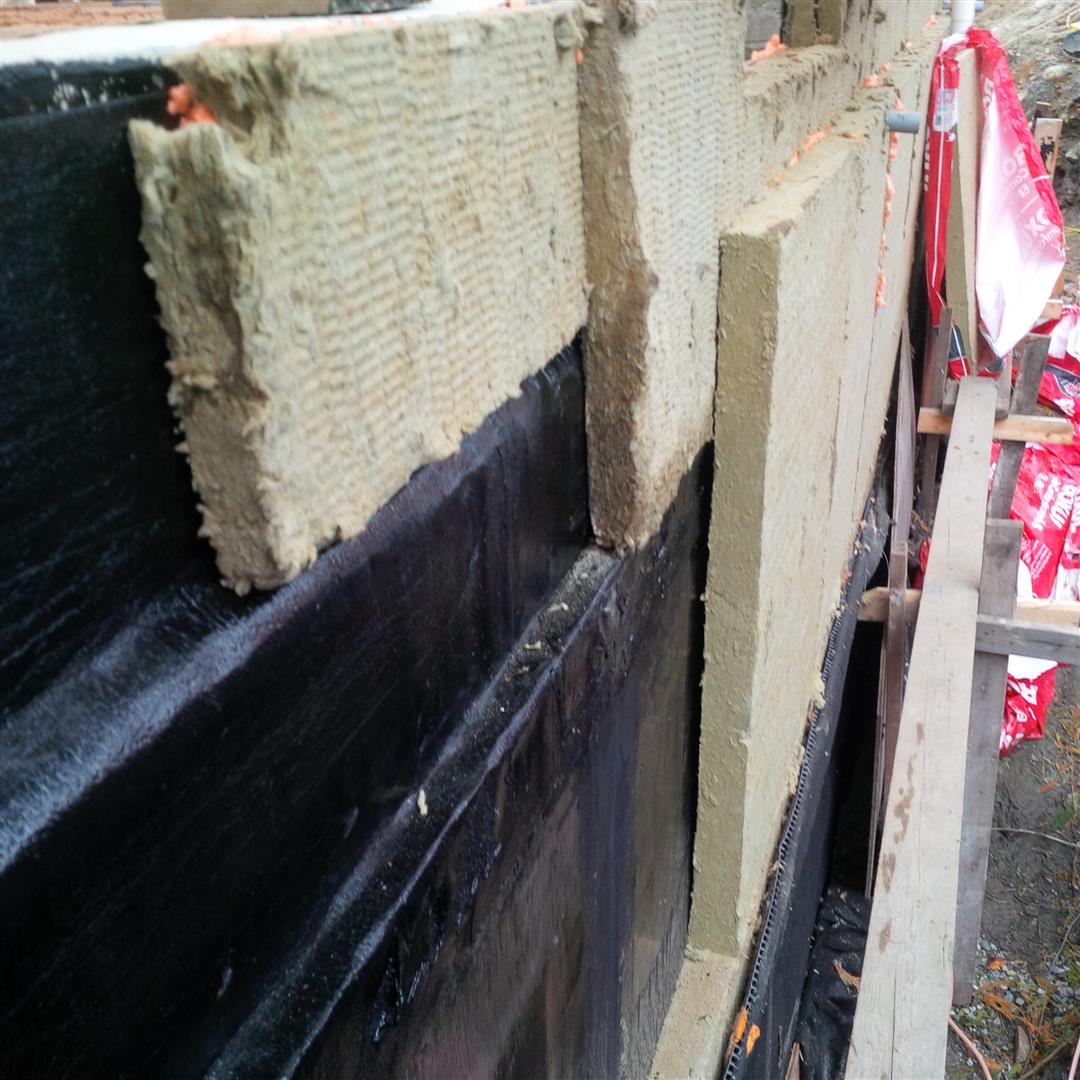
They made the room for their eventual return as seen above . The inboard two panels of ROCKWOOL were formed into the concrete. The thicker 3″ outer layer is applied to the outside of the foundation. I increase the insulation as we get closer to the surface to offset the greater temperature difference that will exist in the winter as you get closer to and then above grade. The insulation will be pushed tight against the foundation by the backfill.
In the top right of the photo, you will see a cutout. This is a door threshold and represents the finished grade at the end of construction. The concrete stub and insulation continues 6″ above grade as required by code.
At the base of the wall, I used the torch off top surface of the membrane to ‘stick’ the ROCKWOOL panels in place long enough to place the back fill. For the top, as there was multiple layers to affix to one another, I used a can of spray foam to hold in place and to each other. I would say that this is the one and only con I have found to date with mineral insulation. It is difficult to hold multiple layers in place when you cannot drive a fastener through all layers into a substrate.
I now need to install the dimple protection sheeting before commencing the backfill tasks which include the gradual buildup of a 6-8″ gravel layer against the dimple that is then separated from the soil with a geotextile sheet.
Thanks for visiting.
“Without ambition one starts nothing. Without work one finishes nothing. The prize will not be sent to you. You have to win it.”—Ralph Waldo Emerson (1803-1882) Philosopher, Poet, Author, Essayist
“At times you have to leave the city of your comfort and go into the wilderness of your intuition. What you’ll discover will be wonderful. What you’ll discover is yourself.” —Alan Alda (born 1936) Actor, Director, Screenwriter
“Maybe the journey isn’t so much about becoming anything. Maybe it’s about un-becoming everything that isn’t really you, so you can be who you were meant to be in the first place.”—Unknow