3 out of 4 - On the home stretch
Friday I finished framing and sheathing the upper south roof which now leaves only the last upper north roof to complete.
The process is going faster now that I am used to all of the steps and able to improve upon the process. For instance, instead of trying to clip on a string line onto the end of one truss at a time, I just now put a small screw at each end of all the trusses and ran strings on 6 trusses at a time. This cut down significantly on the up and down ladder work and streamlined the alignment process so that it only took an extra 2-3 minutes per truss instead of 15-20 mins.
As promised on my last post, I will better explain my roof assembly.
Because I am using a air permeable insulation, it is essential that I have a vented roof assembly. This allows excess moisture to escape, and keeps the roof deck cool so it does not melt the snow and cause ice daming during sunny winter days. Now, once you have a vented assembly, there are certain constraints that must be followed for both best practices and code requirements. One is that there is 1.5″ of cross ventilation from truss bay to truss bay (unless each bay is vented independently, but even then, it is best practice to provide additional cross ventilation). The second requirement is that there is 3.5″ of space between the top of the insulation and the underside of the roof sheathing (this ensure enough volume of air to be acted upon by stack effect – force that moves air in a vented assembly when wind is not present – to adequately absorb and transport away any moisture load).
In my assembly, I have 18″ trusses filled to their full depth with insulation, to meet my target of R60 effective thermal resistance (code is currently R40 nominal – about R30 effective). So I needed to create a total air gap of 3.5″ above the truss assembly.
It would have been better, and I originally designed, a roof assembly that had the majority of insulation ON TOP of the roof sheathing. This type of roof does not need to be vented as the outboard insulation would keep the sheathing above the dew-point. The problem with this type of exterior insulated assembly, is that it gets thick in a hurry. I needed 18″ for the truss from a structural standpoint, and then was looking at 10″-12″ of additional insulation depth on top of that. This caused me to run afoul of the roof height restrictions in my municipality.
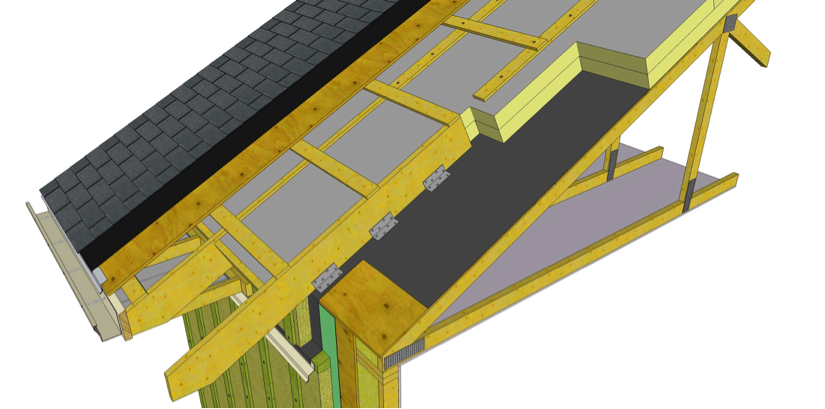
So I had to abandon this best practice (see RDH Attic Mould Study for explanation of the best practice) for a more conventional ventilated roof assembly and then figure out how to add the required 3.5″ above the truss for ventilation. I came up with the below assembly, which comprises of a 1″ plywood block supporting a 2×3 cross purlin, all screwed down with a #8 by 4″ screw for the flatter roofs and a 5″ screw for the steeper north roof (which will have more of a shear load on it during slow loads).
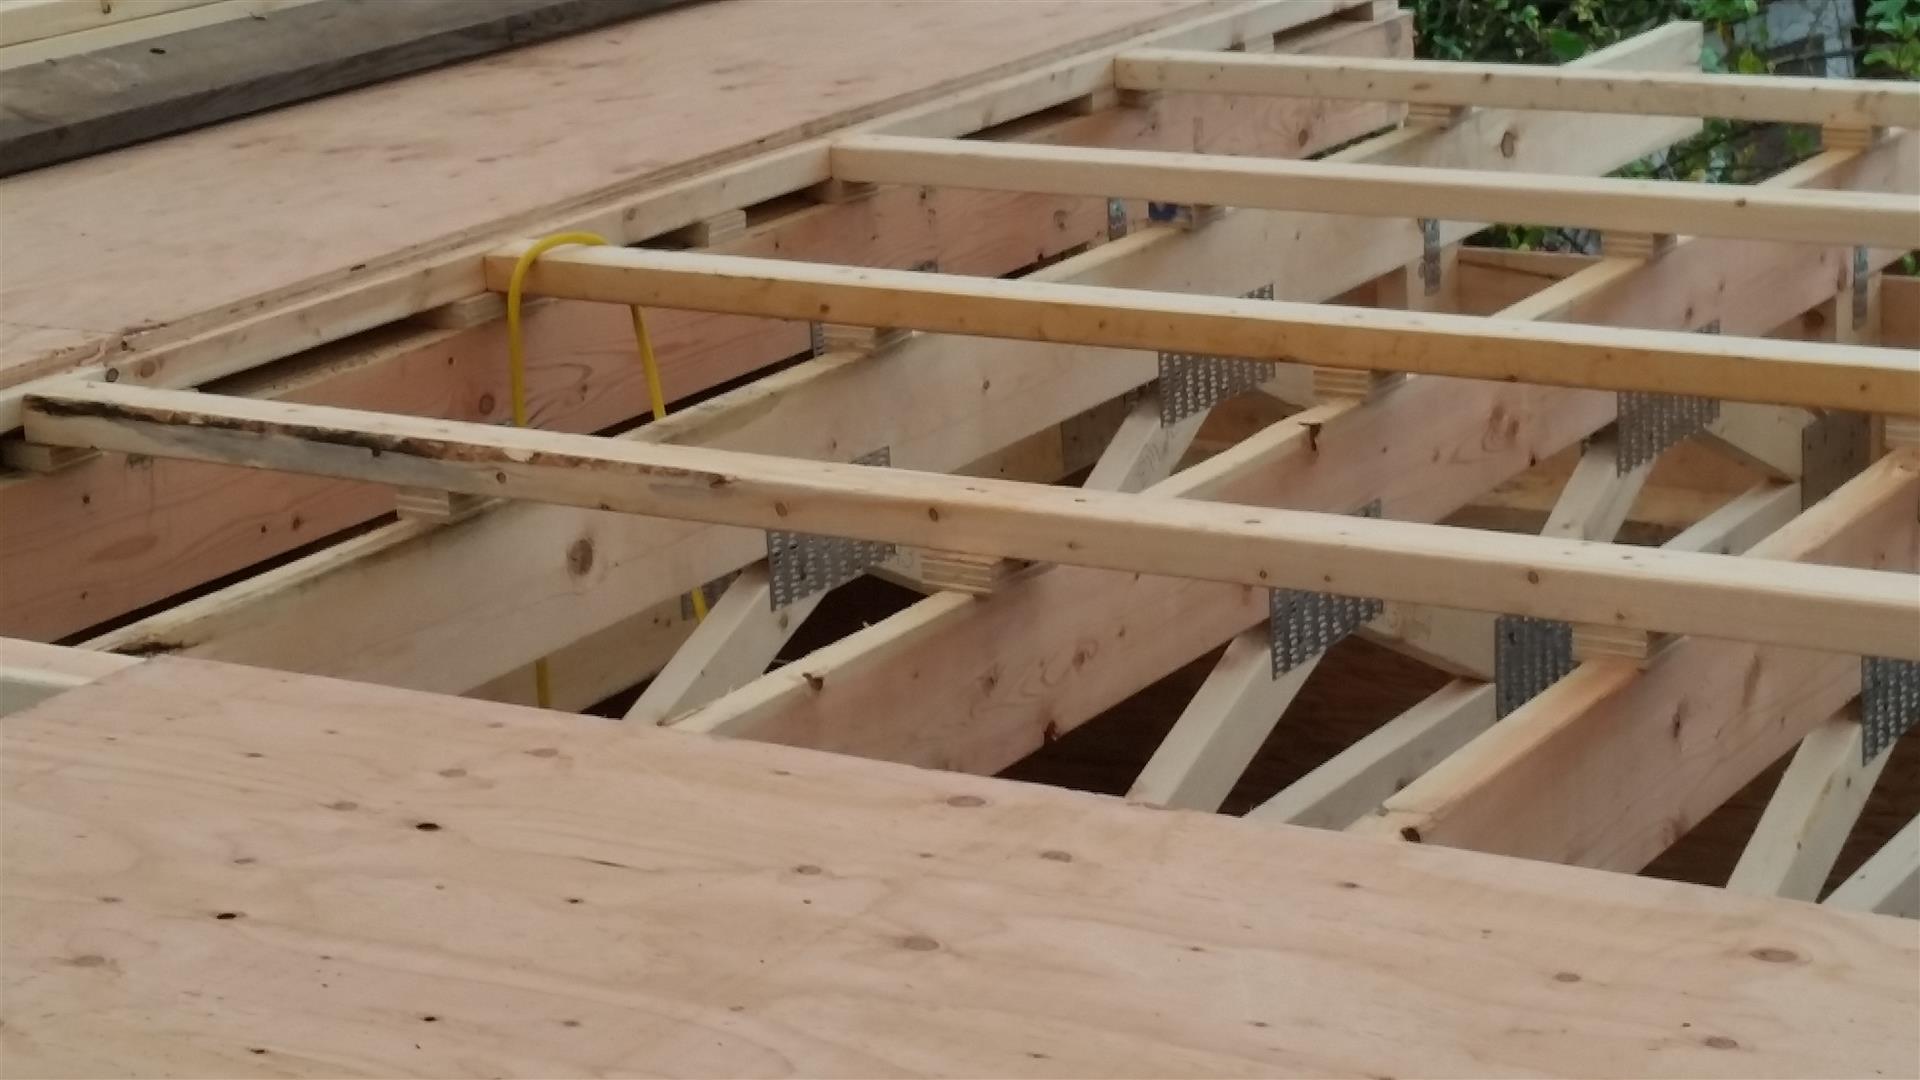
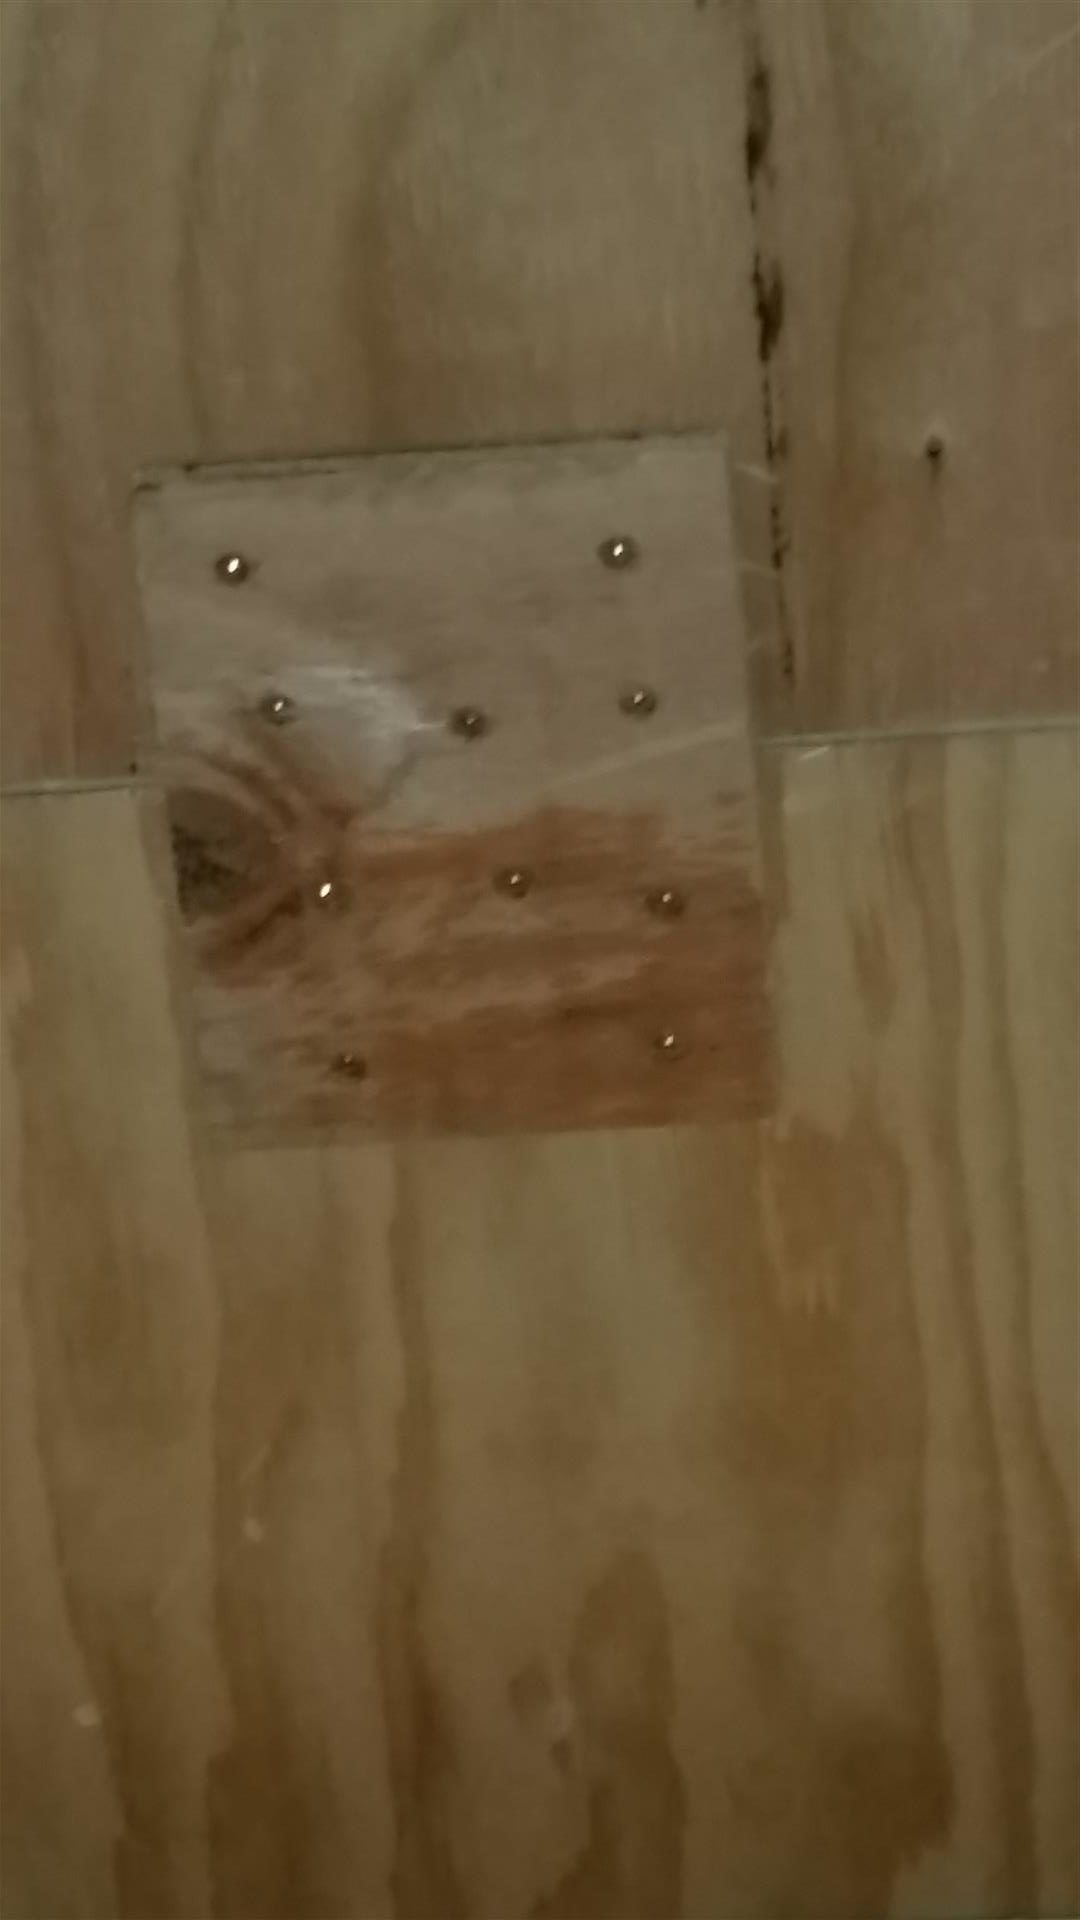
This adds time to the process (compared to just nailing sheathing down to the trusses), but should allow excellent air flow along and between all of the truss bays, and also allows for accurate alignment of the individual truss members as I attach the purlins. I spaced the cross purlins at 24″ centres for the lower roofs, but was not happy with the rigidity of the 5/8 T&G plywood at the unsupported edges (even with H-Clips), so switched to 16″ spacing for the upper roofs. For the lower roofs, in addition to the H-Clips used to align panel edges at unsupported locations, I also glued and screwed 1/2 plywood blocks to the underside of the sheathing over-top of the clip. This greatly increased the rigidity of the roof. On the upper roof with 16″ centres, and therefore clips at 8″ centres, I did not notice any ‘sponginess’ at the unsupported panel edges and will forgo the extra blocking below the clips.
This coming week I will work on the final north roof. The addition of a rope and harness while I work along the eaves and gables of the upper roofs has made me a LOT more comfortable proving that it is not the height I am apposed to, only the risk of falling. For this north roof, because of the slopes involved and risk that the truss could slide off the lower wall and crash to the ground, I will hire a labourer to help place and secure the trusses. They will be able to work along a scaffold setup along the north wall, while I work off of a scaffold platform at the upper clerestory wall. This will not take more than a couple of hours, so I have already worked in the basement over the last Stat and marked out where all the sub-slab plumbing drain lines will be routed and will have the labourer finish out their day trenching. Better them then me 🙂
Should be a good week and hopefully by the end of the month, I will have most of the roof decked and ready for roofing. I will then rent an articulated boom and install all of the fascias and ladder framing at the outside corners of the north roof. Finally, I hope to have the first ply of torch on applied before Christmas and finally have a guaranteed dry house.
Thanks for visiting.
“Hope lies in dreams, in imagination and in the courage of those who dare to make dreams into reality.” — Jonas Salk
“Learn from yesterday, live for today, hope for tomorrow. The important thing is not to stop questioning.” —Albert Einstein (1879-1955) Theoretical Physicist, Philosopher, Nobel Prize Winner