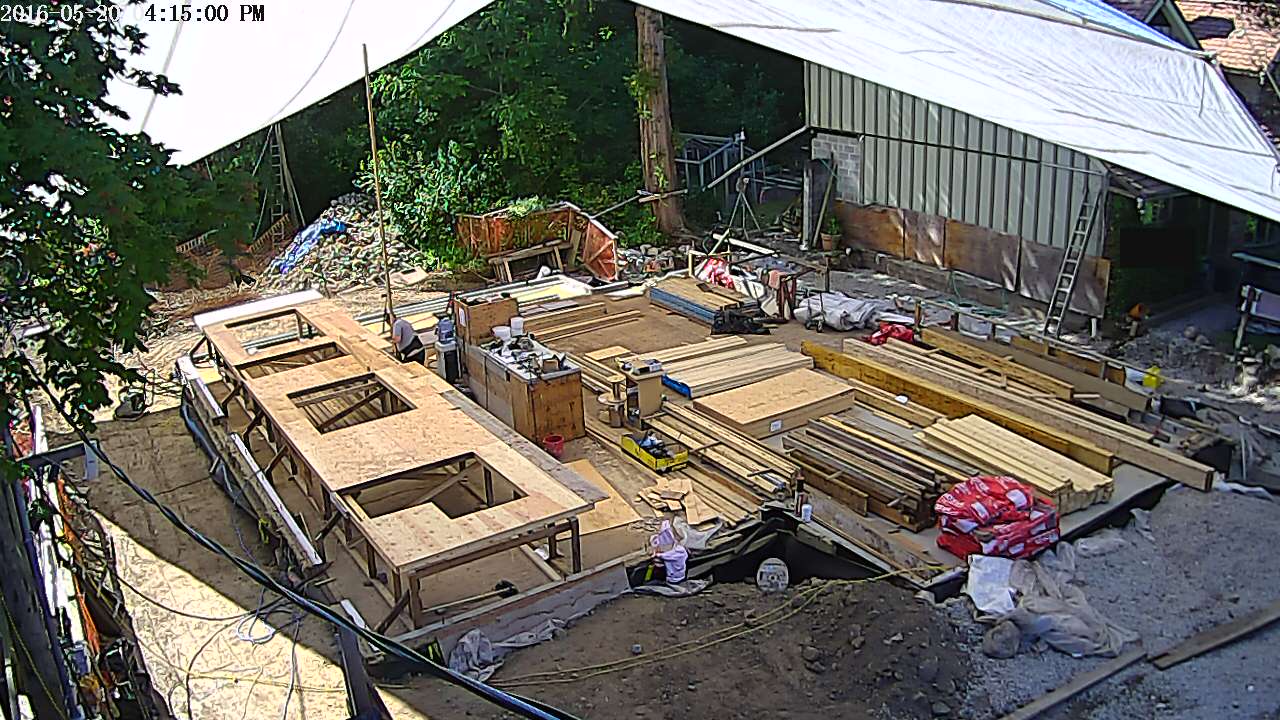
Framing has commenced and we have a wall!
Well today marks two significant milestones.
First, it was exactly 1 year ago today at 12:05 PM, that I broke my shoulder when I tripped on the curb at the side of the road. While I did not let the injury slow me down too much (just over a week later I was already starting to frame the basement), it has cost me a lot of time (and money) in doctors and therapy appointments over the last year. And while I can do most things now, the shoulder still hurts most times I raise it above my head and has not really been improving since roughly last February. So will probably work at getting another Cortisone shot (this time in the Bursa) and see where we go from there.
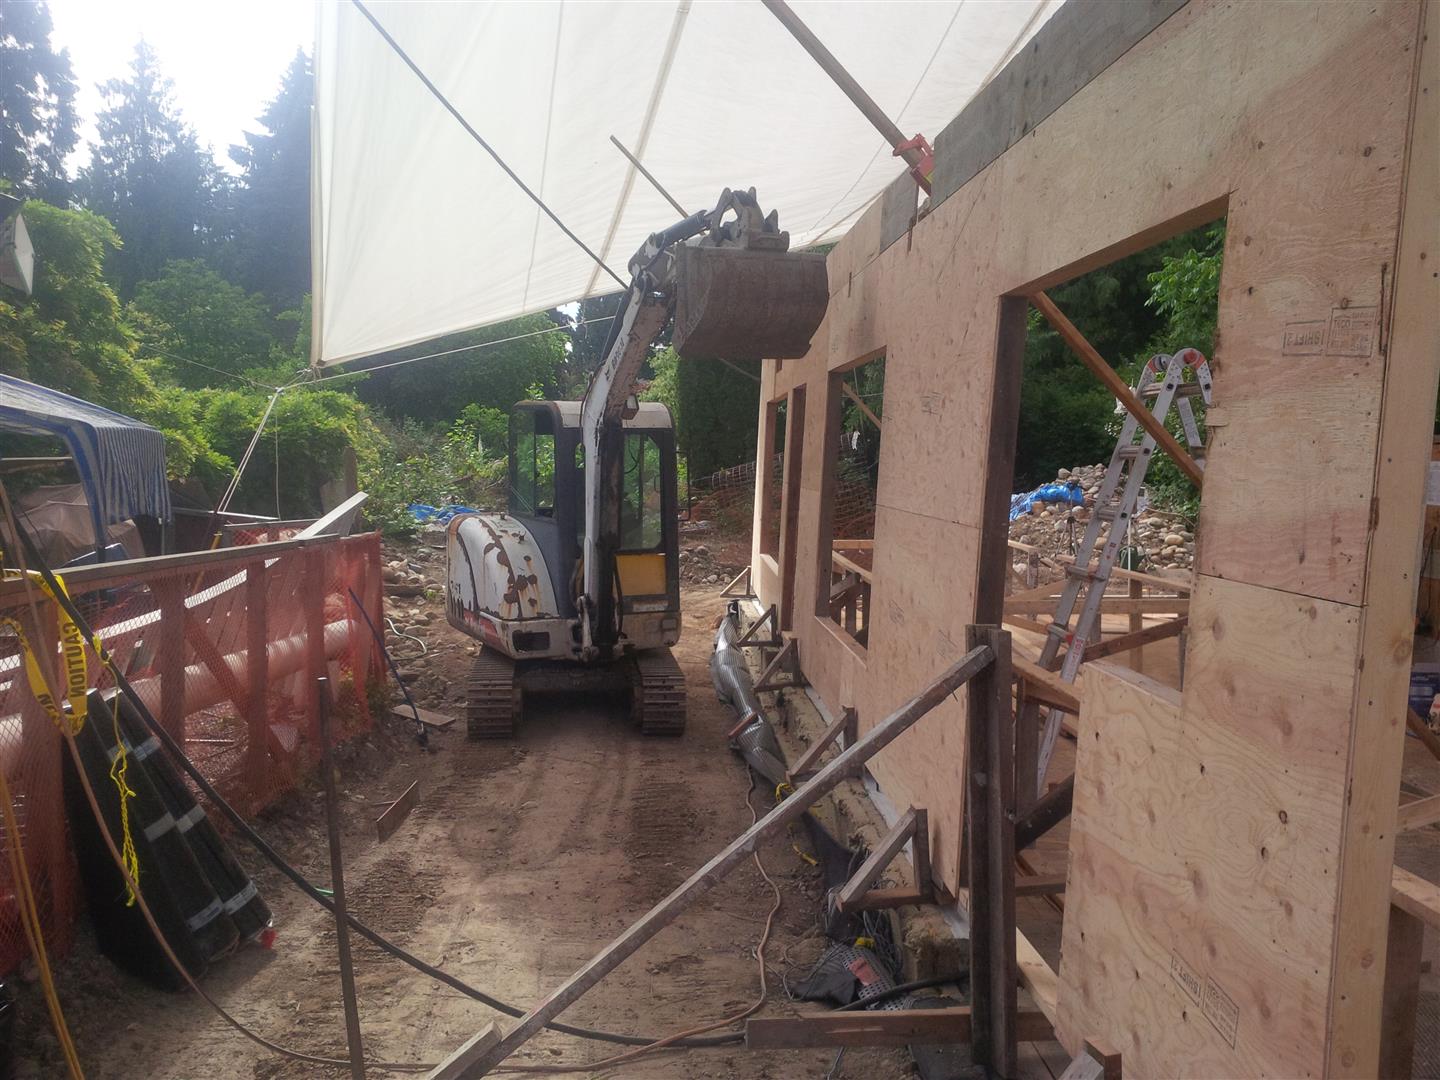
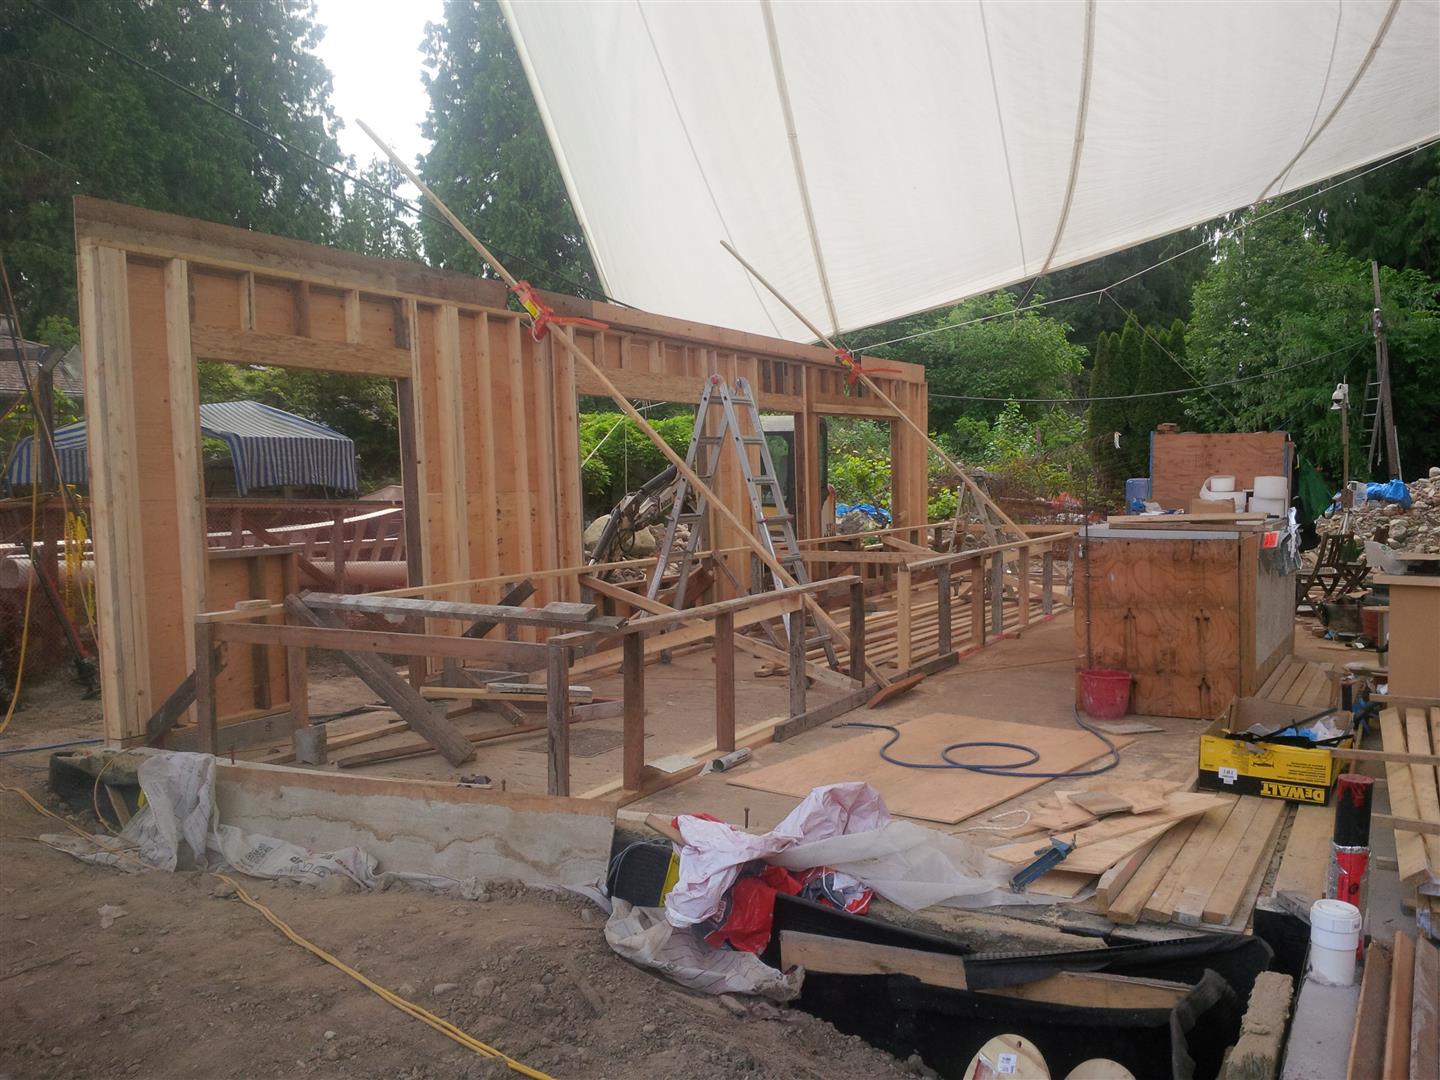
Fortunately, the second milestone is worth a lot more celebration. Today I raised the first above grade wall of the house!
Of course I started my framing with the longest wall of the house with the most openings and special framing considerations (like support for upper floor beams, and the south sun shades), as my first kick at the can. I have framed a lot of walls before, but they have always been what I term ‘utility’ walls, like walls for sheds, shops, greenhouses, etc. This was the first time I have framed a dwelling wall that took into account the building code, the engineer’s requirements, the braced wall panel requirements, and included things like engineered posts and lintels.
I had originally dreamt that I might even have framed most of the first storey this week, but the week did not go as planned (gee what a surprise!). First issue was materials. I had ordered all the materials needed for the storey last Friday noon, for delivery first thing Monday AM. Monday’s delivery slipped to late afternoon, but the worst part was that there were several back orders including the engineering lintels I needed for 2 of the 4 openings on my first wall. So I just proceeded as I could.
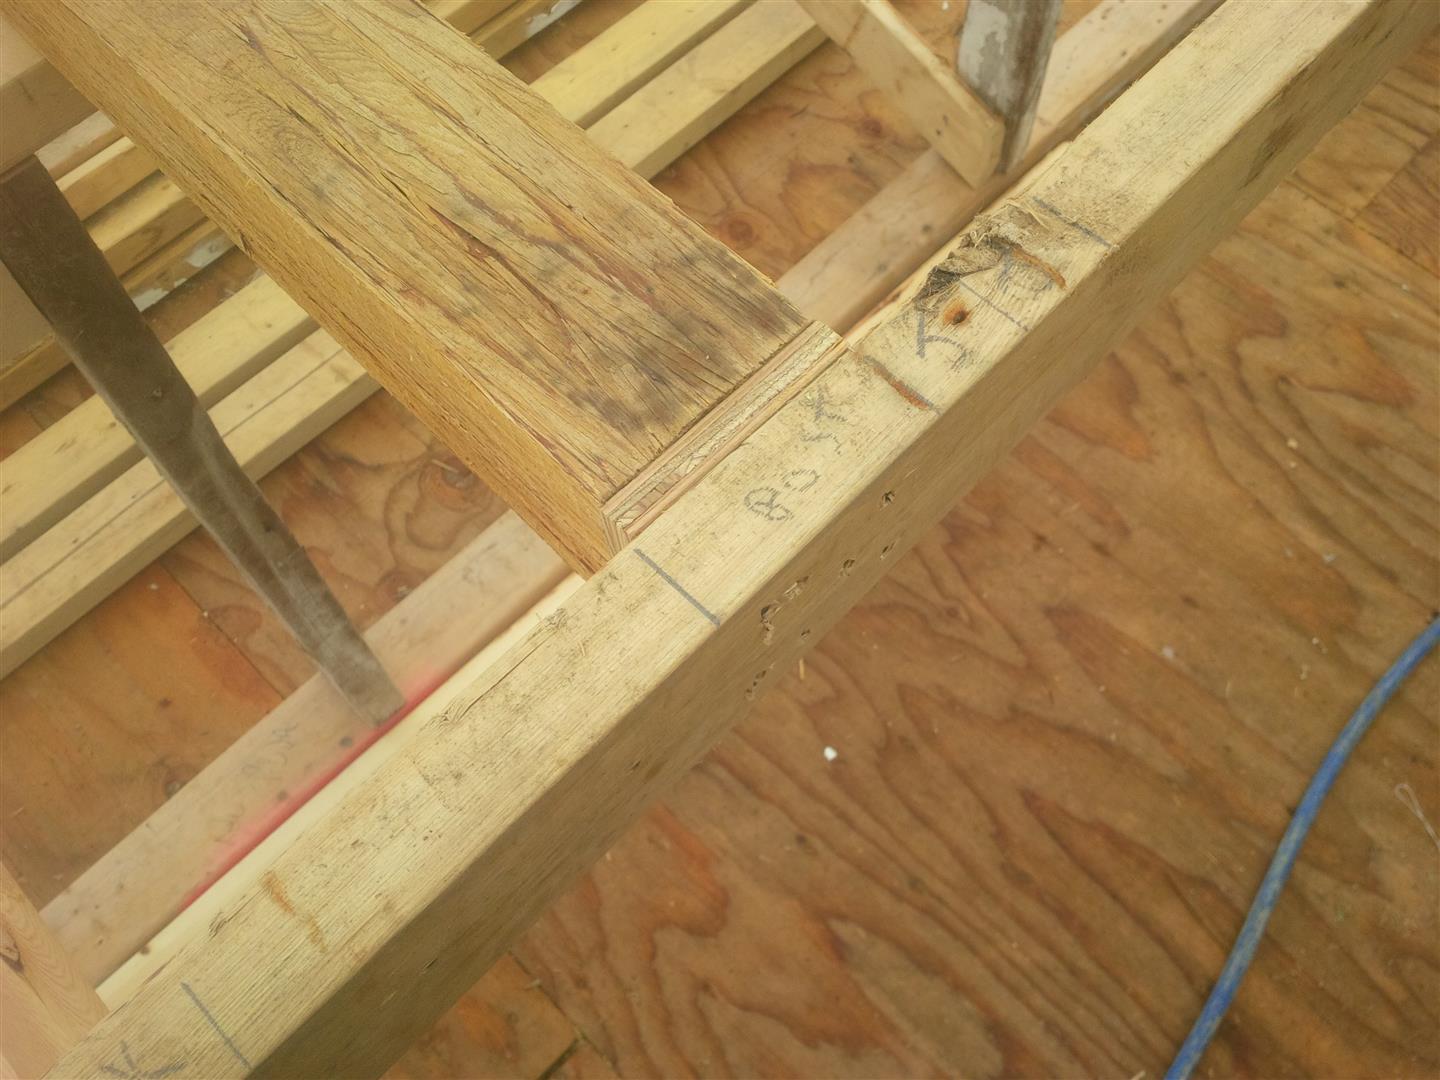
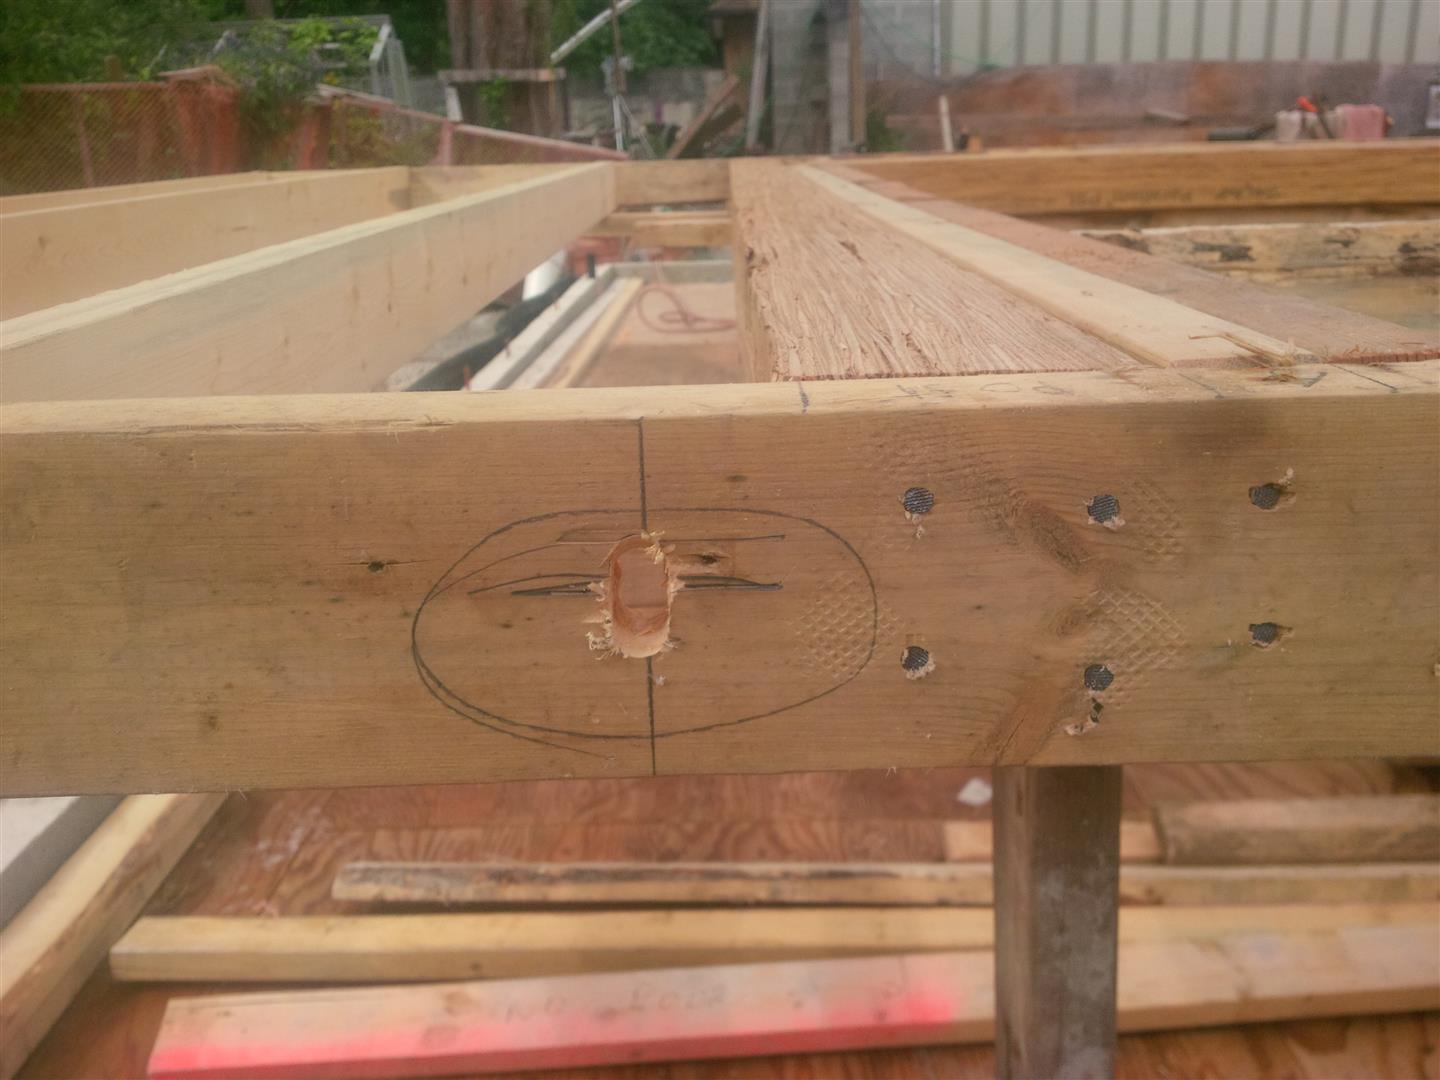
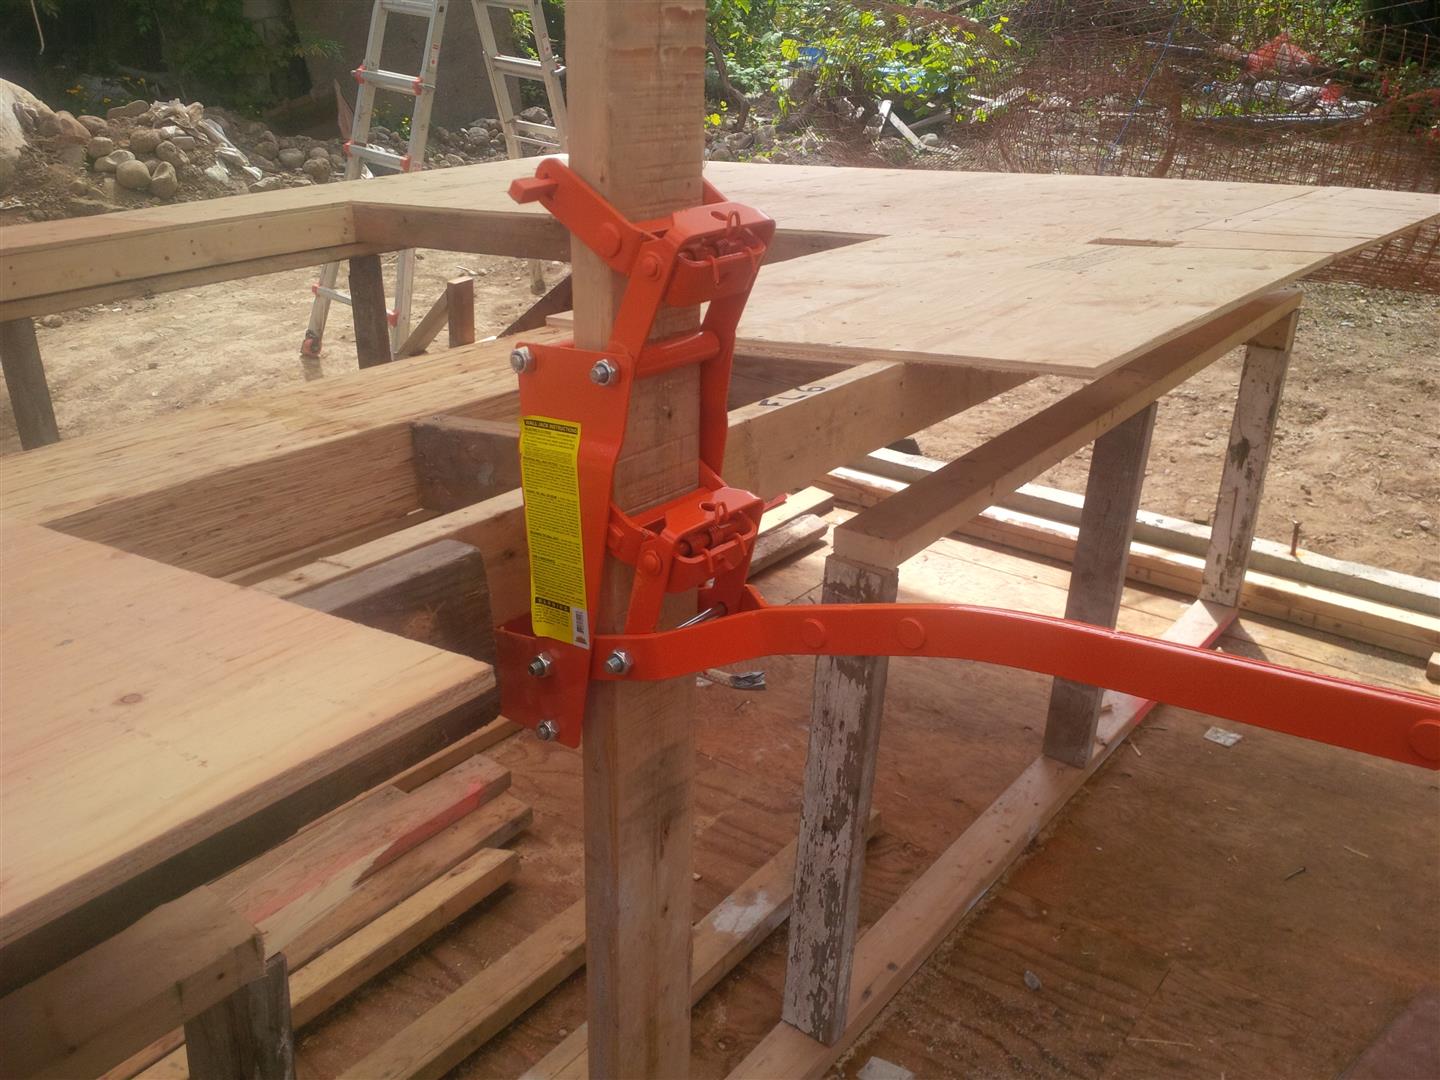
Monday I finished off the work platforms I would build the walls on. These were awesome and provided a factory like setting to layout and construct the walls. They saved a LOT of strain on my back and allowed me to be a lot more accurate in my layout and cutting. I however was still amazed at how easily small dimensional errors can creep into a layout. For some reason all of the marked out studs and openings in the first 10′ of wall were shifted from bottom to top plate by 3/8″ even though both plates were laid out together using a speed square. I discovered the error during the sheathing stage, but took the time to adjust so all were lined up again (pulled out the sledge to ‘adjust’ and then re-nailed). I also had repeated brain farts regarding the office door/coupled window opening at the east end of the wall and took three attempts to get it right. I am also amazed at the variance in supplied lumber. My 8′ 2×4’s were 8′ 0-1/4″ and my 8′ PSL King posts were actually 7′ 11-3/4″. I elected to use the 8′ 1/4″ studs as is and then added 1/2″ plywood block above the king to make up the difference. But make sure you measure your lumber before building it in, or you may be surprised at the outcome. I was also using some of my 65 year old salvaged 2×4’s from the old house, to use as jacks and cripple studs, and these had a much fatter profile compared to modern lumber dimensions which offered some additional challenges.

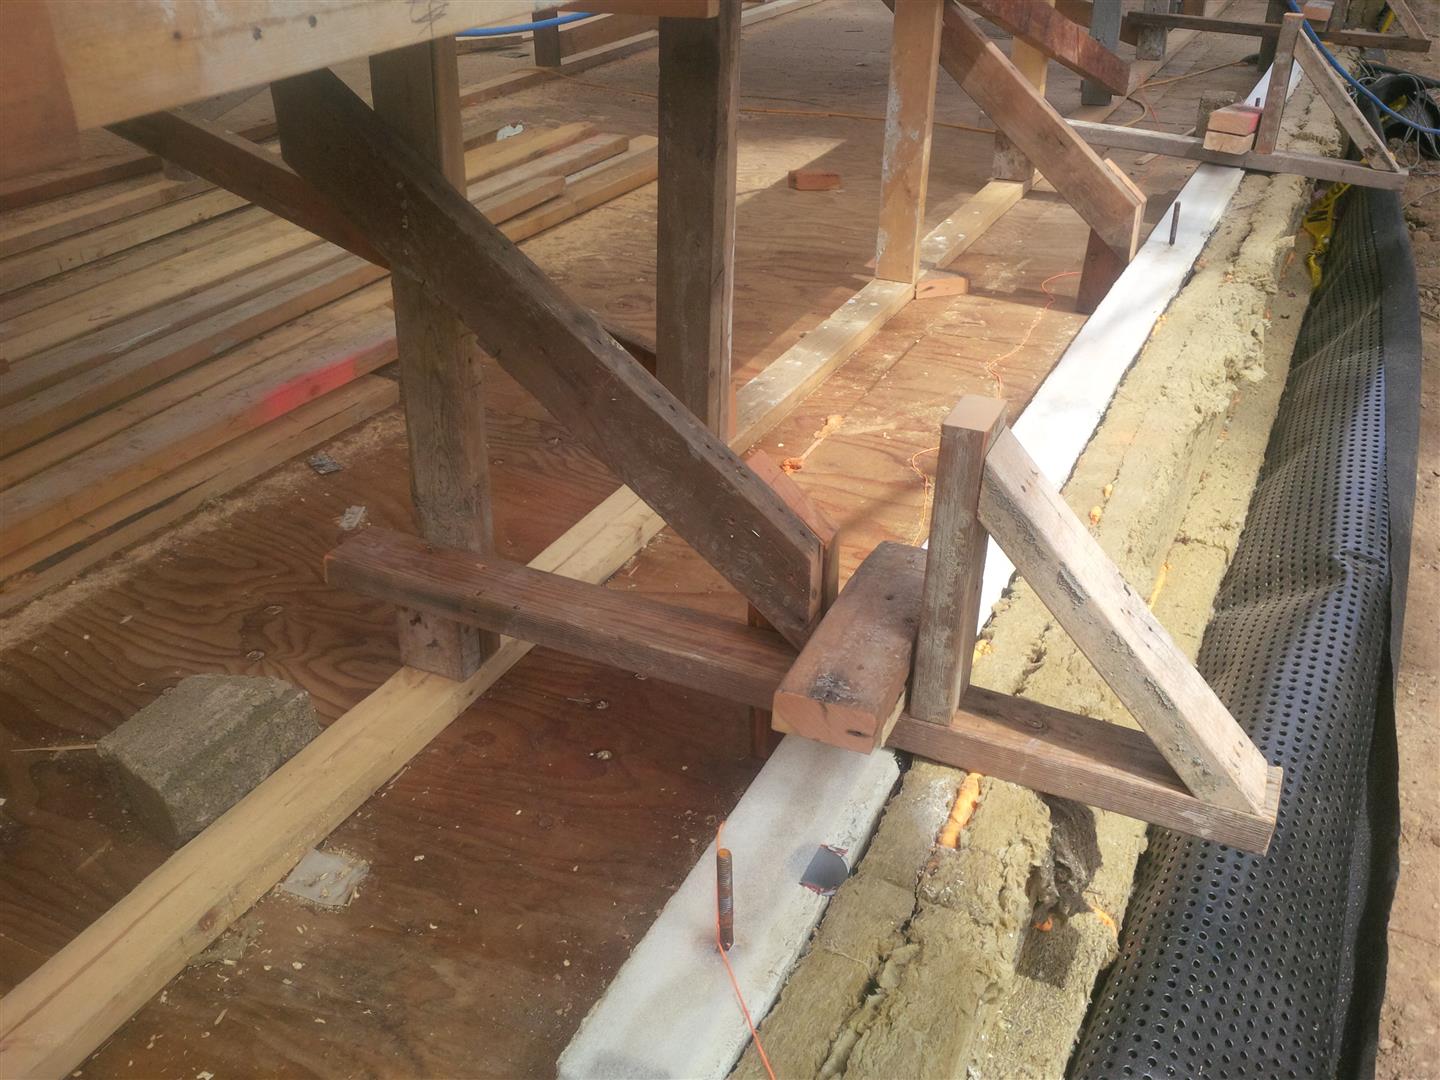
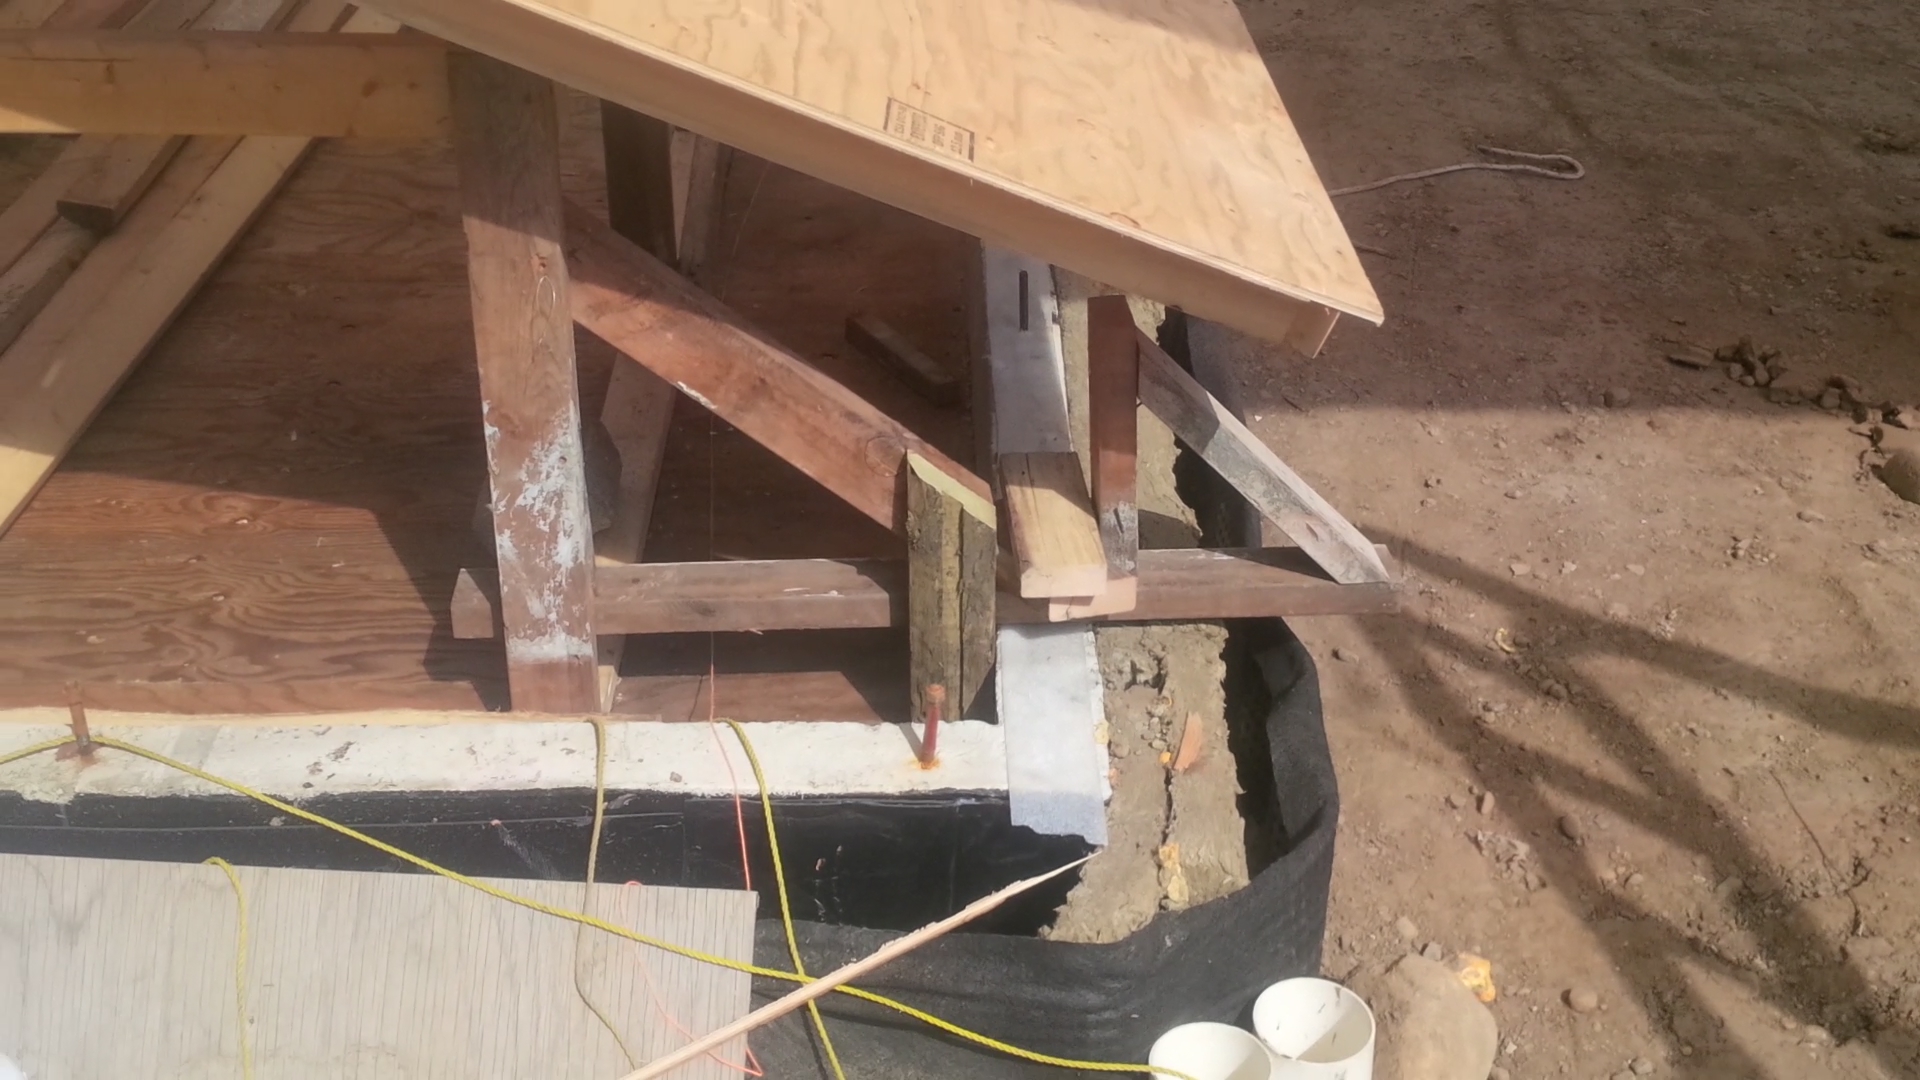
I started framing Tuesday AM and by the end of the day had framed most of the 41′ south wall including the opening lintels I had in stock. I lost half a day on Wednesday taking back a extra beam I had mistakenly ordered and then trying to sort out the wrongly supplied and outstanding items from my order. The rest of the casually paced day saw installation of the top and bottom criples, and sill plates for the 2 windows. There was not much more I could do without the final lintels I needed. Fortunately I was able to pick these up Thursday AM and by the end of Thursday the framing was complete and the sheathing was started. Friday saw the end of the sheathing and the first half of the ‘pockets’ installed that I was going to stand the wall up into so that it did not slide off the foundation before I could slip the bottom plates over the installed anchor bolts. Today I spent the afternoon finishing off the capture pockets before lifting the wall into place using wall jacks and then securing the anchor bolts.
*** Update 2016-09 – DO not slot the plates like this. I considerably weakens the plates per information in this Primer – Anchoring Framing to Foundation. I discuss repairing them in a September Update ***
Going forward, I expect to be much more expedient now that I have all my materials (final beams were delivered Thursday afternoon), and have worked out all of the bugs on wall layout and more importantly raising. By the end of this coming short week (Monday is a stat), I hope to have the east, west, NW, and north walls all in place leaving only the walls separating the garage from the dwelling and two internal bearing walls needed to start installing the second storey floor trusses. Lets see how we do!
Thanks for visiting.
“Never give up, for that is just the place and time that the tide will turn.” —Harriet Beecher Stowe (1811-1886) Author
“Diamonds are nothing more than chunks of coal that stuck to their jobs.” —Malcolm S. Forbes (1919-1990) Publisher
“Courage is grace under pressure.” —Ernest Hemingway (1899-1961) Novelist, Nobel Prize Winner