Firsts!
This has been a week or firsts for me.
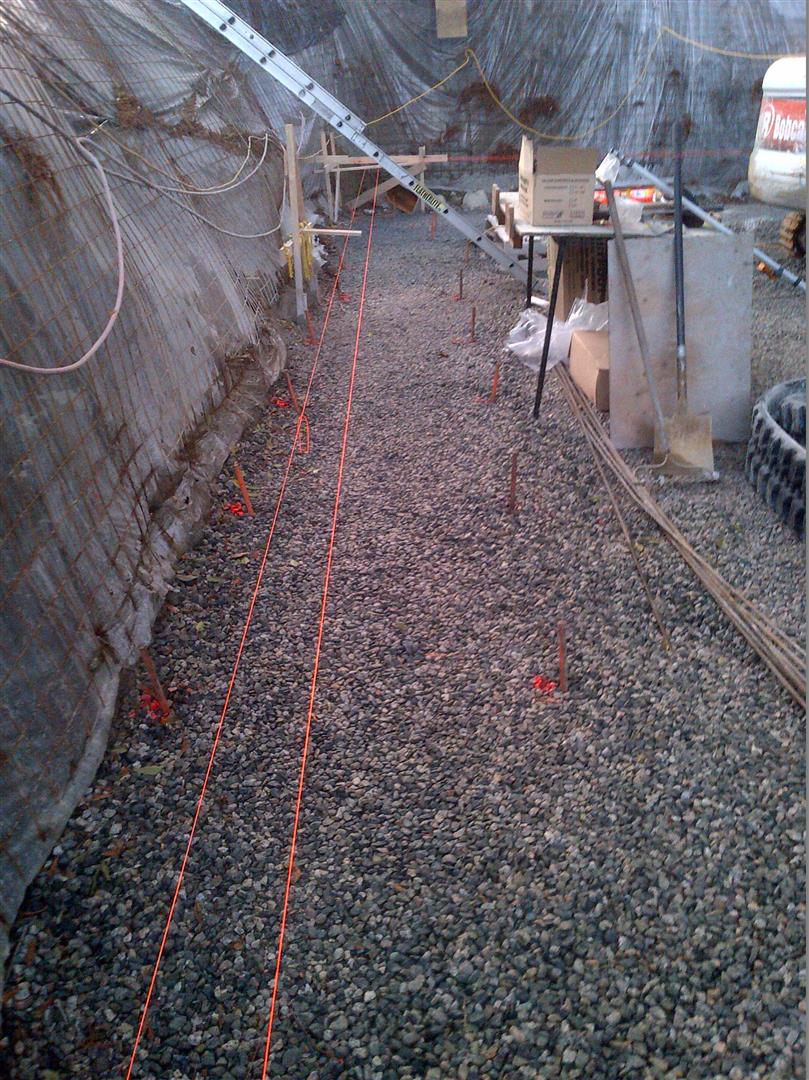
We had our first snowfall and the tarp survived. It was straining mightily, but sustained no damage. With the continuous freezing temps, much of the snow is still on the tarp in the form of crusty ice. The rope support system really came under fire in the front half as the weight of the snow built up in each section. The back side fared better because it is at a steeper angle. It also receives more sun, so just today, the remaining snow and ice slipped down to the edge where I was able to knock it off. Hopefully the rains will start gradually and allow the snow/ice to melt on the front half, or I may end up with ice dams and puddles requiring emergency release of the support ropes which would allow the tarp to drop straight down.
But the best of the firsts is that I have actually started installing my footing forms today. I have made up and placed two ICF modules (three blocks per module) and the process came together just as planned.
I am installing the first row of ICF with the footings so that I end up with a perfectly level starter course. This will take a bit more effort to set up the footings but will save a lot of time later.
First, I will not have to worry about levelling the top of the footings after pouring. I also can be off a little bit on my order volume (will order slightly less than needed) because I do not have to bring the concrete level up to the top of the ICF block. As long as it fills the bag footing and comes part way up the block, I am golden. This saves time because now I really do not have to level any concrete after pouring until I get to the final pour at the top of the ICF foundation wall. This saves money because I will be able to do the footing pour by myself (no labour costs).
Next, I will now not have to bed the first row of ICF into a mortar bed to ensure that row is perfectly level. This would require hand mixing mortar (my back!) and additional costs. Plus, as anyone who has worked with CMU’s can attest, this process is a PITA as unless the mortar mix is perfect and stays that way over 15-30 minutes (good luck in this weather), it is difficult to get the blocks to level as the mortar is often too soft (block sinks) or too firm (difficult to bed blocks). I spent many a summer working with Joe Hirmer (my neighbours growing up in Richmond) placing brick and mixing mud and hated that first row!
So – How am I doing this?
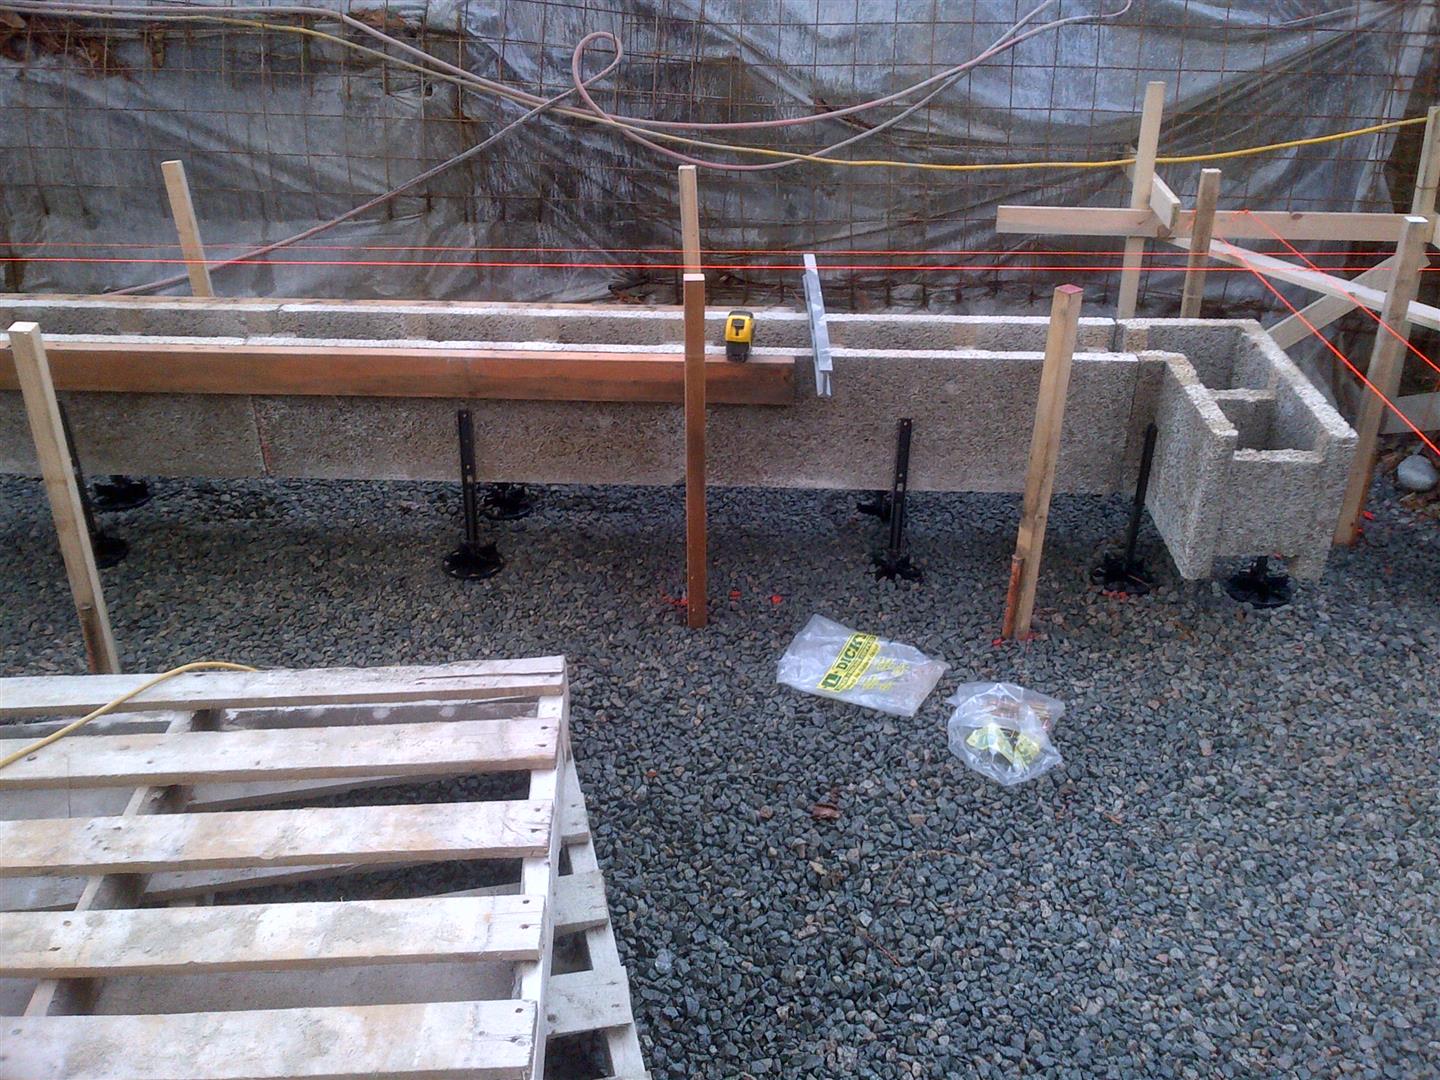
Step 1 – Install uprights. I have found that renting the form stakes from a form rental company to be the best approach for anything that has to go into this ground. It is far too dense to drive in wooden stakes. I get 24″ stakes and drive them through the gravel layer and into the ground so only the last three holes remain above the surface. I then screw a 2×2 upright to this stake. This step I did yesterday.
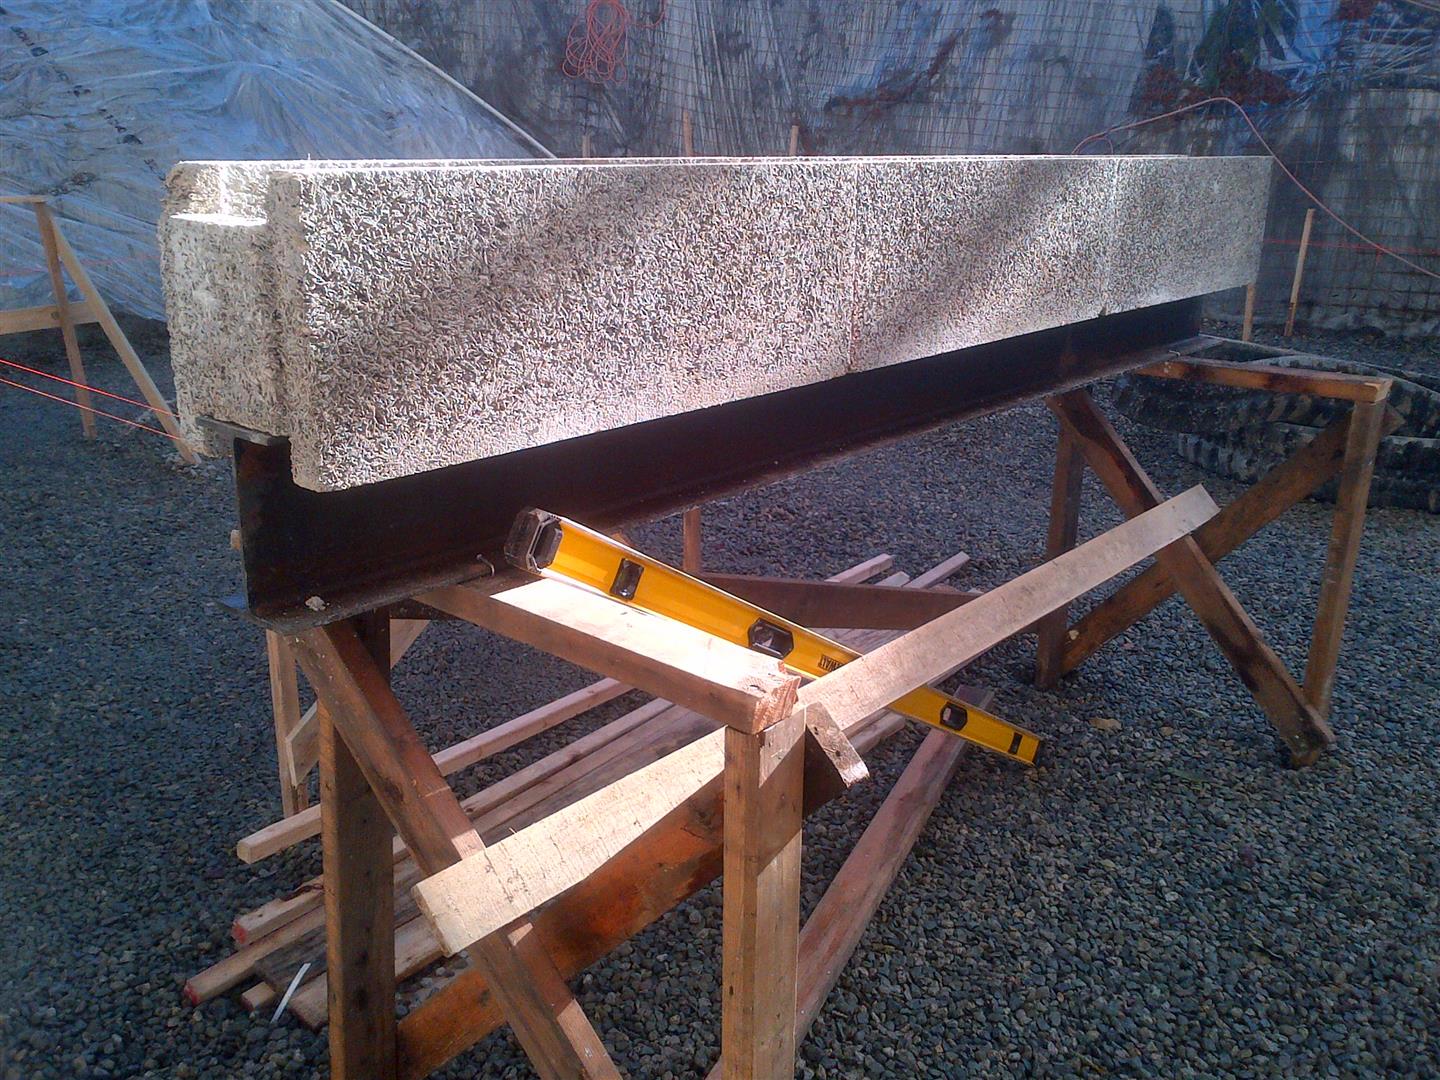
Step 2 – Build the ICF module. I am using a W8x18 Metal beam that will be a support beam in the basement. It makes the perfect flat surface to place the ICF on. The width of the beam fit inside the ICF core so that only the connecting webs were resting on the beam and I had full access to the outside panels. I screwed each block together through the webs at each end. I then screwed a 2×4 flush with the top surface allowing the 2×4 to overlap at one end (so I can lock each module together with the next).
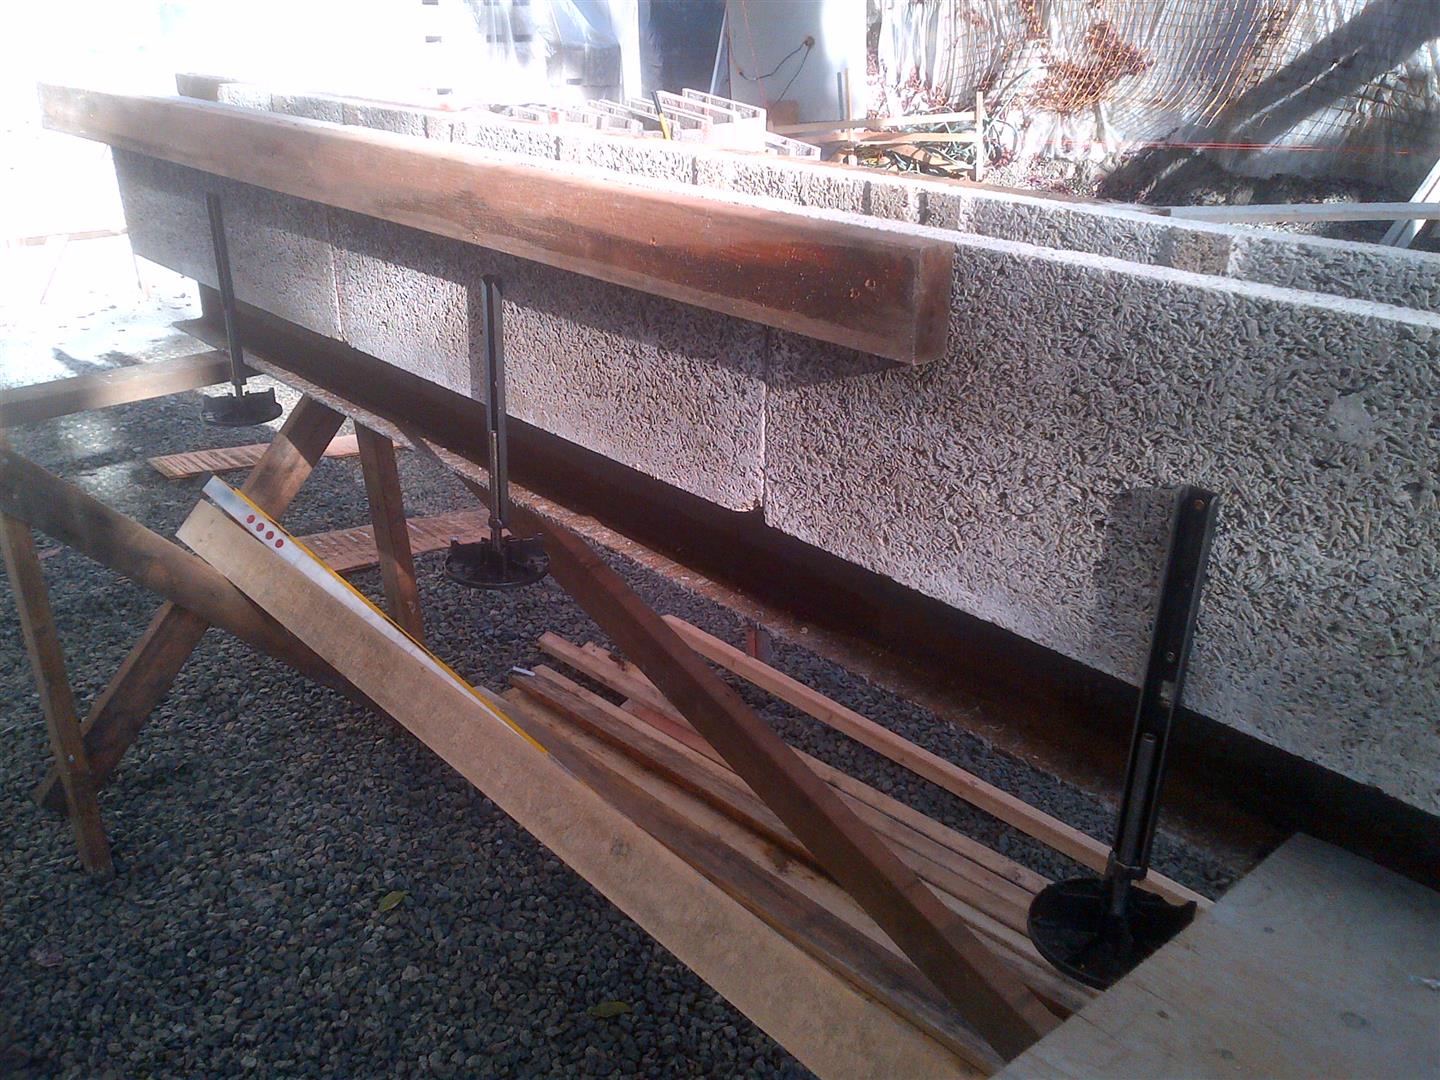
Step 3 – Install Feet. I bought a dozen adjustable feet from Fab-Form. They would normally sell their clients enough of these so that each Foam ICF block is supported around the whole perimeter. But these metal adjustable brackets are a significant cost (would have been $750 on my project) and also represents a significant addition to the embodied energy of the system. I instead plan on using them for the levelling the ICF modules and they work really well for this. They have an included hex driver bit that goes in your power driver, that allows you to raise and lower the feet and therefore the assembly. The little round pads on the bottom fall off a lot, but they have redesigned these and are just waiting for their shipment to arrive. I will then unscrew a set of 6 feet from a module and transfer to the next module once I have supported the previous.
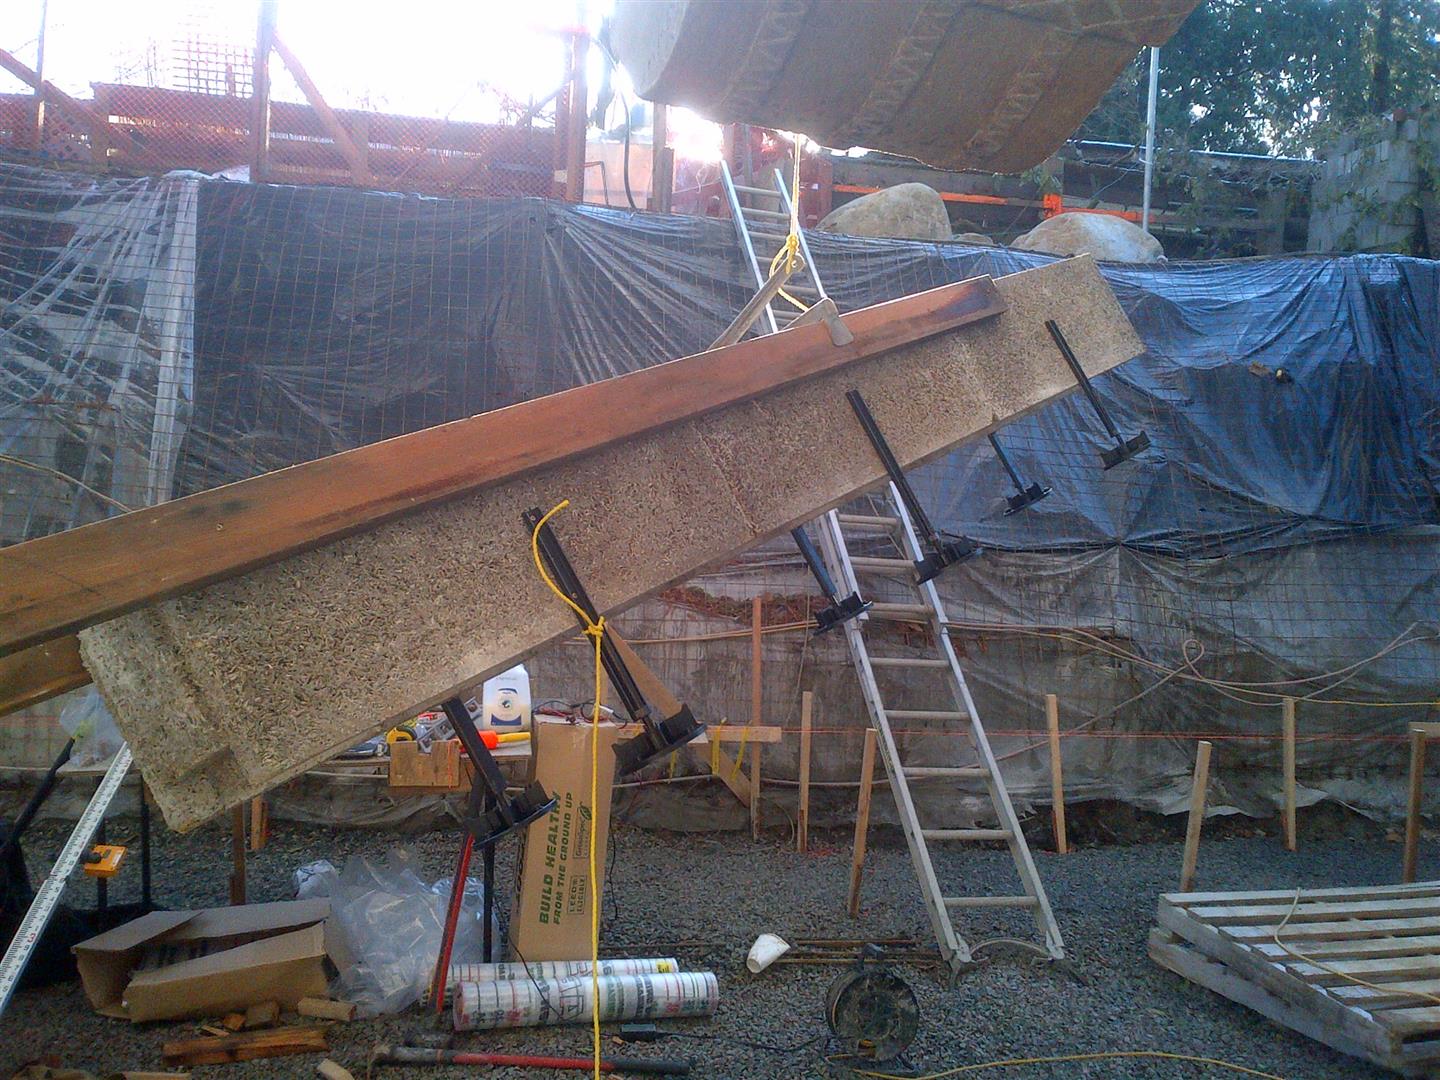
Step 4 – Lift into place. Of course on a normal job site, you would get a couple of people to do this. The module is around 150 lbs so not bad. But I am cheap, have a bad back, and have Alfie at my side. So I used a masonry brick lift and tied it to the tractor’s boom. The first lift you see below was quite lopsided, but on the second module I was able to find the centre of gravity. I tied a rope to each side so I could control the swing of the module from the tractor cab.

Step 5 – Level. With the feet on, the module can be levelled end to end and side to side. I was using a laser level to get one side level and then a spirit level to level the side to side. Worked a charm and was dead on! I got irritated at one point because I was unable to lower the module and figured out the feet had bottomed out, but then I realized I was below the 8″ required footing thickness, so I believe this is designed as a fail safe (8″ is typical min footing thickness). In the end, it turned out I had the wrong height marked off on the measuring stick and needed to be higher, not lower.
Step 6 – Secure. Once I had a module perfectly level, I attached a 2×4 to the upright on each side with it resting on top of block. Then I anchored it into each side of the block on each side of the 2×4 (Toe-Screw). This locks the module into position so that it can not shift out of alignment and provides ‘hanging’ support so I can remove the feet.
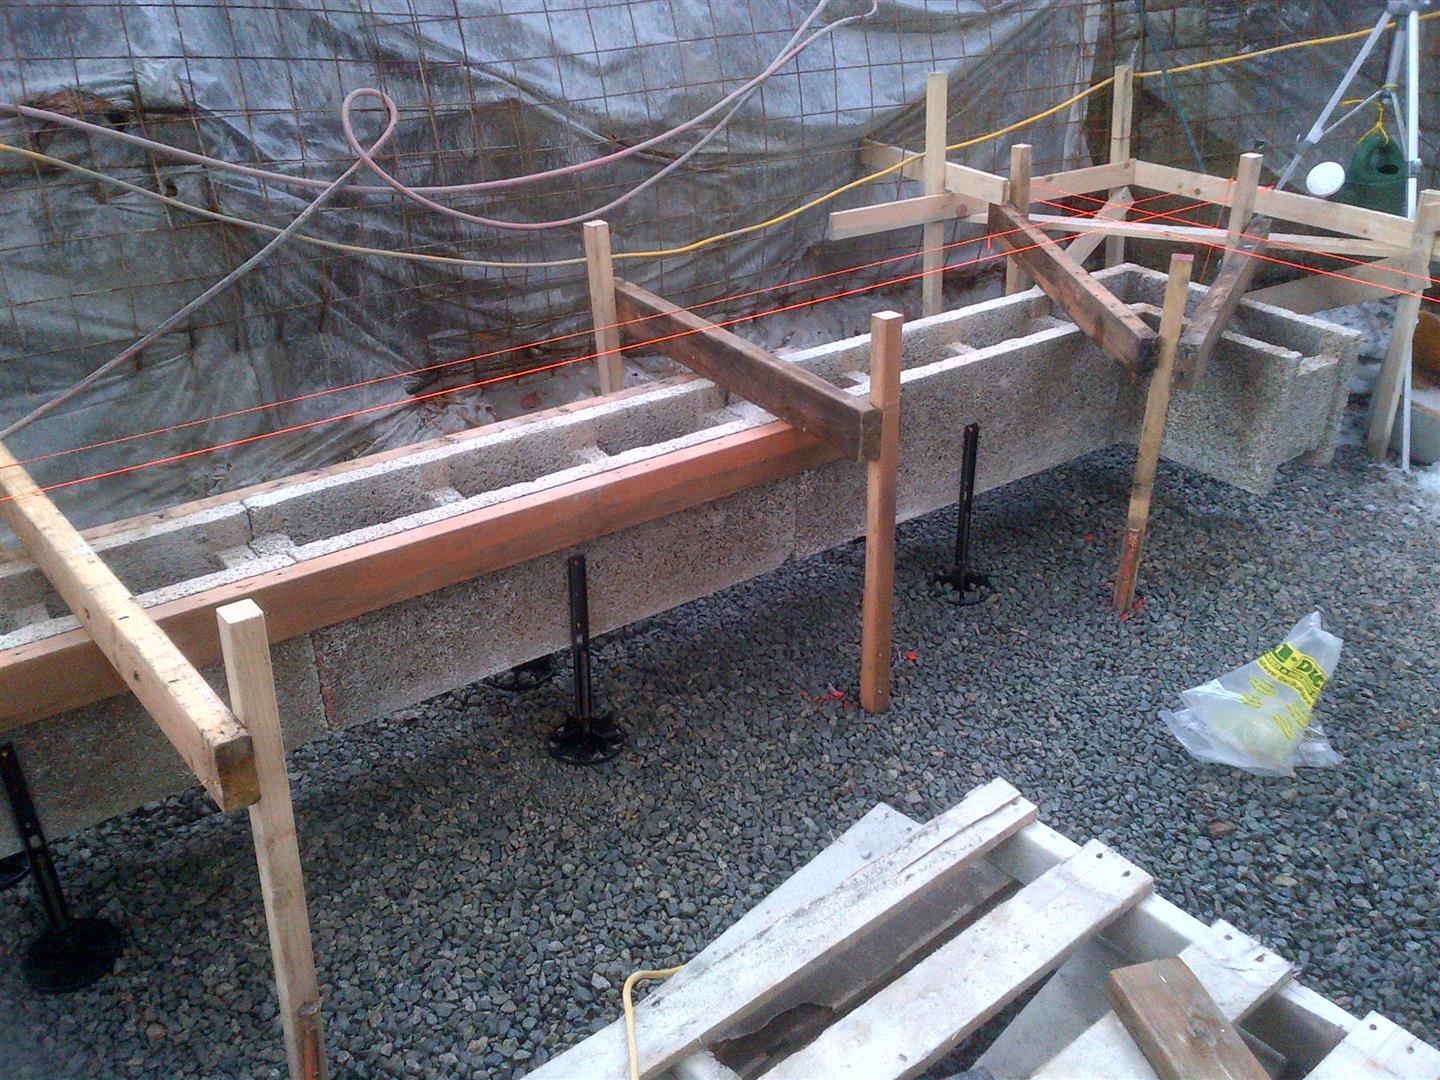
Step 7 – Move on. Once the module is secure and hanging from the cross braces, the feet can be removed to start the next module.
Once all of the first course of ICF is installed and supported in this fashion, I will then attach the footing form fabric to the bottom edges of the ICF and I will be almost done. I will then just need to place the rebar dowels into the top of the ICF, and then will be ready for inspections and to pour.
I am pleased with this progress and really happy that the installation is going as planed with no hiccups or real challenges to the process. Now I just need to put in the hours to get it done. Monday and Tuesday morning were needed for an urgent business matter I had to attend. Tomorrow will be both Physio and massage, so again a short day. But to be honest, it is just TOO COLD to work in the pit more than 4-5 hours. Even with 4 layers, I leave absolutely frigid!
I hope to get a full day Thursday and Friday, and will probably also get some time in on Saturday. It is my hope that the full perimeter ICF starter row will be in place by the end of the week and I can polish off the fabric form installation early next week. Then I will need to layout the internal footings which will be framed with rigid foam. This will probably be done by the end of next week and I can call for inspections and survey.
Thanks for visiting.