Floor Installation - ✔
Steady progress has been made over the last week and a half, and I now have 95% of the first storey floor installed. This has been quite the struggle with one usable shoulder and the unbearable afternoon heat, but I pushed forward each day as best I could.
The process started with this impressive delivery by Standard Building Supplies.
I needed the delivery anyway as there was no way I was going to carry this load in my trailer, and the delivery and crane to deck only cost me just over $100. It would have cost me way more than this to hire two labourers for even half a day to move this from the driveway to the deck. Only thing I would do differently next time is rotate the pile so the tongue and groove are oriented to the direction they will be installed to reduce the handling required of the sheet (a bigger deal for a temp cripple like me).
On a side note, I have found Standard to be an excellent supplier of construction materials. I started out at Dicks and found that the account managers at Dicks just were not treating me like a serious builder and the pricing reflected that. After 6 months, I still did not have any appreciable discount associated with my account and it took 4 months to get the account set up with ANY discount. I went out for some pricing on my Basement lumber BOM and received a quote from Dicks at $2310 + Tax and only $2055 + Tax from Standard. A 11% savings. My account rep at Standard (Dave Snowden) seems to ALWAYS be available by email – day or night, which is not something I need, but sure does ease the stress in planning when I know my request has been actioned and I can move on to the next task. They seem to almost always have what I need in stock and both the yard and the contractor desk crew are professional and very helpful.
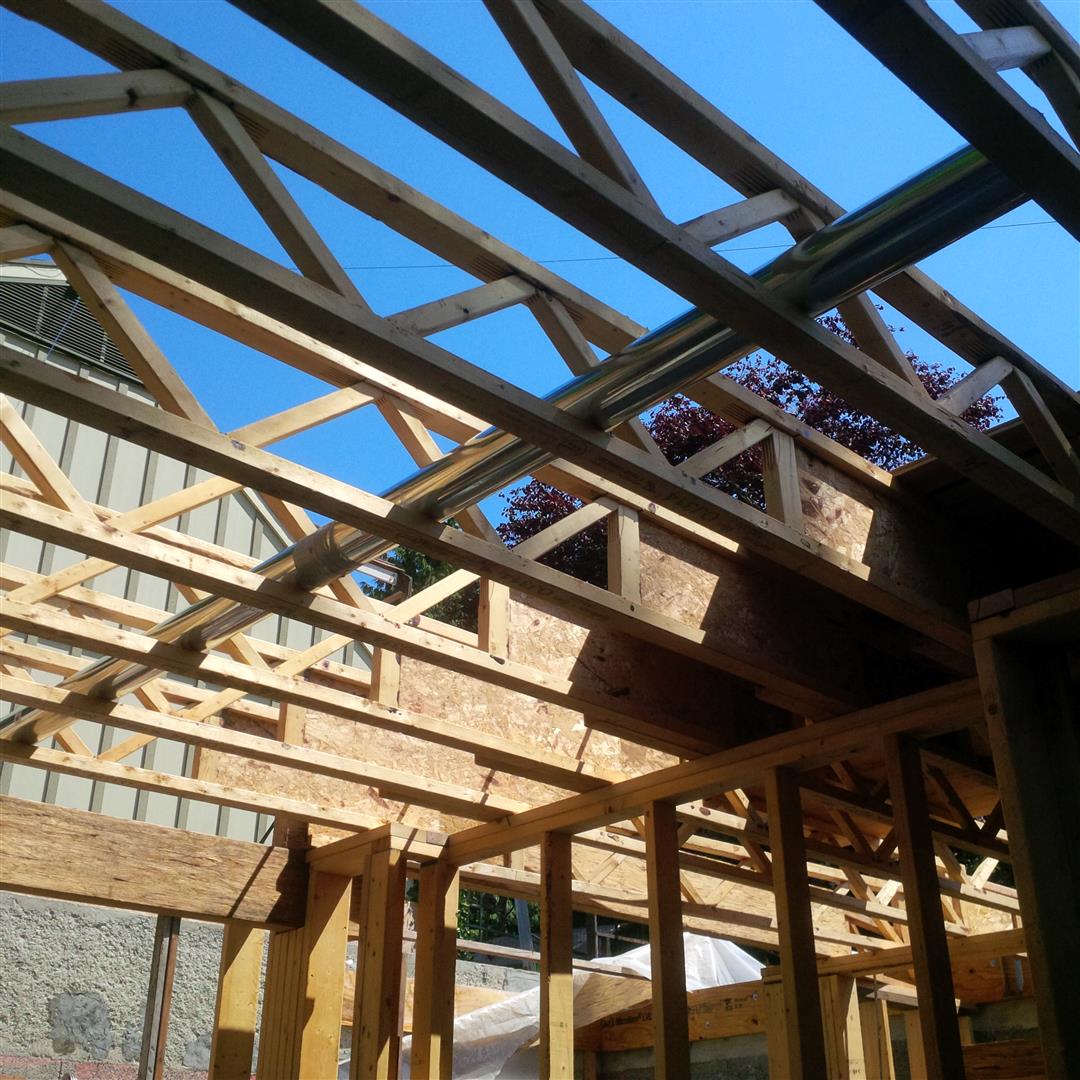
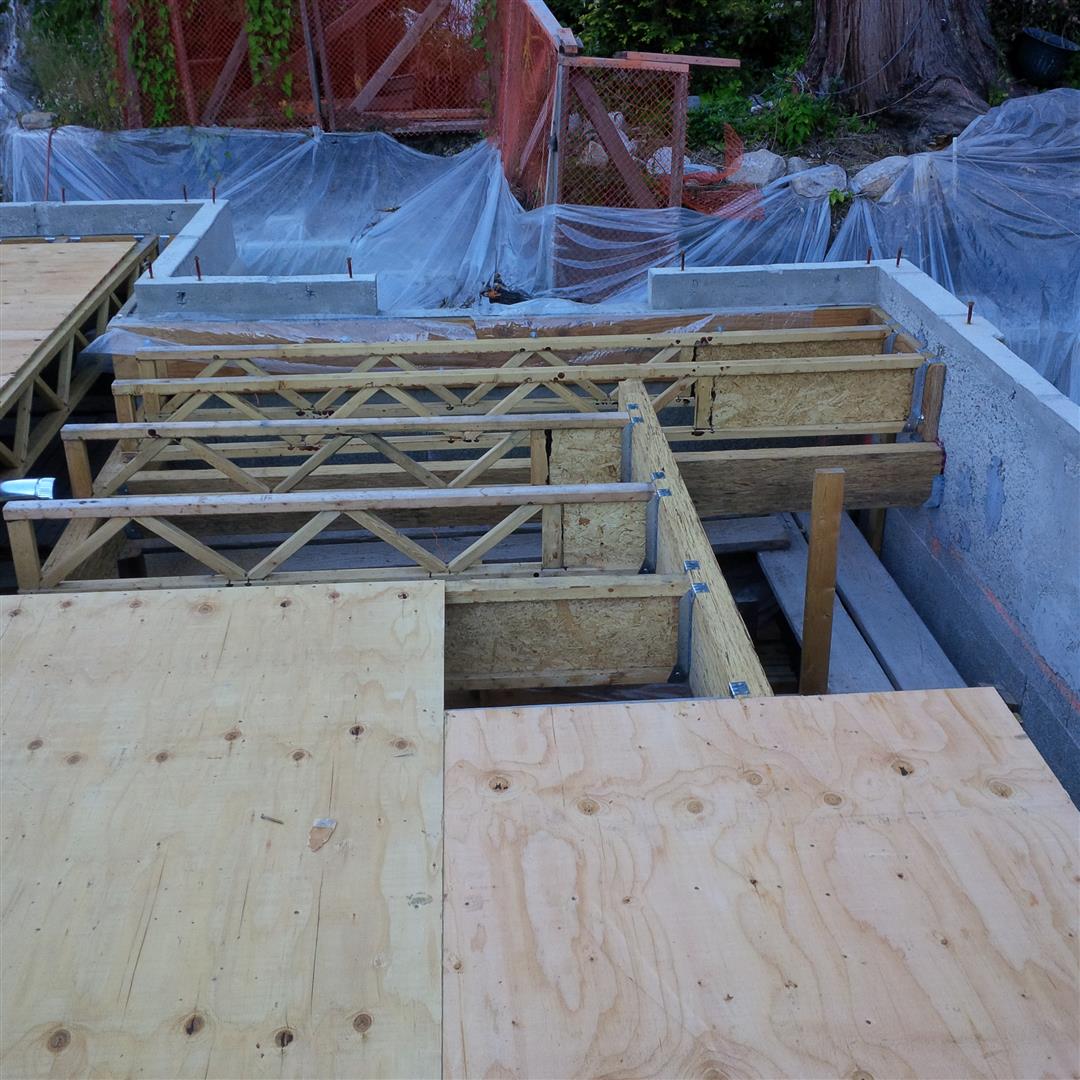
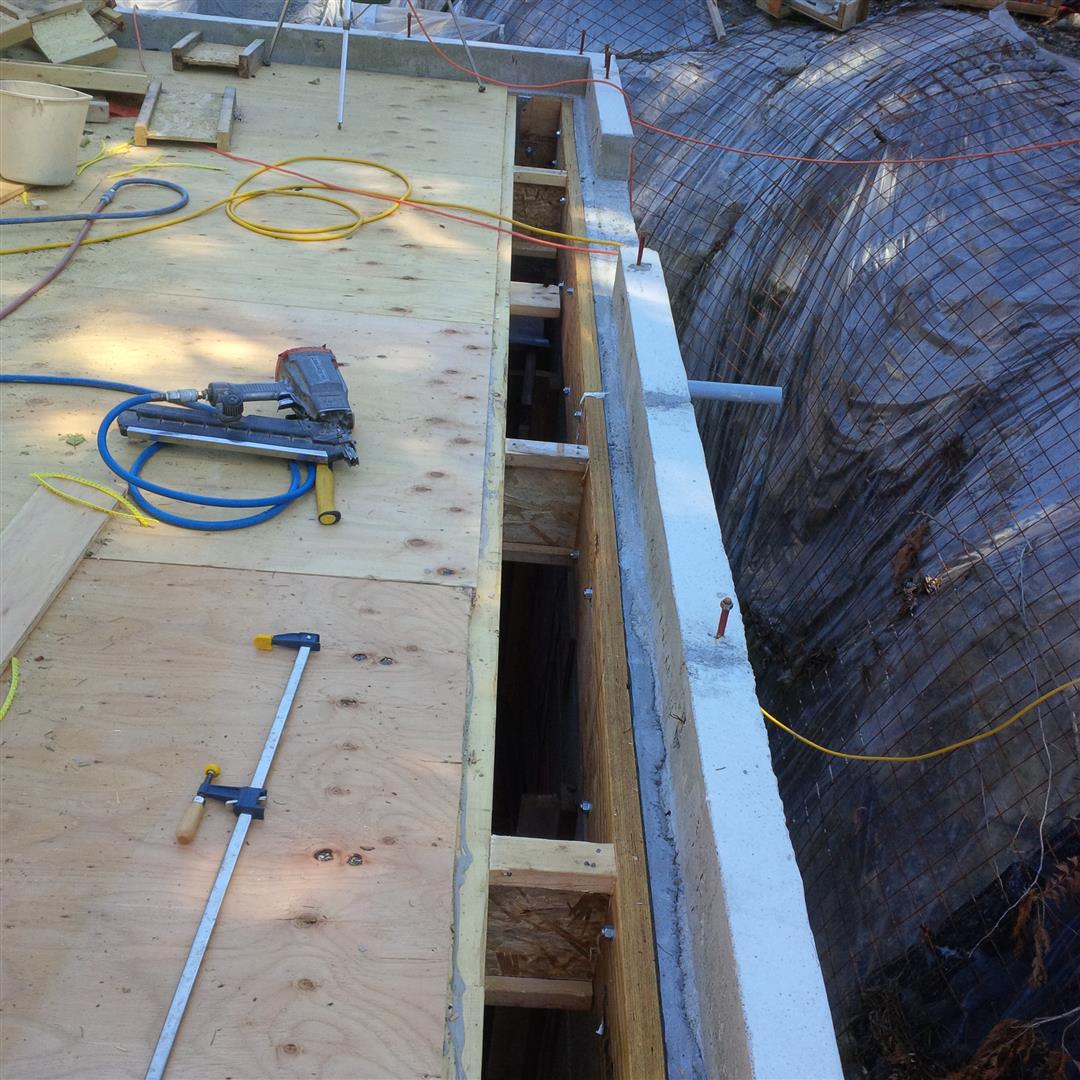
With the sheathing delivered to the deck, I proceeded on decking over the floor. This was only interrupted by the need to finish the beam and truss layout below, or the intense afternoon heat. I also needed to install the strong-backs and a long run of HRV piping before getting too far ahead on the truss and sheathing installation.
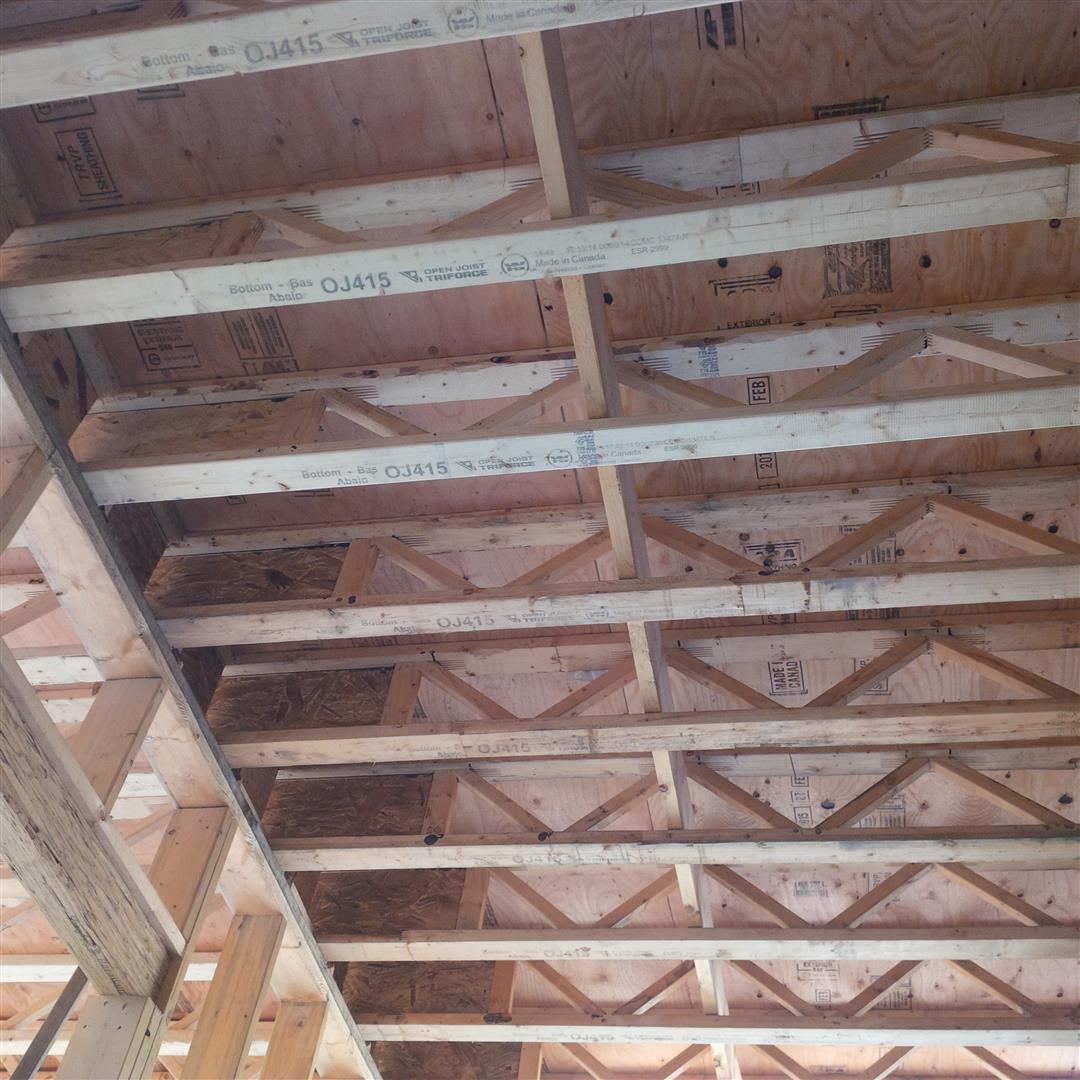
The strongbacks are not yet complete, they will need vertical 2×4 ties to the top and bottom chords of the truss per the next photo from the TriForce installation guide.

Strongbacks help strengthen the truss pack and make it act as a single diaphragm. This reduces deflection and also vibration. I am using 3 rows of 2×8 strongbacks on the longest span trusses and a 2×4 on a mid span truss pack as per TriForce instructions. Even without these being secured yet, the floor system is very stiff. For strongbacks that needed to be installed on the north side, I slid them into the south truss pack before placing the north trusses. Otherwise, there would be no way to install these strongbacks in a dropped floor assembly that hangs off the side of the foundation.
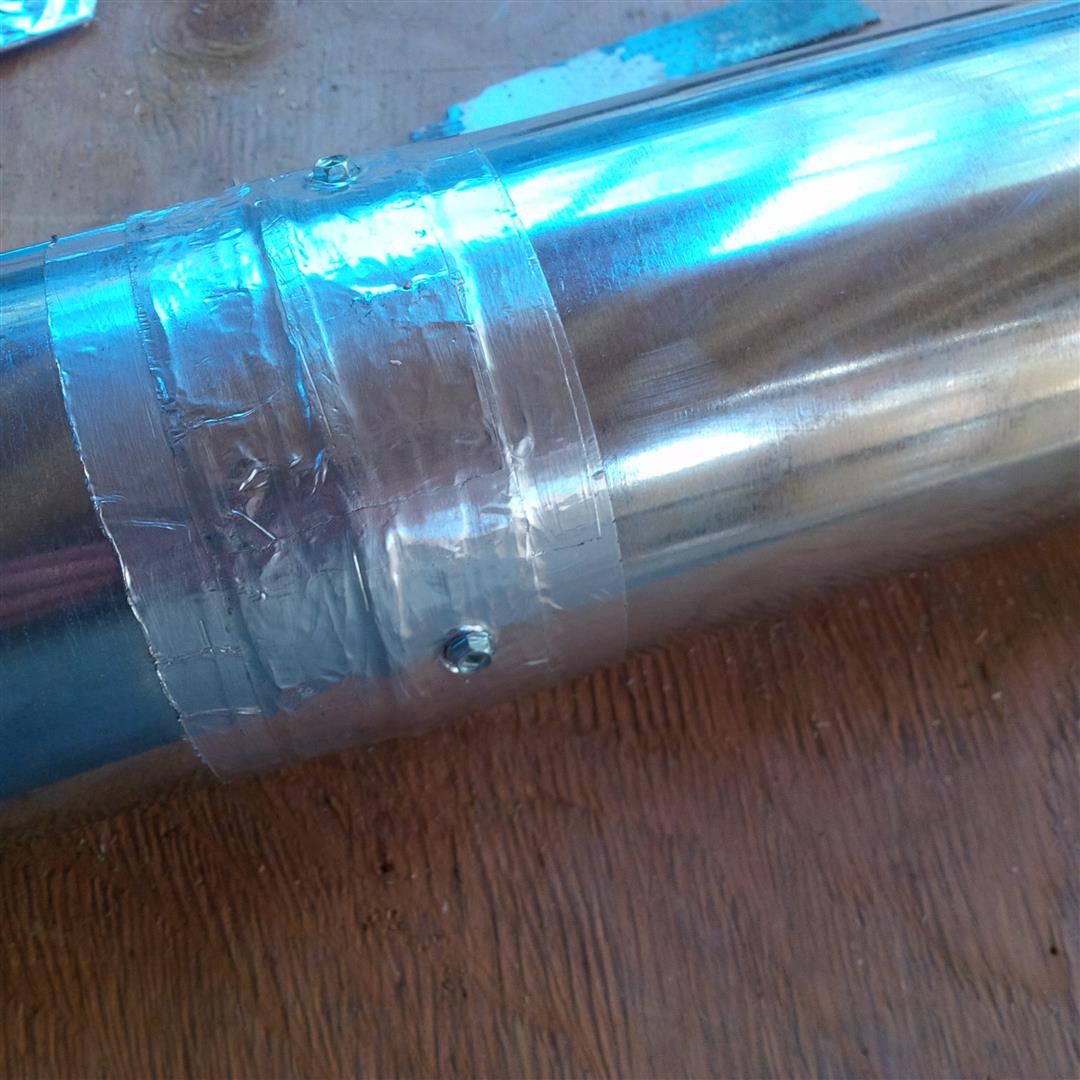
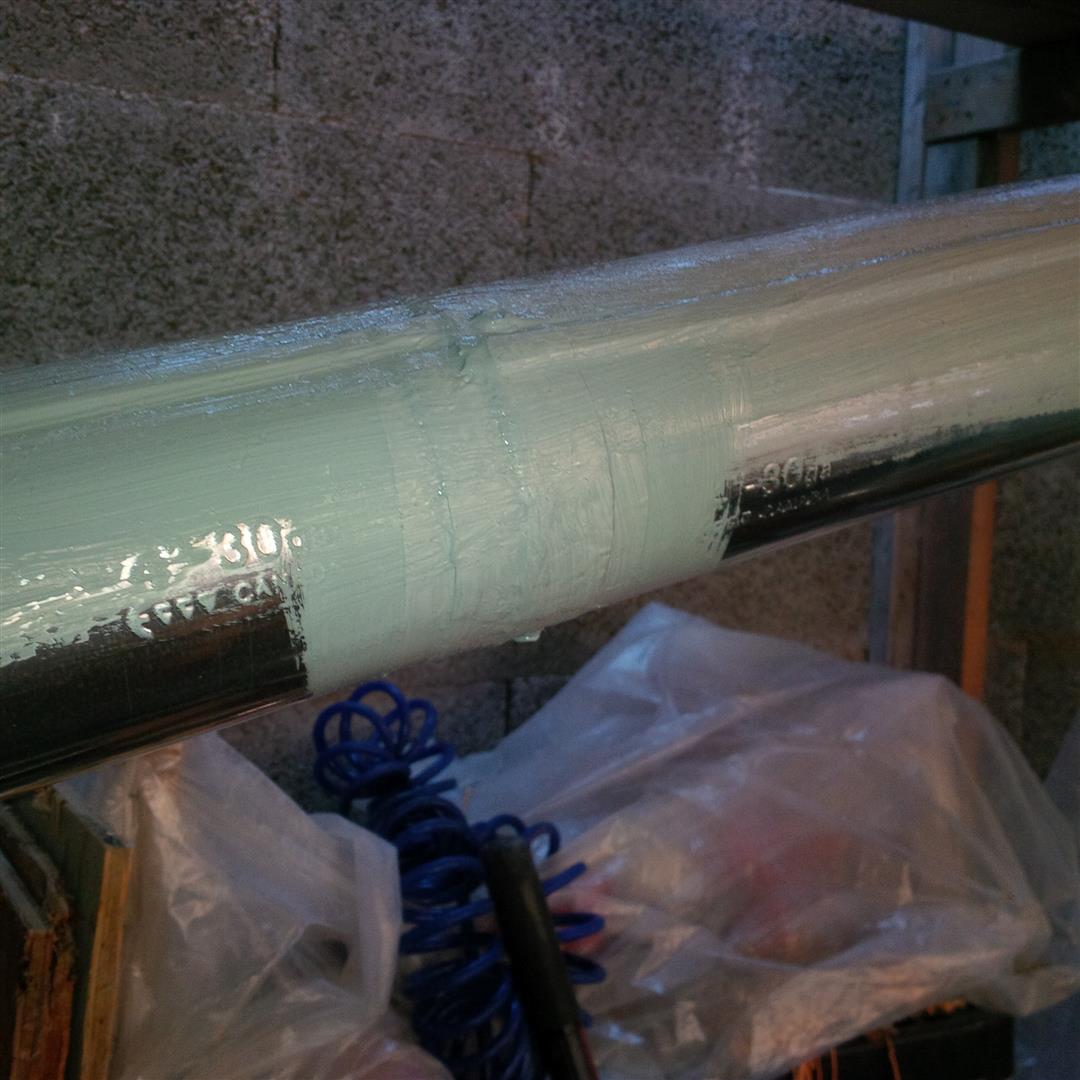
In addition to the stongbacks, I also needed to install any longer lengths of ABS drainage pipe of rigid metal HRV duct into the truss packs as they were being placed. This prevents the typical practice of many short length of pipe being used and couple together. I did not have any ABS lengths perpendicular to the trusses in the basement but did have a 4″ HRV supply run.
Of course I will be installing my own HRV ducting and was provided a great primer from Patrick Sommer. The key to ensuring a HRV (or any air driven HVAC system) operates as close to possible as the designed conditions, is to ensure all ducting is air tight. Patrick advise that the best way of accomplishing this is to use long lengths that reduce the number of joints, and to first tape, then screw, then seal all joints with mastic. By using long lengths of duct and doing this sealing work prior to installation, you are assured a quality-air-tight-assembly.

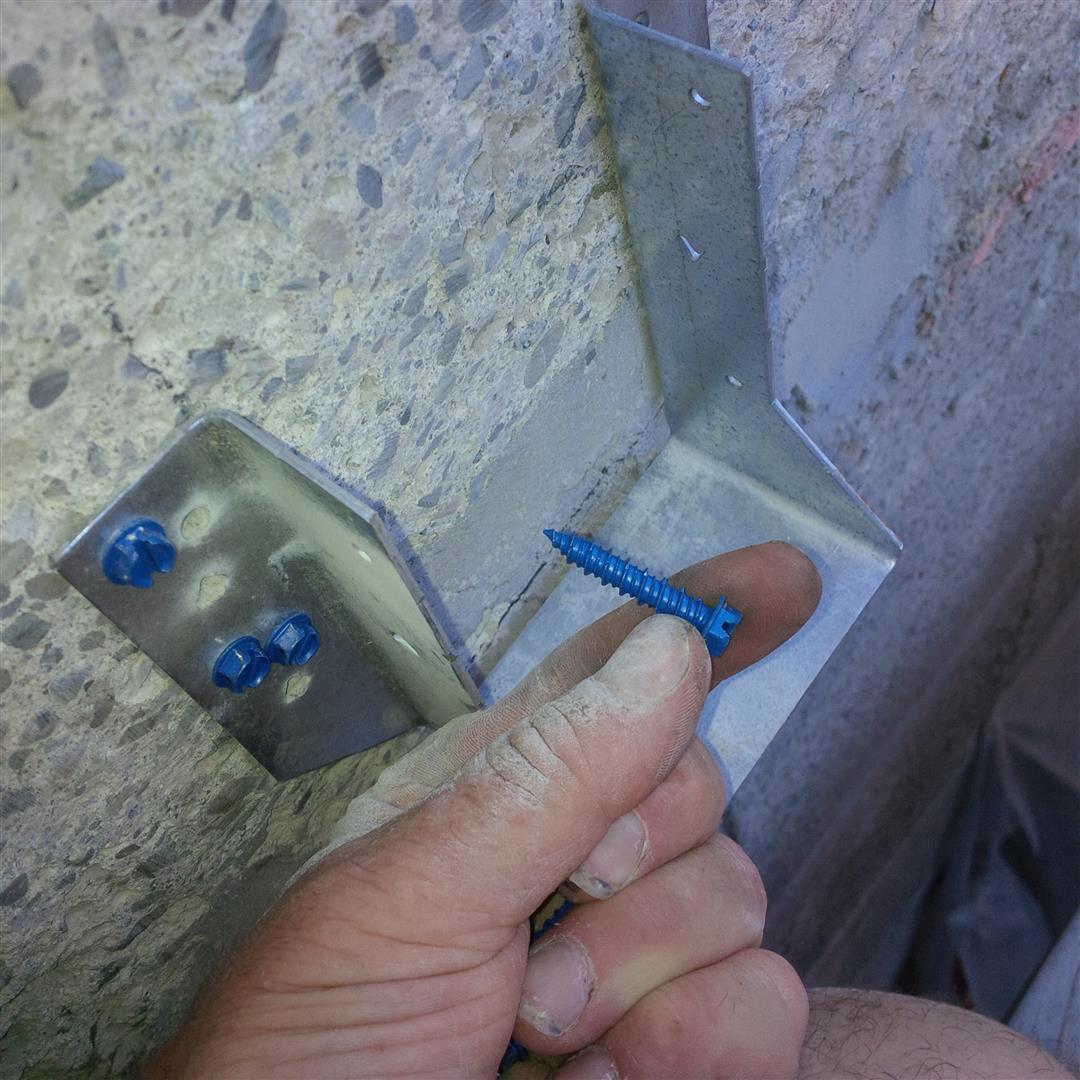
With the strongback and HRV duct installation complete, I turned my attention to the north side of the floor assembly and the various beams needed in this area to provide support to the floor trusses, stairwell opening, and point loads from above. The first to address was a dropped truss (BB5a from S2). I had framed the bearing wall below with a pocket to accept this beam. But as this pocket interrupts the top wall plates, you are required to install a metal strap to tie the plates on each side of the pocket together.

I then turned attention to the beams around the stair opening. And I have to say, things sometimes have a way of working themselves out. Both of the perpendicular beams that frame out the ends of the stair opening were supposed to rest in pockets on the north foundation. But because of the stair opening rebar placement conflicting with the dropped beam that would be placed at the west side of the opening, a pocket was replaced with a hanger with concrete fasteners. As I was starting to lay out these beams for installation, I realized (very fortunately) that I had a deeper basement than originally planned and so my original stair rise and run would be off. As my risers would now need to be 8″ if I kept the same number of treads, I was going to need to make the opening a bit longer to accommodate 1 more step. If I had a pocket formed for the beam, I would have had to abandon it and either cut in a new pocket or have a hanger engineered.
This was the good news (I remembered the need for the edit and moving the hanger would be easy). The bad news was that the bearing surface for the hanger was not smooth. You may remember that this was the one wall were I had a form blowout (see Blowout Blues). I had hamer-drilled the excess concrete off previously, but now needed to grind the backing of the beam hanger very flat so that I would have proper bite from the fasteners. As I inherently do not trust attachments to concrete (much prefer hangers attached to wood), I wanted to make sure that I installed this as professionally as possible. (Between you, me, and the lamp post, I will probably frame a post below as well just in case)
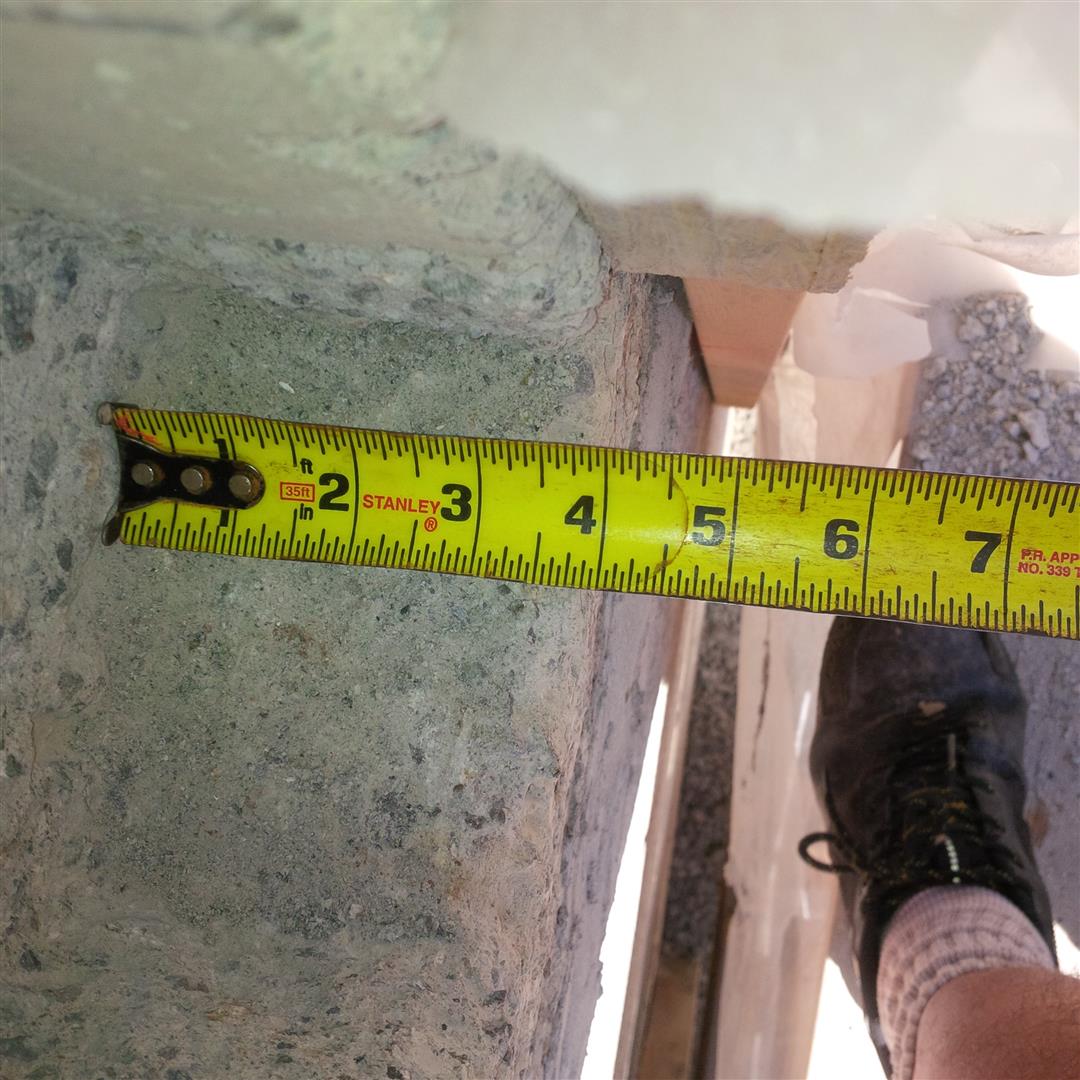
With the hanger in place I was able to place the beam and turn my attention to the flush beam at the other end of the stair opening. Now, I had already had some joy on this beam as the first one I prepared was 2″ too short (due to slight changes in the actual poured foundation and resulting layout changes in drawings), and I had ordered a replacement. (original one to be used on second floor). But as I went to install into the pocket, I realized I had made the pocket for a 9.25″ beam instead of 11-7/8″. SO – I had to get out the pneumatic chisel and enlarge the pocket ensuring the bottom surface was flat and had a 3.5″ bearing surface.
With these roadblocks out of the way, I was able to finish the framing of the stair opening and proceed with decking the floor. The scaffold I build to erect the wall has been extremely useful for erecting the floor assembly and I would recommend taking the time to make scaffold to all builders as it will cut down overall installation time. I also used the railing of the scaffold and other temp installed 2x bracing to slide these heavy beams into place on my own.
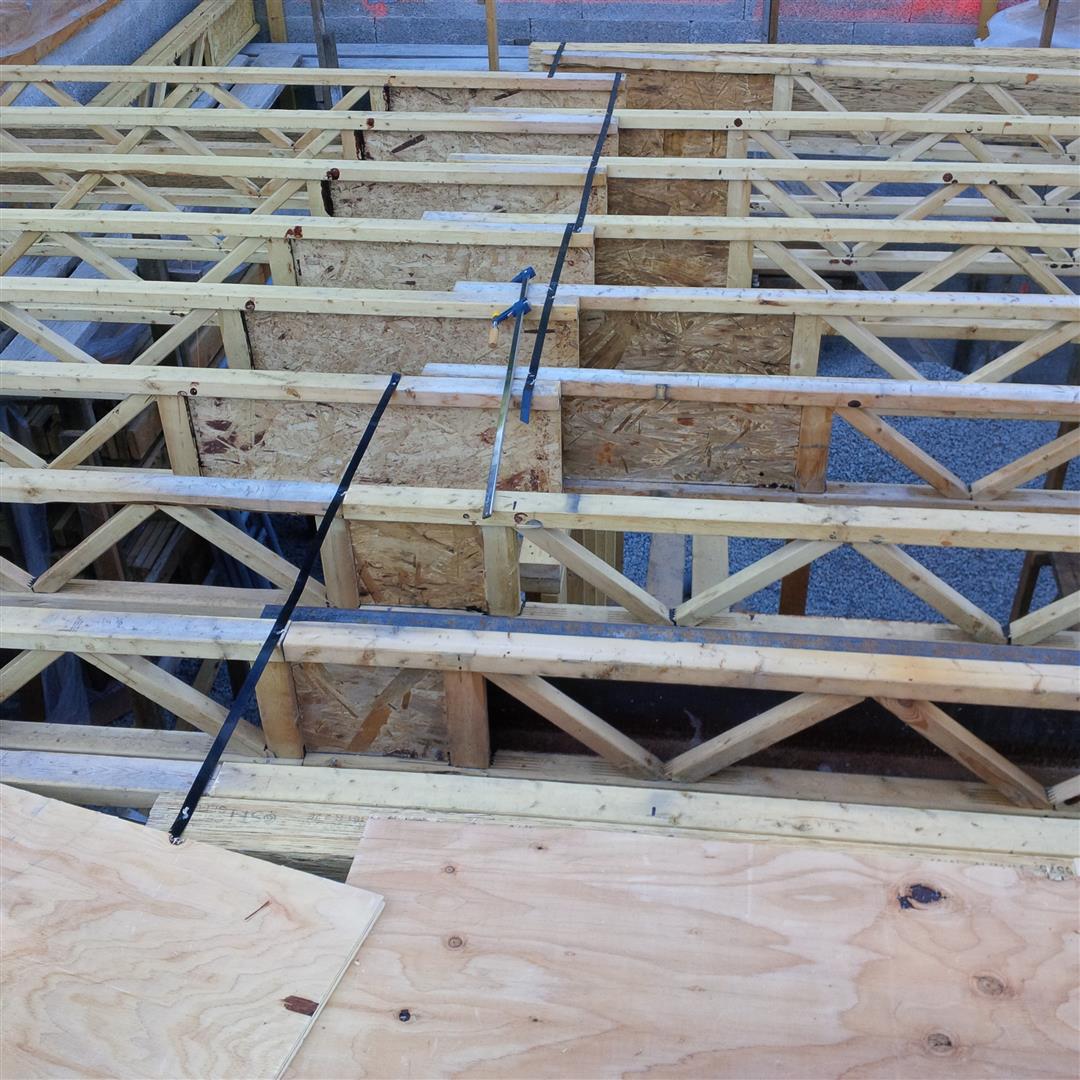
While the Triforce trusses have stood up well, there has been some twisting of a small number of trusses during their storage over the last year. I used strapping to true these up prior to installing the deck.

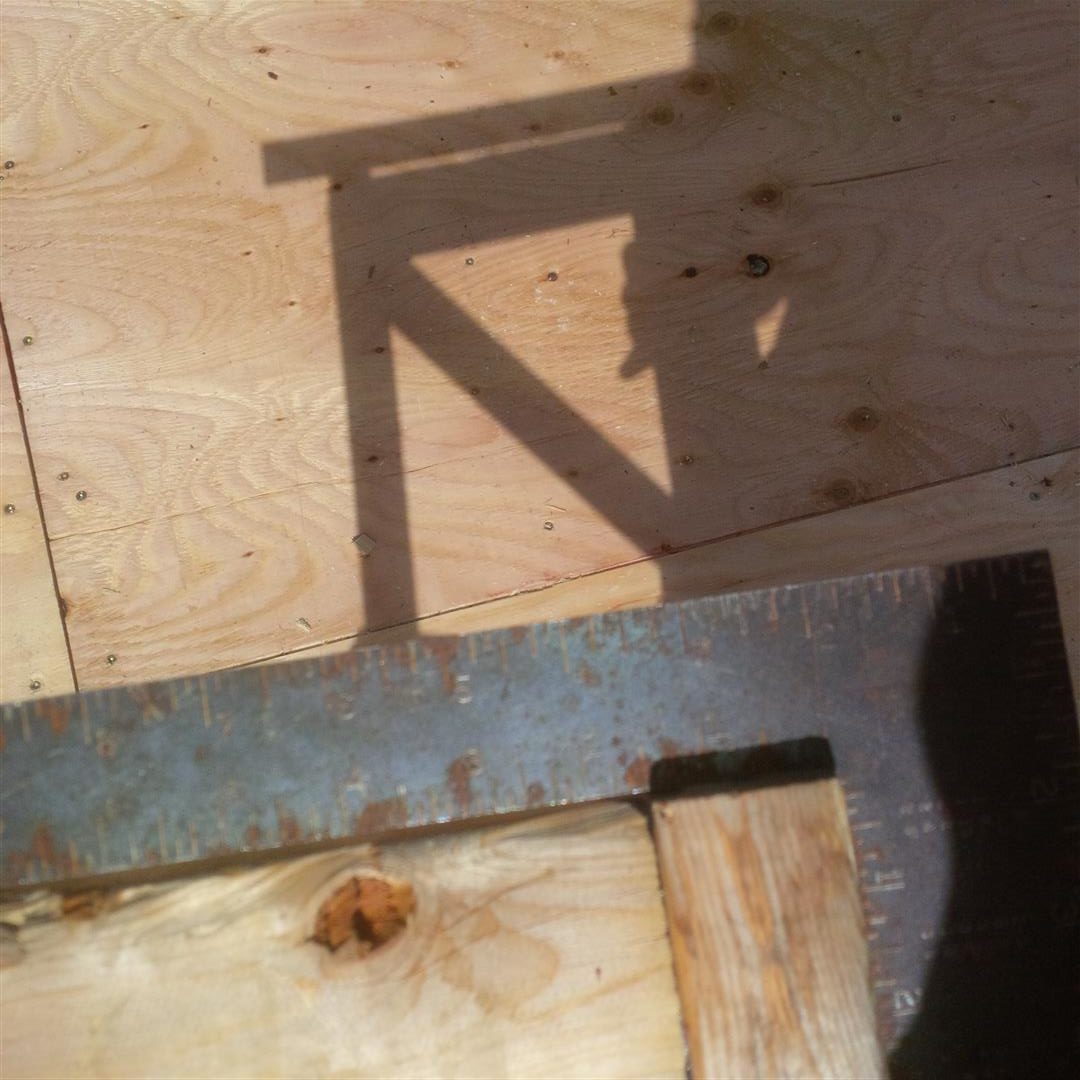
I was also caught on several occasions where my trimmed truss did not fit. I finally threw a square onto the unit to find my problem.


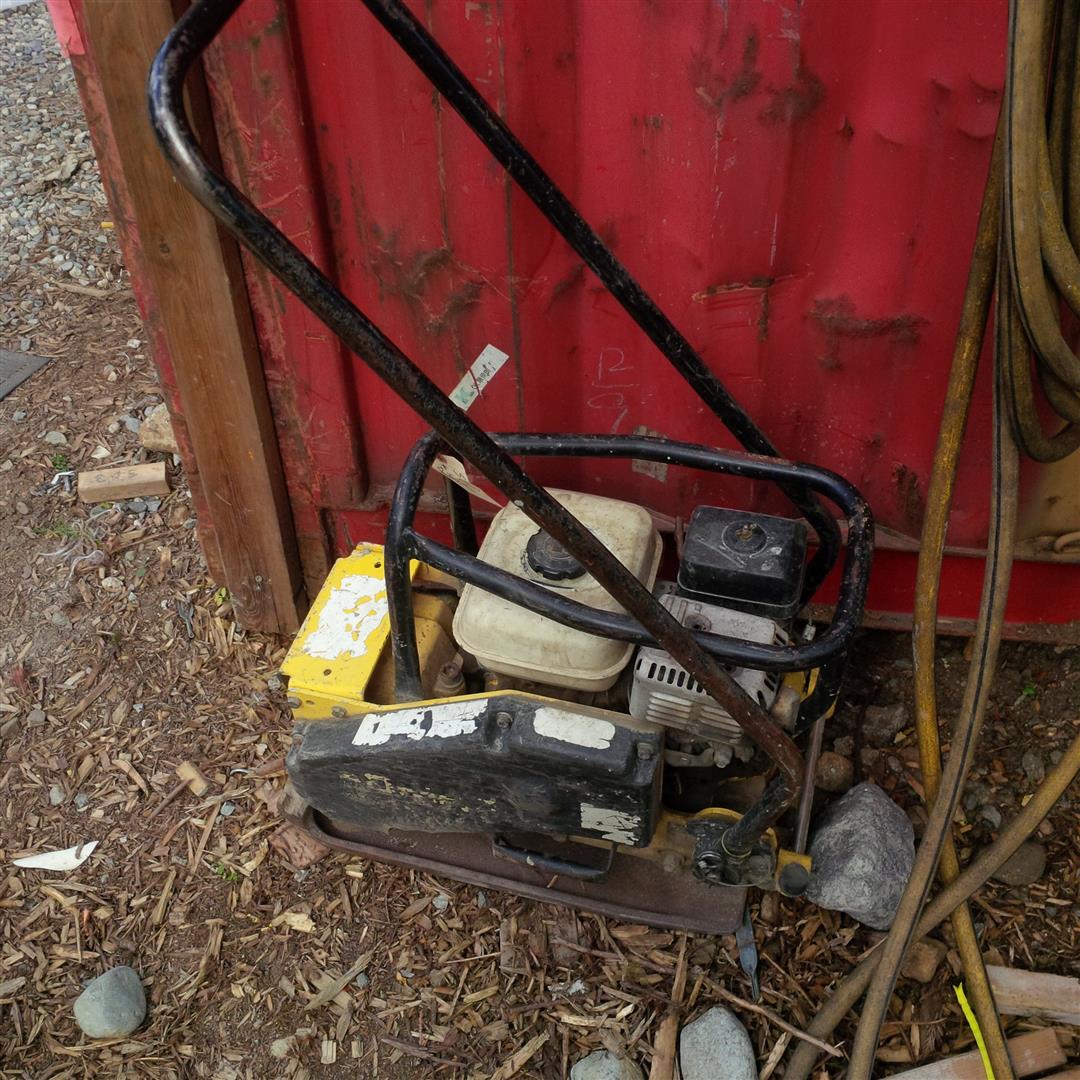
Finally, I would like to introduce you to George Jr. George will be helping me in all my numerous compaction needs. I bough George from Sabre Rentals in Whistler (where I also bought Alfie).
The decking is basically complete (have a couple small panels to install once some plumbing and services are routed), and I will now move on to preparing the foundation for back-fill. In some ways this is a welcome task as I will be able to generally stay out of the sun, but the tasks also require the use of both arms, and as I received the sign off today from the surgeon from a bone healing standpoint, my arm is far from functional and will require several months of painful Physio to get back to shape.
Thanks for visiting.