Floor Truss Package Installed!
I am pleased to advise I have completed another important milestone on my build. All floor trusses have now been installed for the second storey which means the full floor truss package has been 100% installed.
I was extremely relieved when I took the covers off the truss packs that had been stored by the road since the Late November of 2014! They looked every bit as new as when I got them. They had been in storage at the vendors yard in Quebec between July and November of 2014, so they arrived already a little ‘weathered’.
I would have been done earlier in week (finished today), but there were a few setbacks.
The most disconcerting for me is that my cell dropped and killed the screen. So I was without a phone from Wednesday till this morning. It had me off my game for the rest of the week. To the one person who called but I could not answer or see who it was – sorry! I met Toby from AceMobile.ca at a Telus store at Landsdowne Mall this morning and picked up a refurbed Samsung Galaxy S5. I decided to switch from Blackberry to Android and so far this is looking like a great decision.
Anyway back to the house – I had someone come by who wanted some of my scrap wood. With me being off in general because of the phone (I use it for reminder alarms for appointments, sending email notes to myself, and also photos of the build), and the interruption of the Craigslister, I miss cut a beam. First and only time this has happened and I have now installed all but the last two beams of the structure. Fortunately, it was the smallest and cheapest beam of the whole structure. Phew!
I also spent an evening and audited my truss layout around a particularly dense area of mechanical on the first floor, and re-reviewed the truss manufacturer’s rules re offsetting trusses to make room for plumbing and the like. Of course I had already raised the trusses in this area and secured them at one end, but my gut was telling me to do the review and I am glad I did. I had originally miss-interpreted the truss installation guide when I drew up the truss plan in 2014.
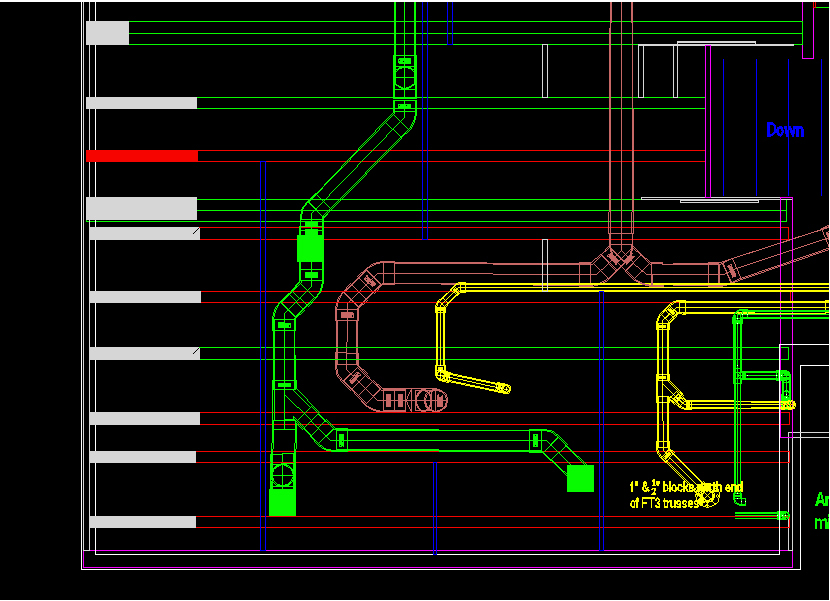
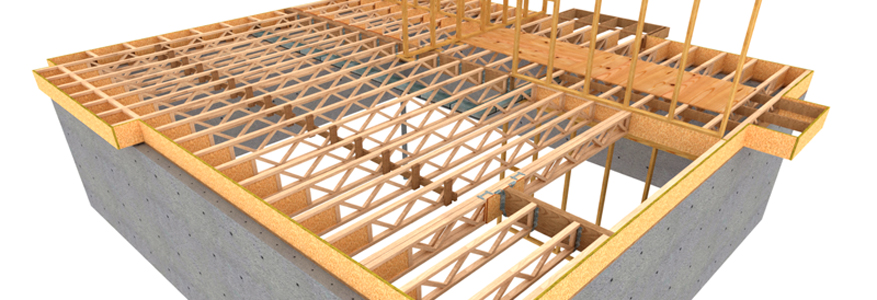
So I had to redo the layout in this area which of course meant a re-do of the plumbing and HRV runs in this area. Nothing a few late nights and a nail puller could not solve. For me this detail is important to get right, because unlike most houses, I have planned for ZERO bulkheads to rout mechanical through. Not an easy task in a floor cavity that is only 11-7/8″ tall and only in bays parallel to the truss. The truss web openings are only just big enough for a 7″ metal duct to squeeze in.
On a good note, remember the mistake I thought I had made with the kitchen windows cripples, I reported on last post. Well I was mistaken 🙂 I had forgotten that the point load supporting the roof beam was transferred north and south on the second floor by a bathroom window lintel that the roof beam will sit on. So there was nothing wrong with the crippled layout. Oh well, at least it got me to do a full audit of the first floor dimensions.
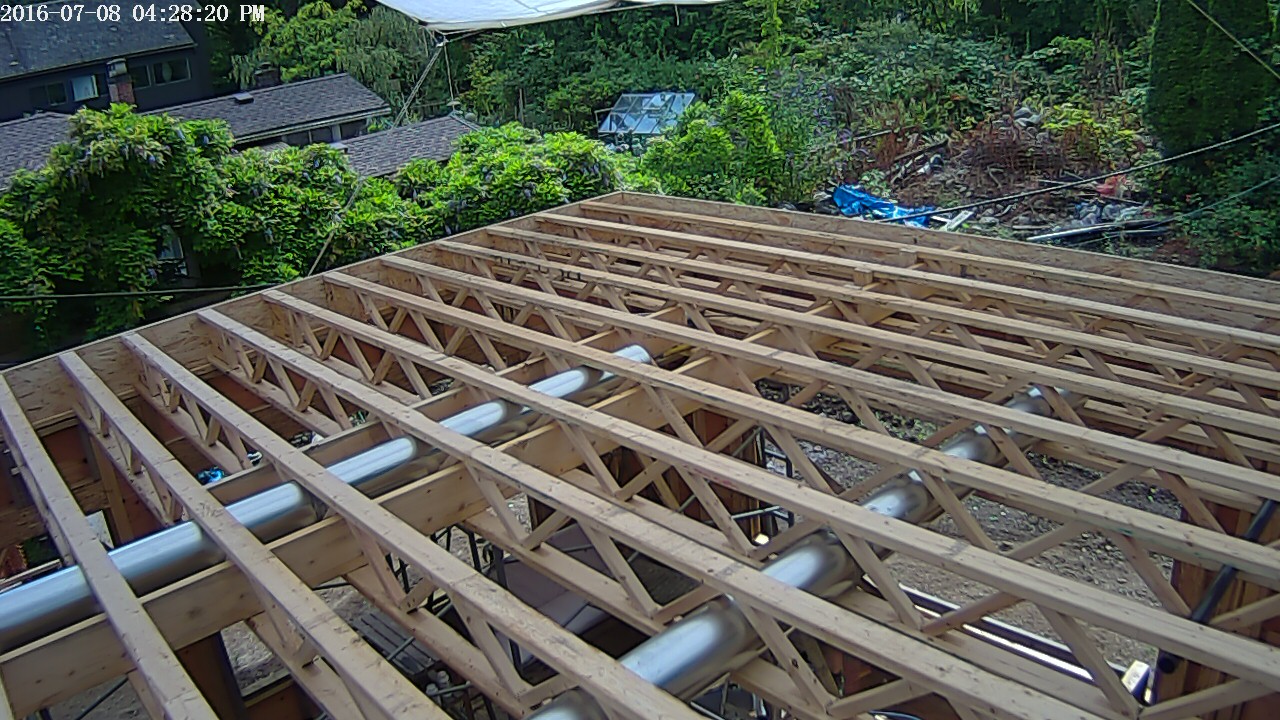
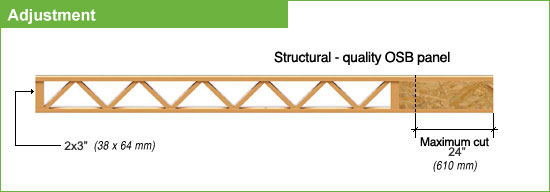
When installing the trusses, I found in general (both doing the basement floor in summer 2015 and now) that the shortest 6′ trusses were the most twisted. Almost all of them needed a lot of persuasion with clamps and such to orient to a plum vertical position at both ends. I had very little problem with the longer 20 and 22′ models (which have 2×4 chords instead of 2×3).
What I did have problems with however was the lining up of the truss bays. The vendor had advised they recommend that the trim web side of the truss be installed against the outside walls.
BUT, this results in the webs being offset if any of the trusses are trimmed to fit their inboard bearing points.
You trim the trusses when the inboard bearing changes locations. As you can see by the photo below, I had all kinds of different inboard bearing spots I was lining up with.
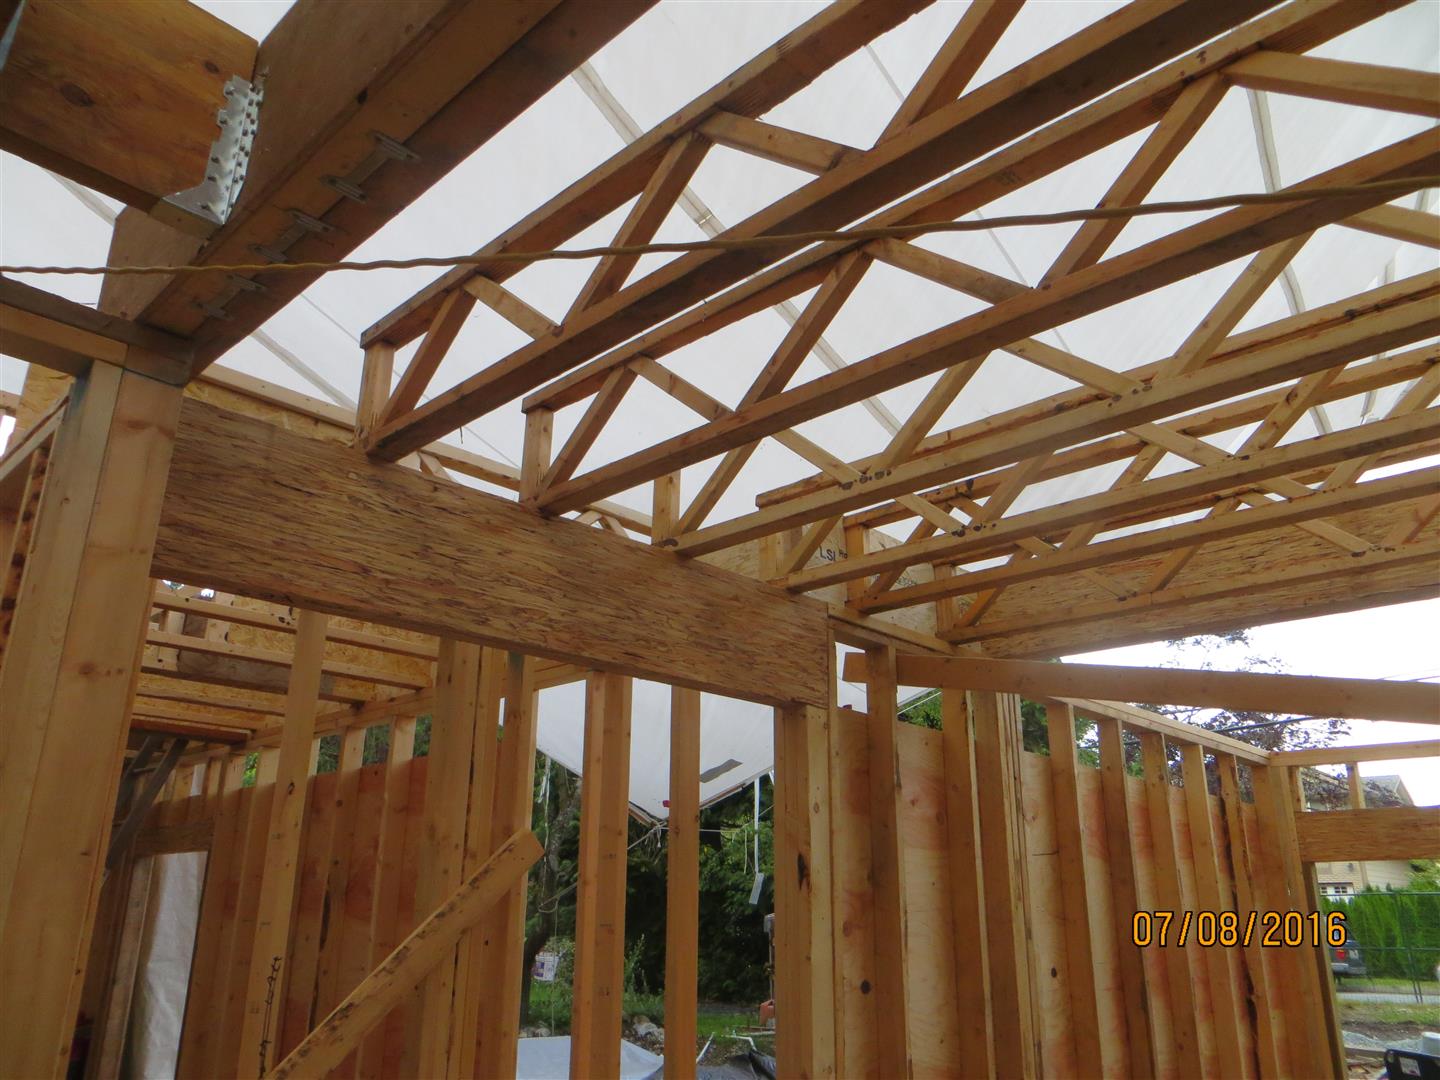
This results in the inability to run the needed continuous strongbacks through the longer truss packs or any larger pipes or ducts.
In my opinion, a better plan would be to install the trim web away from the straight wall. This way the truss pattern would always line up perfectly.
While on the topic of routing strongbacks and long service piping/ducting into the truss packs, don’t forget to do this as you are installing the trusses. After you have a few of the trusses in place (say 1/3 of the space), install ALL of the longer items into the partially installed truss pack, even the items that go in at the far other end of the truss pack (you will be able to slide these down latter to the other end). Once the trusses are ALL in place, you will not be able to slip any long items into place.
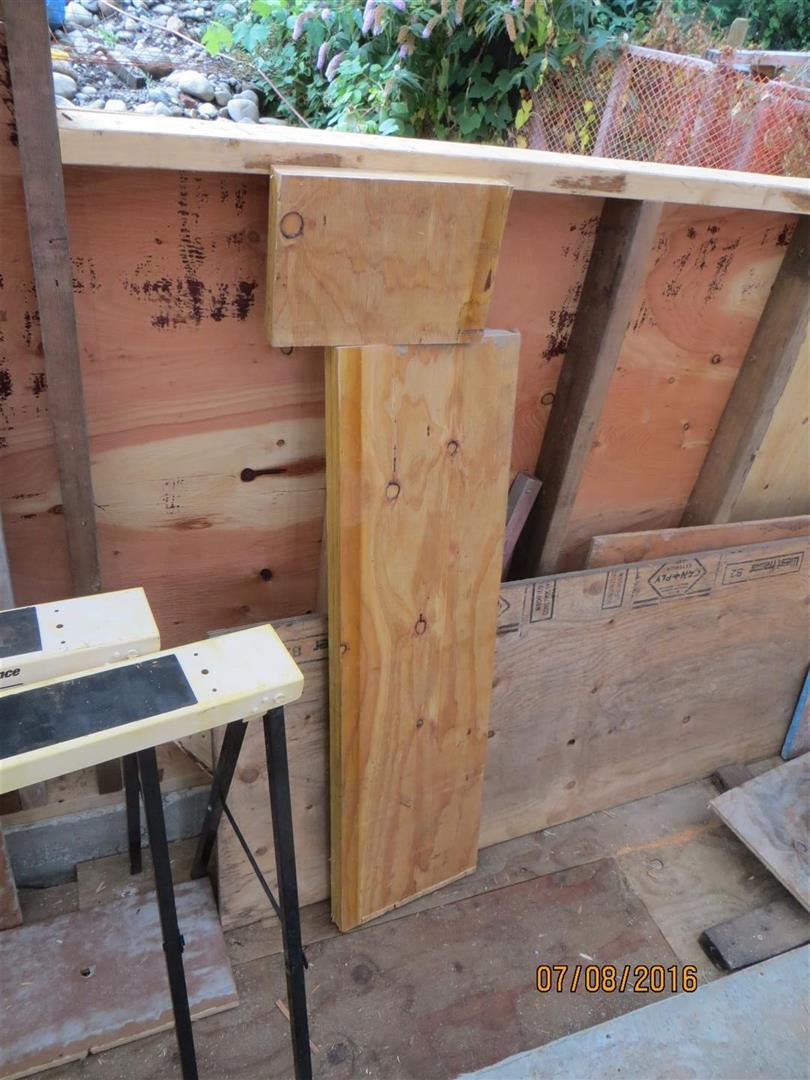
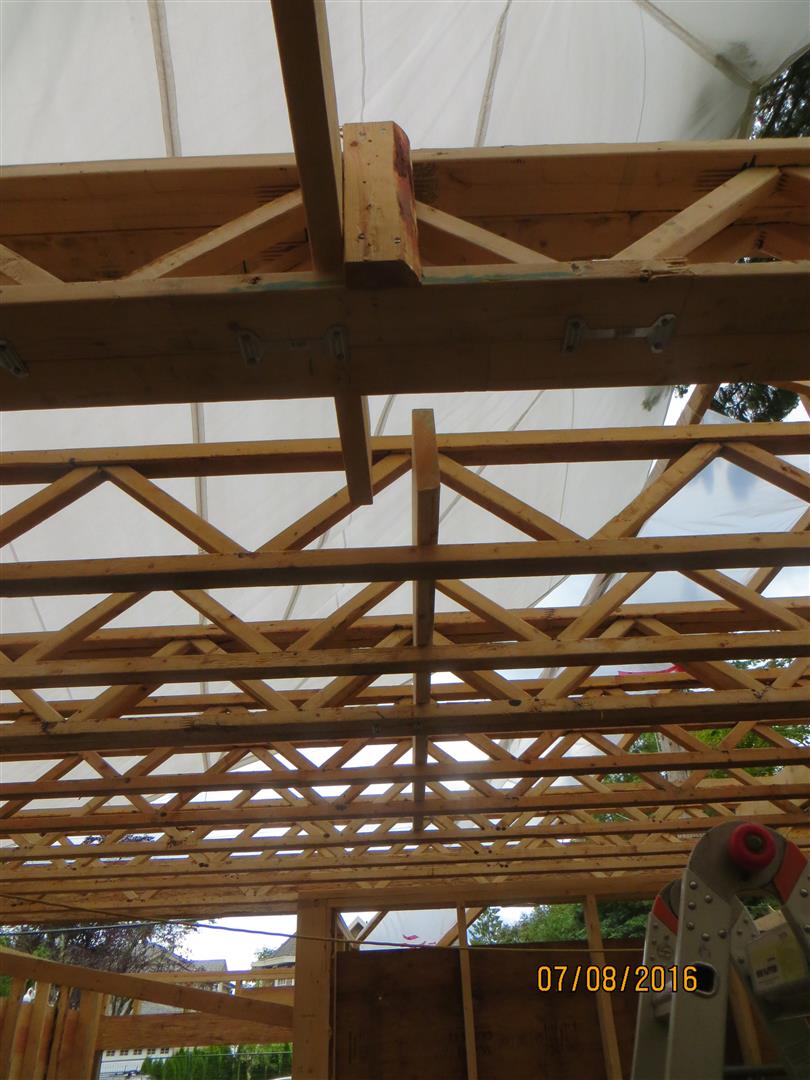
I did really well on the basement level and almost made it through the main floor level, but ended up forgetting two short lengths of strong-back. The result is shown below.

At least it was as easy as just lifting the beam out of the way, 30 minutes later and the problem was resolved. If this has been a wall with a rim board securely fastened to the wall plates, there would have been no way to fix my oversight.
In hindsight, it would have been wise to leave the rim board that is on the wall parallel to the trusses off until the end. That way you could install all of the long strongbacks and piping/ducts into the packs from the side after they are all installed. Just remember that any flush installed beams parallel to the pack would interrupt the bays and prevent access behind the beams.
Anyway, all is done now. I have some more strong-backs to secure and some perimeter blocking to install. I also have the ladder blocking below some lightly loaded walls on the second floor that are parallel to the truss pack, and then the floor structure will be complete and ready for sheathing. I hope to have a majority of the sheathing complete by the end of the coming week.
PS – Sorry folks, I had not realized that the embedded photos in a lot of my recent posts were not popping up when you clicked on them for a closer view. I have gone back about a month or so and edited all of the posts to fix the problem.
Thanks for visiting.