More Planning
Hey folks,
Another week has flown by and as I look back to see how I have spent my week, I am amazed at how long planning has continued to take on this project. I certainly start to understand the costs assocated to architects on custom homes. At least my efficiency is high because I am both the designer and end user, so do not loose anything in translation.
This week, the planning entailed the following:
1) Figuring out a way to install the LED wafer style recessed lights on the 2nd floor.
The led driver for the recessed lighting needs to slip through a 2-3/4” hole and sit into a 1-1/2” service raceway created with 2×2 attached to the bottom side of the OSB air and vapour barrier. As the driver is just under 1-1/2”, this presented a bit of a challenge. I need to stay to the 1-1/2″ allowed in my design for the raceway because otherwise it will project below the top of the windows in the clerestory and start blocking the window opening.
I finally figured out that if I cut a rectangle hole in the OSB layer above the insulation layer, I would be able to slide the driver into place through the layers and fasten into place.

Although this led driver fits lengthways through the 2-3/4″ hole needed to install the recessed light fixture, there is not enough depth in the hole to rotate it flat into the service race way.

Assembly is made up as follows:
- Drywall Finished Surface
- 3/4″of rigid foam insulation with foil facer (represented by cardboard) inserted between Pex-Al-Pex tubing snapped into aluminium heat transfer plates on 6″ centres (simulated by the white pipe you can barely see in photo below)
- 1/2″ OSB or plywood backing layer. This layer allows the drywall to be screwed through the insulation and into the plywood backer at many locations, instead of just at truss locations, providing a tighter fit between the drywall and heat transfer plates and better heat transfer between the two materials. In the end, the drywall becomes the radiating surface of the heating (and cooling) system.
- 2×2 lumber strips attached to the OSB above and into the roof trusses, perpendicular to the roof trusses (the screws will be coated with sealant before screwing into place to maintain air barrier)
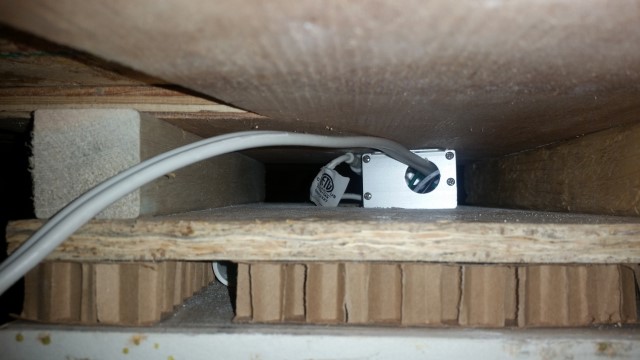
By cutting a rectangle, the size of the LED driver, in the OSB layer above the carboard (simulated insulation), I was then able to rotate it down flat against the top surface where it could then slide into the cavity.
Note: the top layer of plywood shown in the above two photos was just to form the mock-up and attach temporarily to the real OSB surface as I also needed to ensure 550 lumens was bright enough at this elevated roof height.
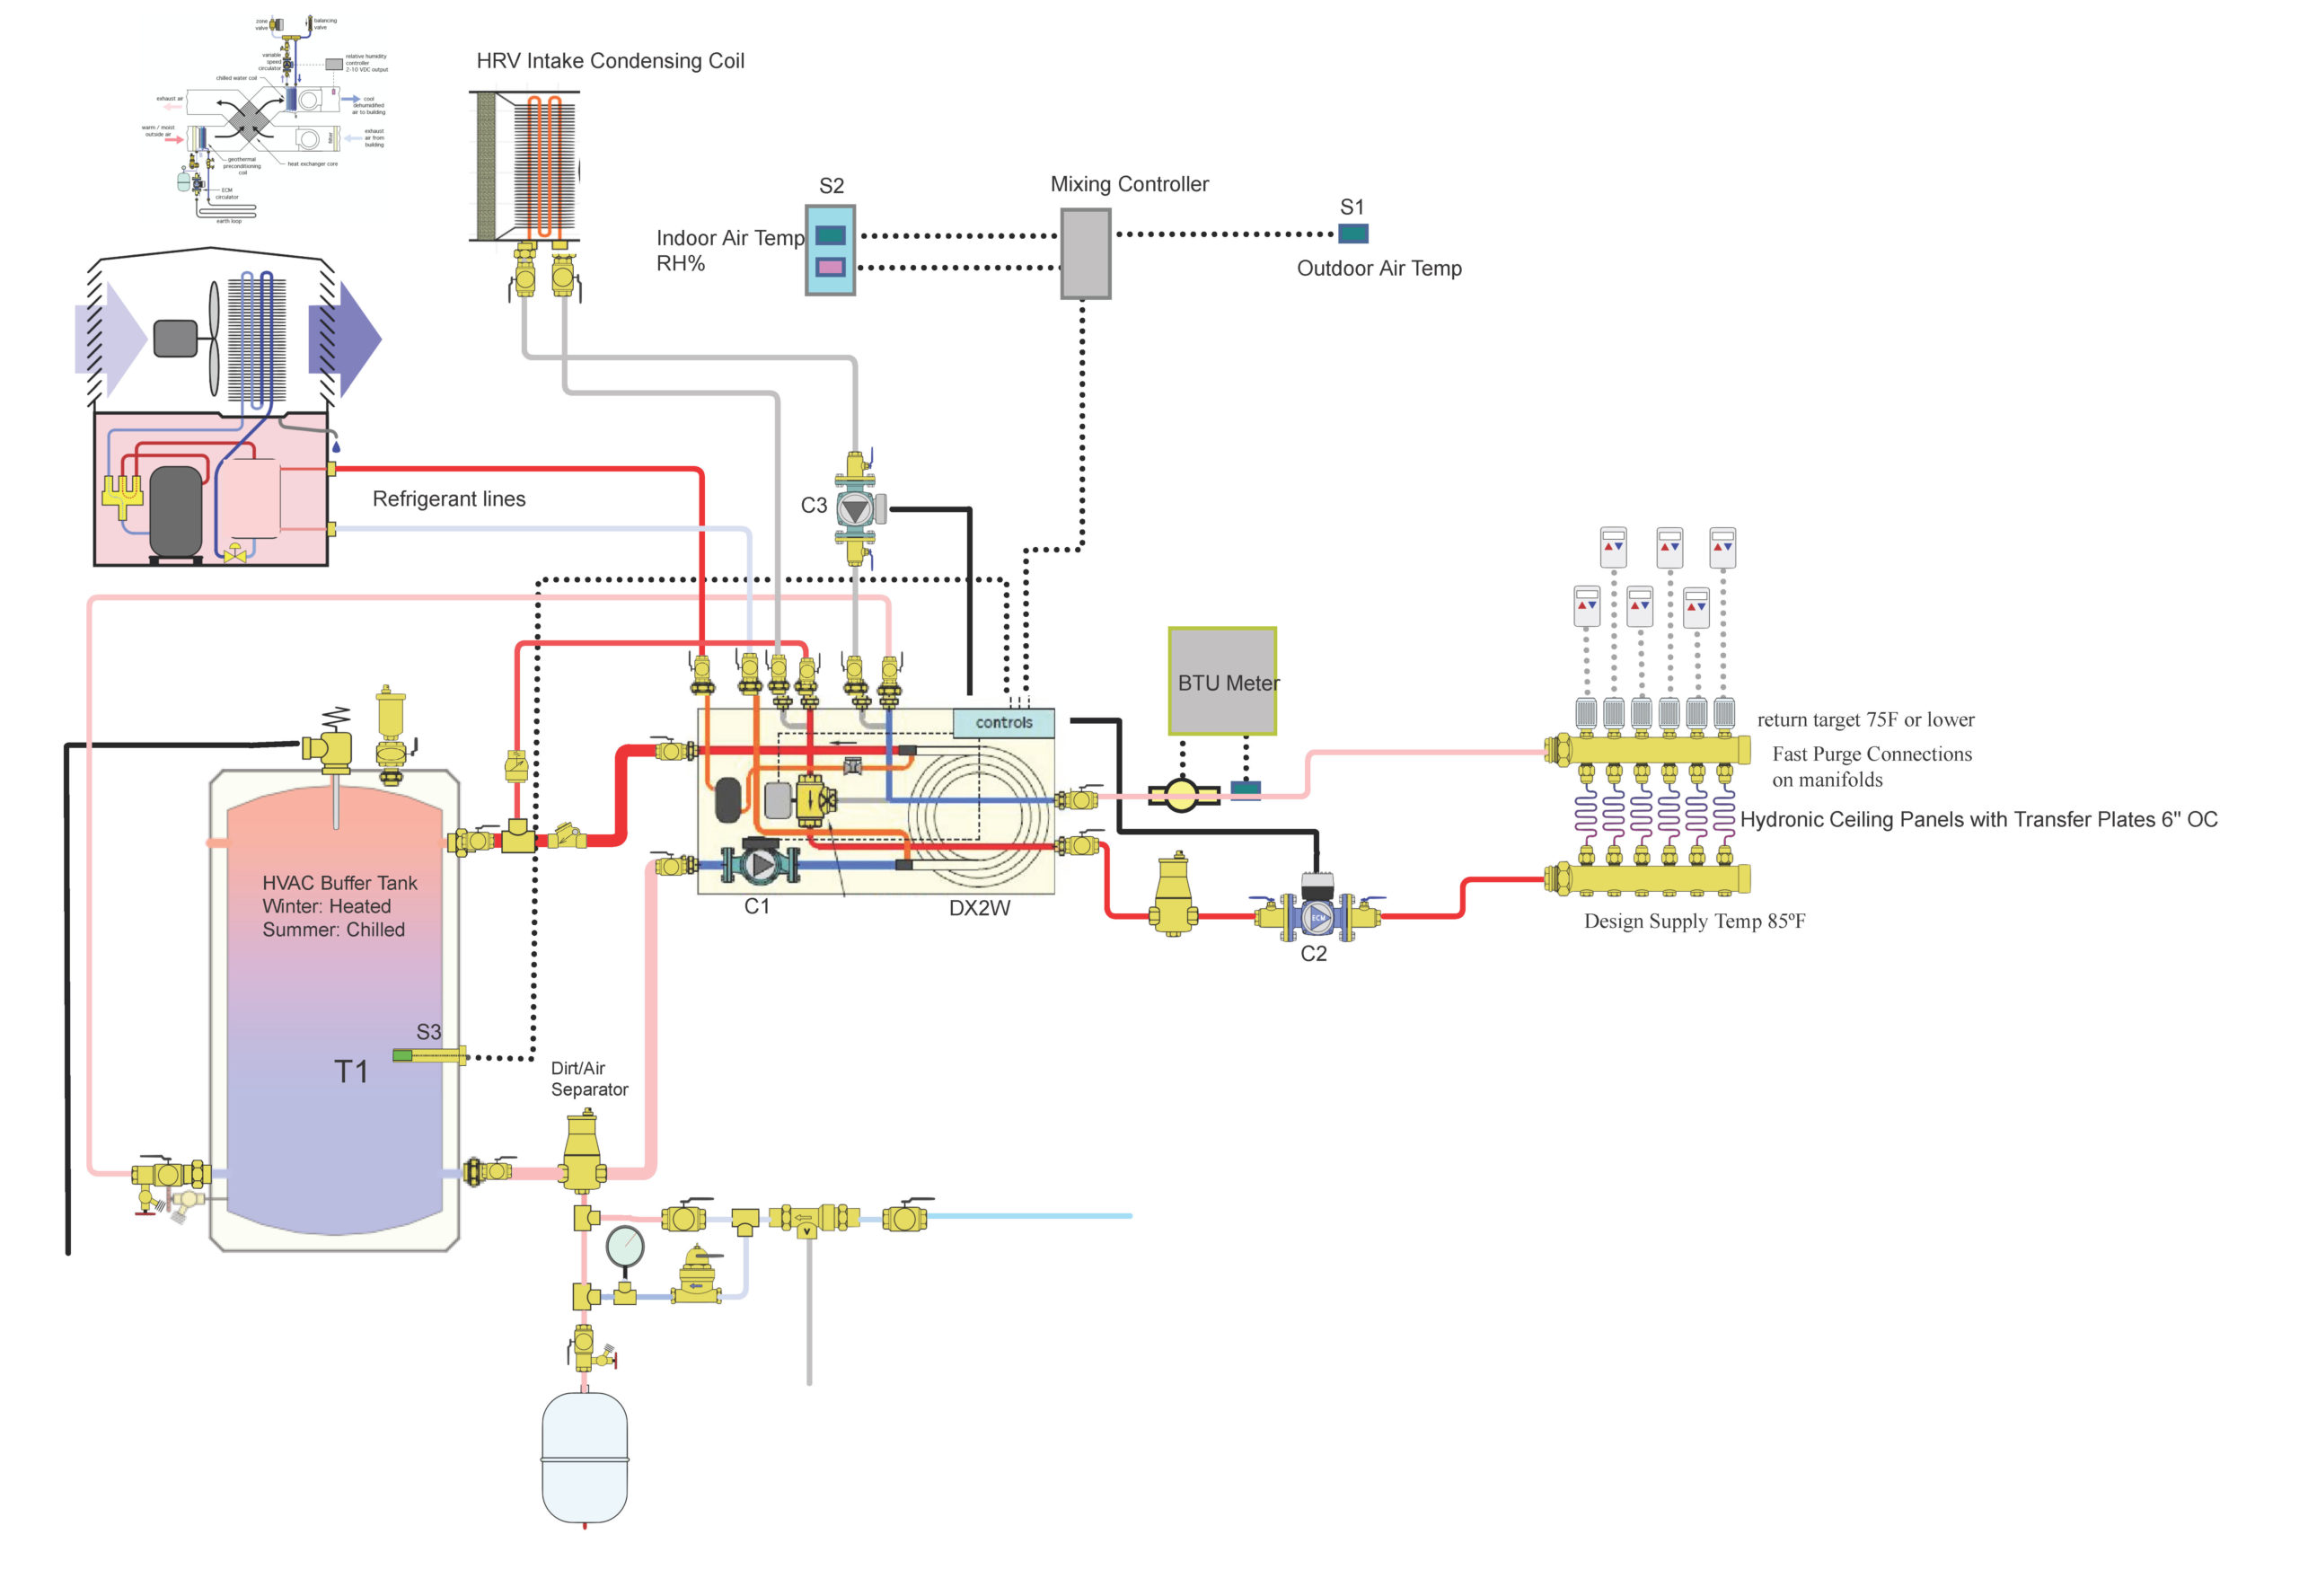
2) Since I recently confirmed a direction for creating the domestic hot water with a hybrid heat pump water heater, this meant I needed to finalize the layout of the heating and cooling system.
I finished a preliminary layout of that system and am now participating in a critique discussion of the plan on some forums I belong to. Once I get some feedback, I will send it off to Benoit at ThermAtlantic for his final comments and then to my consultant for final design of the piping outside of the boiler room. I will then be ready to start procuring the equipment.
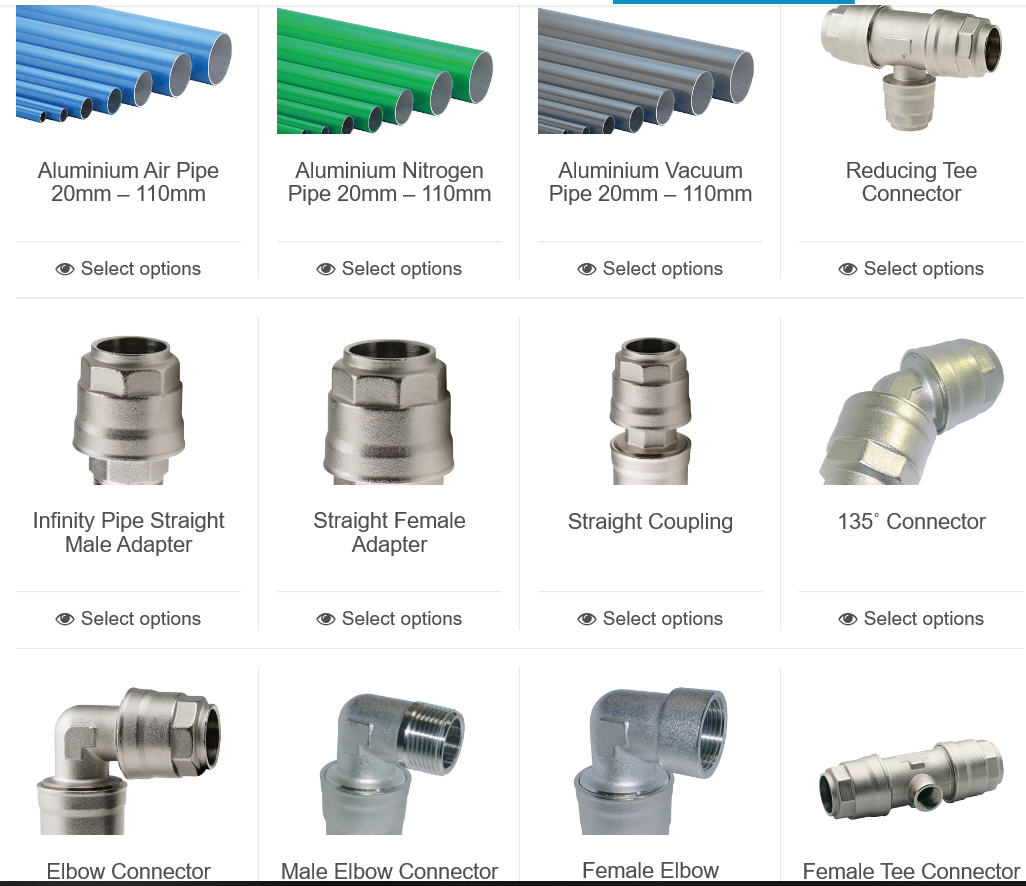
3) I will be installing shop air in the dwelling to the two shops, but also to the garage and the two roof levels (to aid in blowing off tree leaves and needles)
So I spent some time doing a circuit plan and material takeoff before sending a quote request to WiseWorth for the infinity piping system.
Aluminum piping is often considered the best practice approach for shop air as more affordable than copper or stainless, but does not rust like any form of galvanized or black steel (never use PVC for compressed air lines!). I may also consider PEX if I can find enough information showing it will not be effected by the oils in compressed airs, as it certainly has the pressure rating and would be cheaper than the aluminium pipe and require less fittings.
4) I also spent some time designing the security system and getting technical info on the components.
I will probably utilize a DSC security panel interconnected to my HomeSeer home automation platform.
5) There was also a number of hours spent on the electrical systen planning.
I need relays to drop two subpanels, from the main panel, when on generator power to prevent the generator form being overloaded.
I am installing a service rated 200A transfer switch prior to the main electrical circuit panel to allow the whole house to be powered by the genset in a utility power failure. But this means I need to take some larger loads like the tools in my two shops and the dryer offline via the shedding sub-panels.
I also need the ability to select between several high amperage loads when on utility power to ensure I do not exceed the 200 amps coming to the dwelling (Welder, compressor, dryer, and high amp car charger).
I am working with www.pspproducts.com on both the dropping relays and the load selecting switches. I will explain this system in more detail once all of the components are selected and installed.
In addition to the above ‘office work’ I did manage to complete some ‘real’ work at site this week.
As always, thanks for visiting!
“Every great story happened when someone decided not to give up.” —Spryte Loriano Author, Entrepreneur, Humanitarian
“Take a method and try it. If it fails, admit it frankly, and try another. But by all means, try something.” —Franklin D. Roosevelt (1882-1945) 32nd U.S. President