The Enclosure - Return to home page

Main Content

Tarp Raising

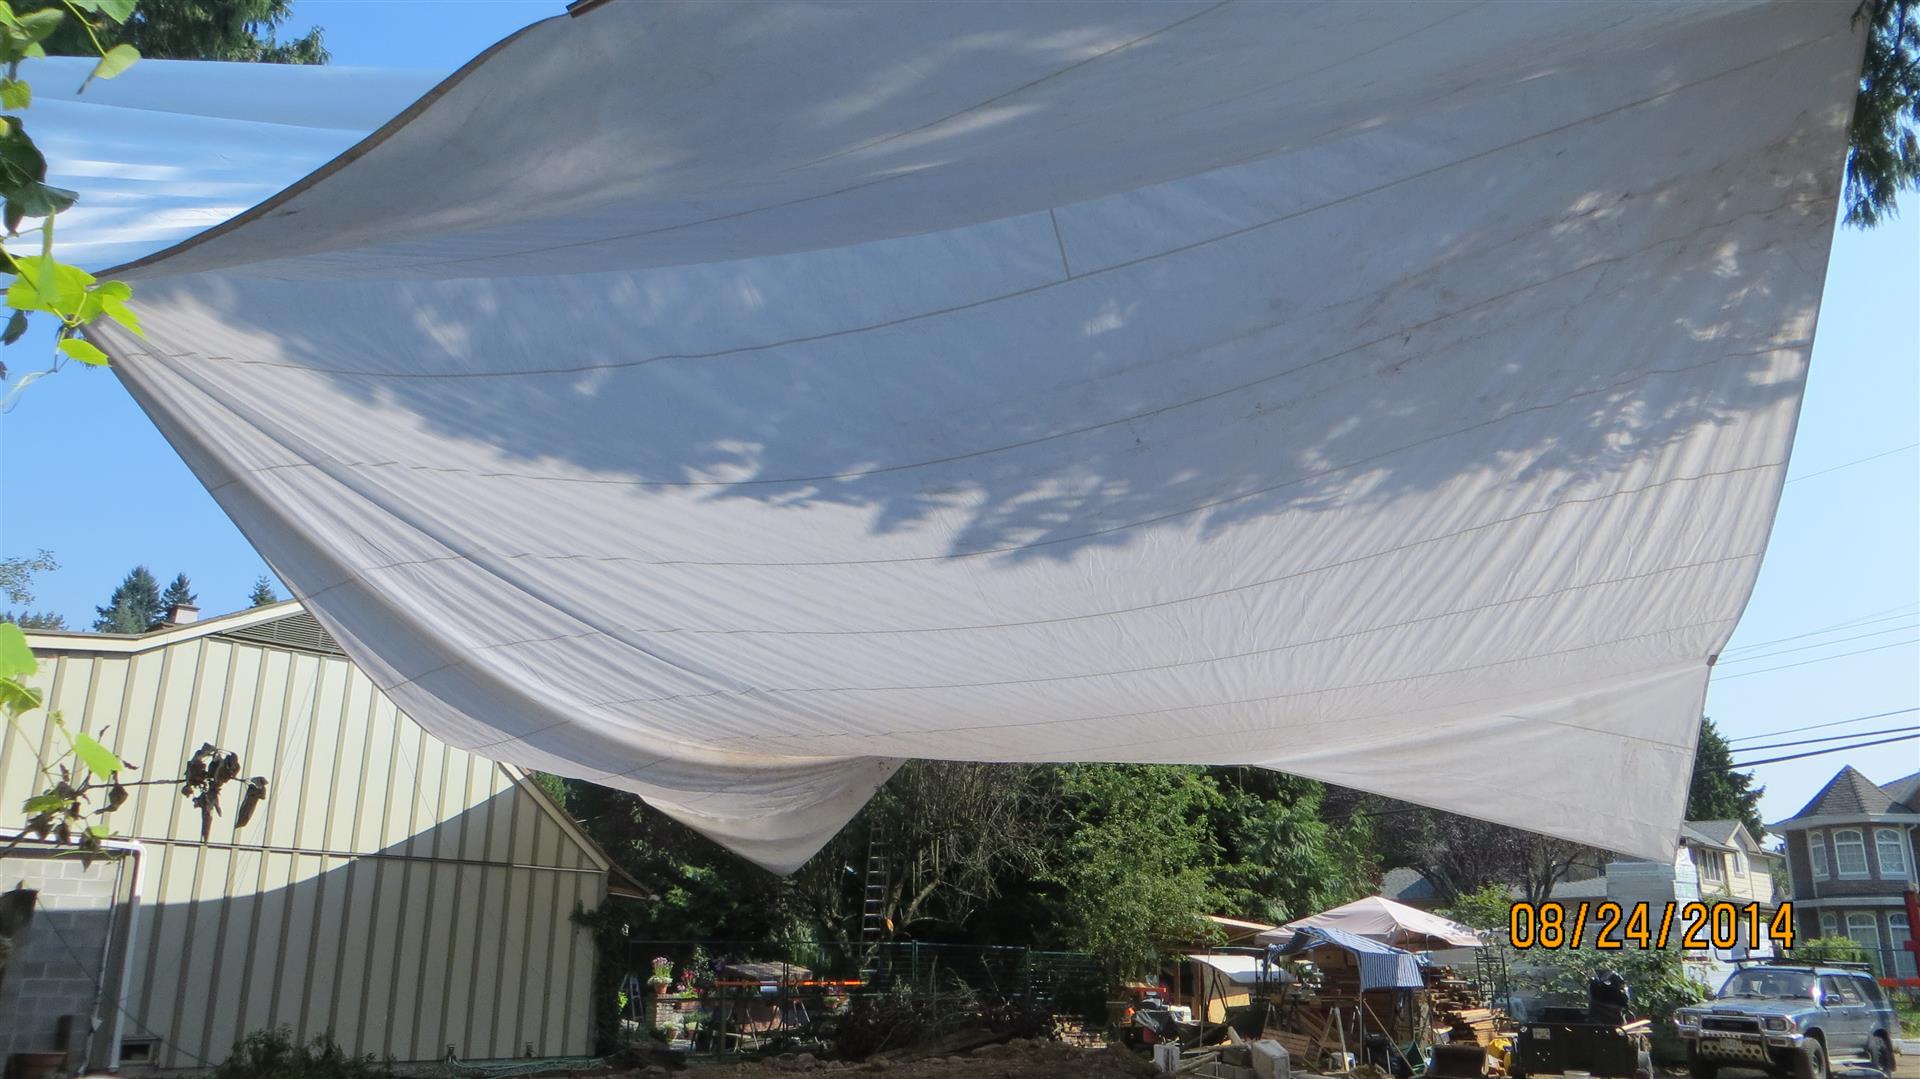
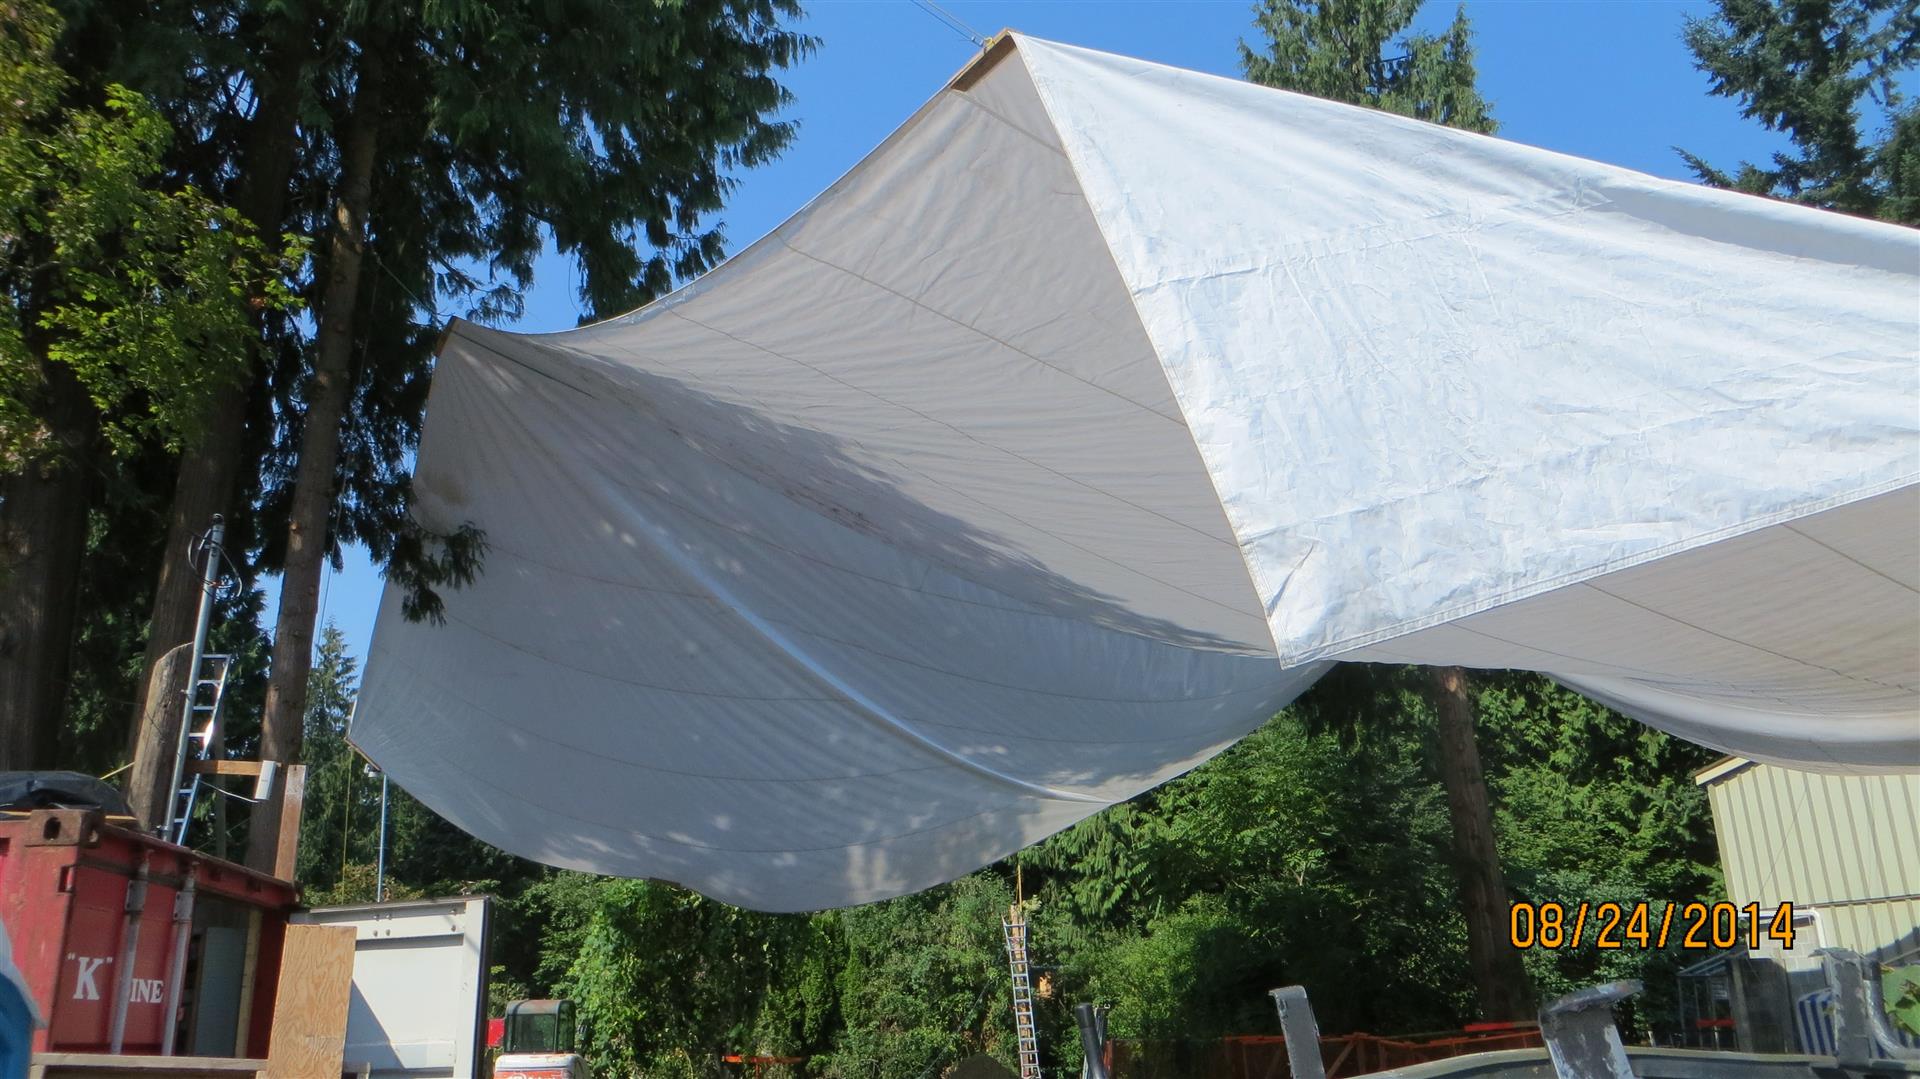
Well – it took the better part of 5 days but the tarp is up.  I tensioned the last point this morning.

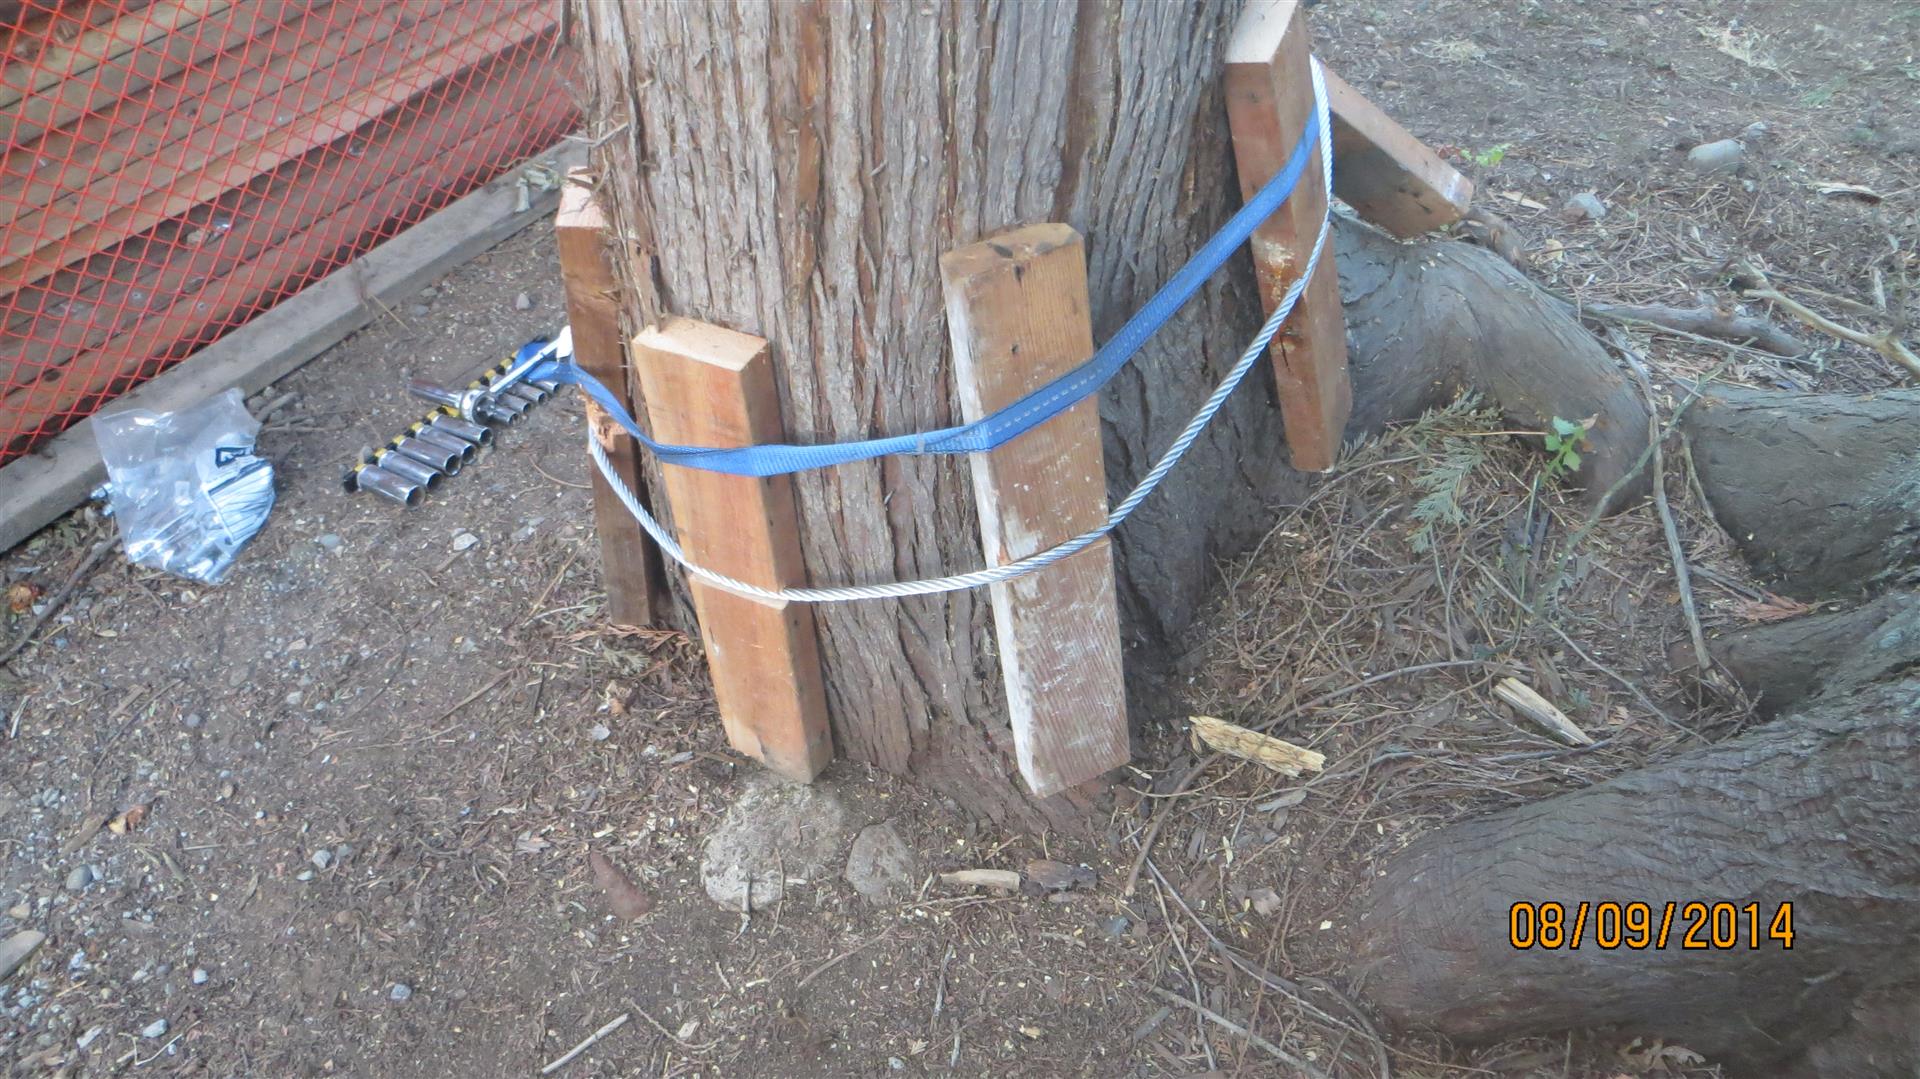
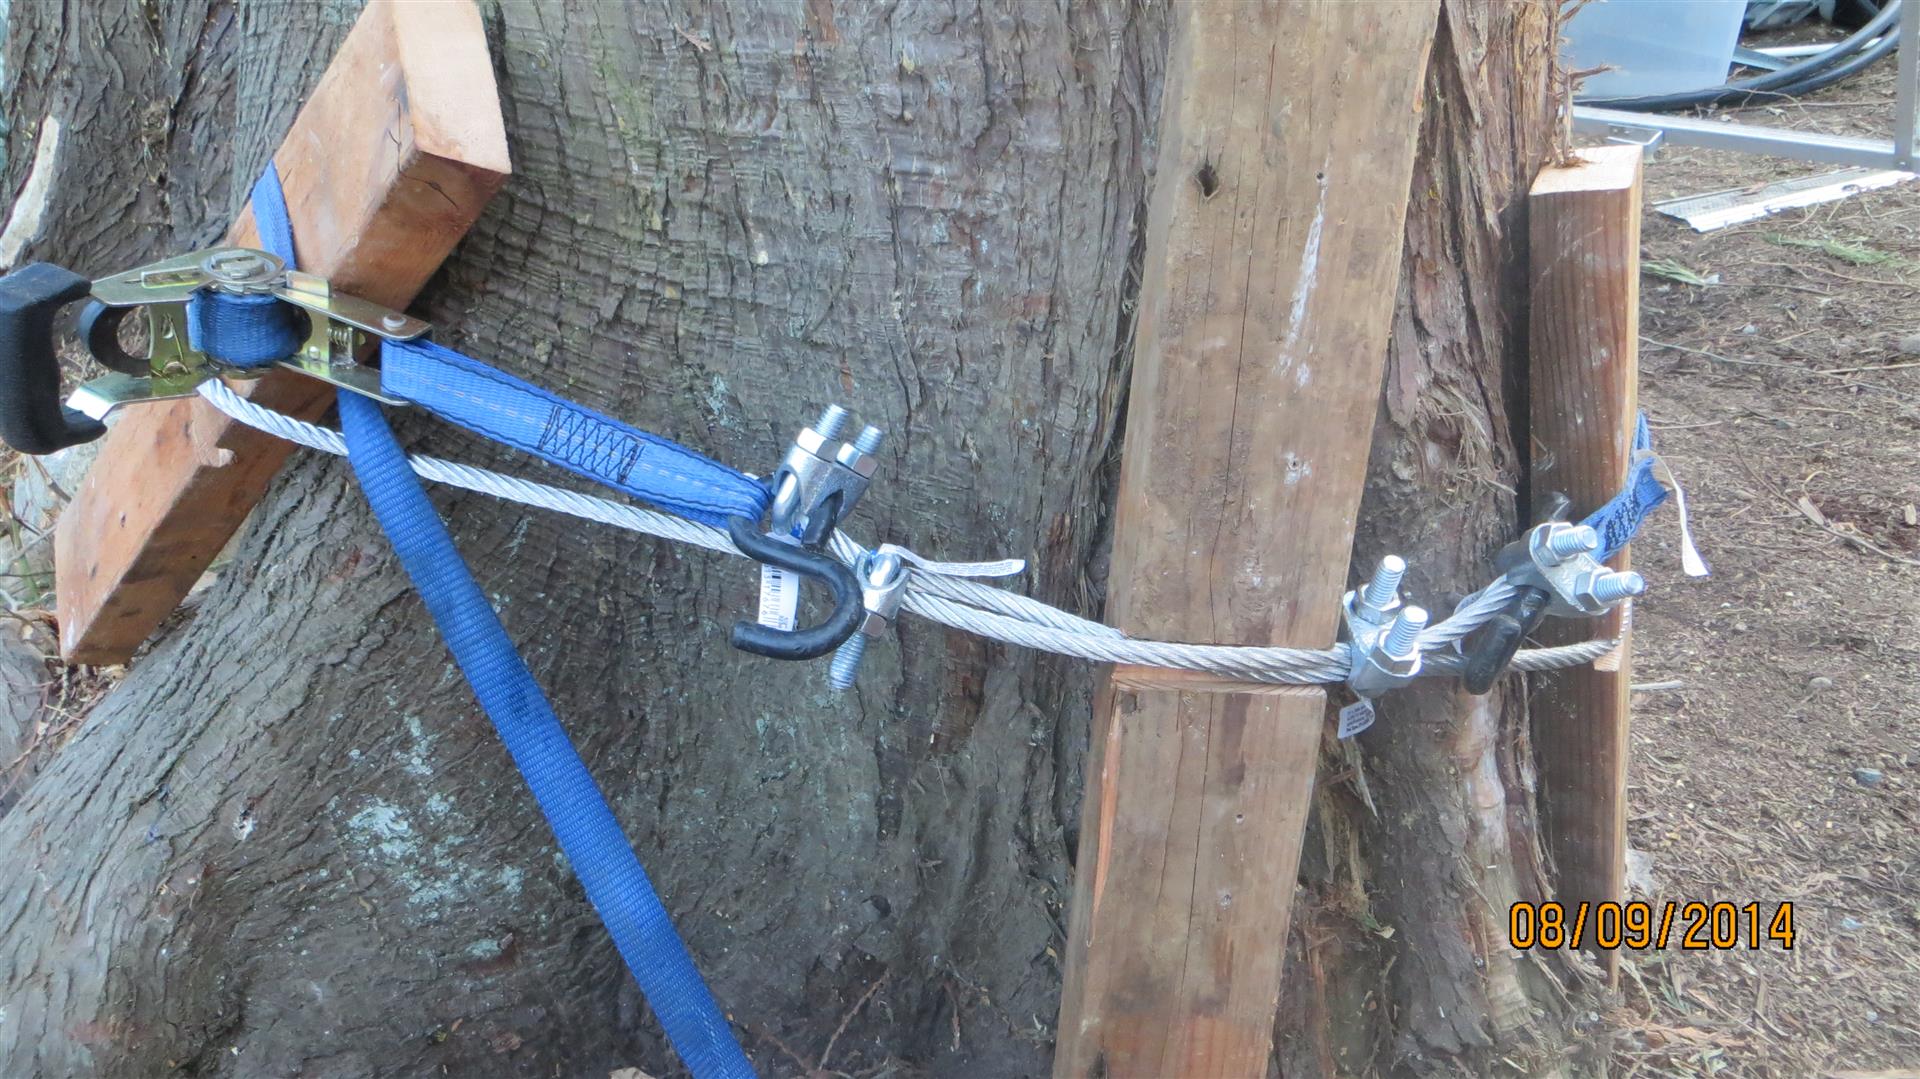
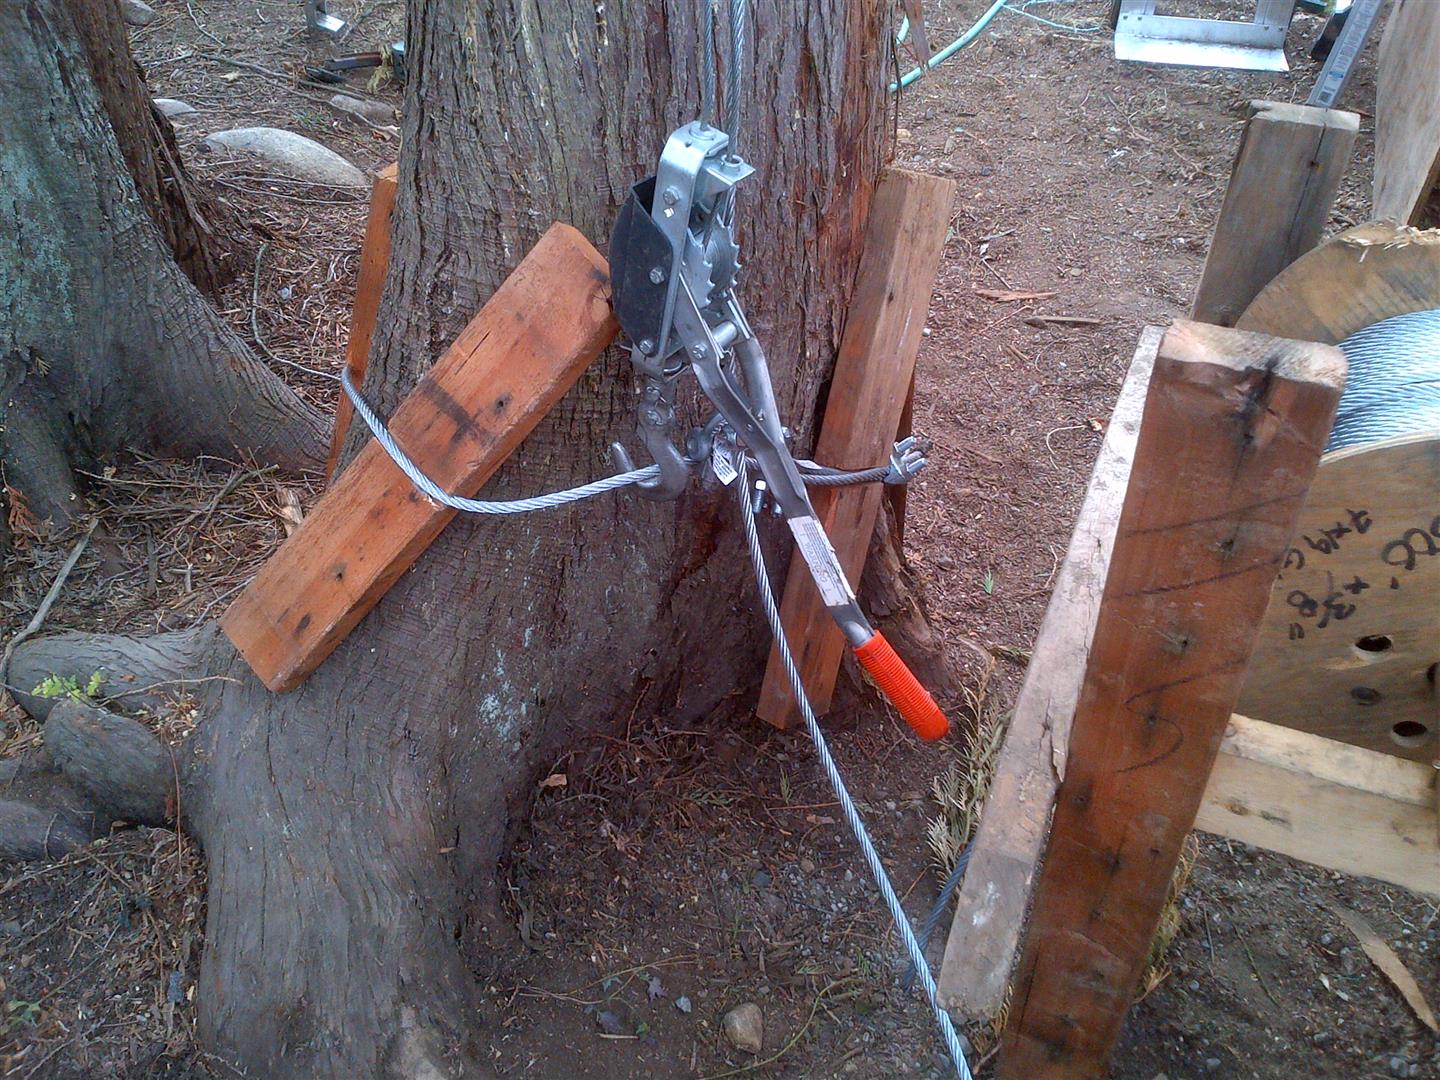
This has been an interesting process full of frustration and learning.  First thing learned is just how heavy something like this could be and the tension it would put on the attachment points. As mentioned earlier, the original nylon chord was not nearly up to the task, so I switched out to galvanized cable for all of the attachment points.

Then there was the dynamics of what shape the tarp would take depending on where it was being pulled.  I needed to rotate the tarp as mush as possible on the main overhead cable because the trees the cable were attached to were diagonal through the build site.  I also needed a lot more of the tarp on the east side of the main line than the west (again due to where the trees were in relation to the new build).

I also lost a lot of time going back and forth to the lumber store for clamps as the scope unfolded and the design was modified.  I cleaned the local Dicks lumber out of two of the sizes.

But the majority of the time was just spent tensioning each line.  This would entail creating a hard point on a tree to attach one end of the come-a-long and then clamping a metal ring to the rope or cable to attach the other end of the come-a-long.  The cable or rope then would typically be run through an eye screw that was screwed into the tree.  Once tension had been placed on the cable, I would install a clamp on the cable on the outboard side of the eye bolt attachment point to hold the tension while I disconnected the winch and re-rigged to do the next pull.  This process was often repeated 5-10 times until that cable was tight and the entire process was often repeated if the attachment point had to be shifted or for instance when I switched from rope to cable. The end result was that most of the attachment lines took an average of 4-5 hours each and I had 5 major points.

None of this would have been possible if there was not tall and strong enough trees available and great neighbours allowing me to use their trees.  So, while I still contend that this is an excellent idea for new construction or renovations, it will not be possible in a great many sites.

The installation has garnered a lot of attention from passers-by wondering what the heck I am doing.  Some say I am nuts and some say why is this not done more.  I explain that this is my cheap way of imitating what they do in a neighbouring municipality where they will often build a aluminum infrastructure over the build area that is closed off with glass or plastic panels. Only difference is mine is going to come in below $2000 and the fancy version is reported to costs $60K or more.

I have tested and have the rain runoff taken care of but realized at 2AM last night I did not account for snow load.  Lets hope it is a typical Vancouver winter with a minimum of snow or it will get interesting as I figure out ways to dump any accumulated snow. One obvious method will be to try and wash it off.

In several cases I wrapped a cable around the tree and protected the tree with wood blocks to distribute the load and prevent the cable from cutting into the bark.  I got this idea from the internet where people were installing zip-lines.
In several cases I wrapped a cable around the tree and protected the tree with wood blocks to distribute the load and prevent the cable from cutting into the bark. I got this idea from the internet where people were installing zip-lines.
I then used a ratchet strap clamped to each side of the loop to tighten the cable around the tree before installing the double cable clamps
I attached a shackle to this cable that I ran the main line cable through.  I would 'lock' this off by placing a clamp just down stream of the shackle once tension has been applied to the main line. This photo shows the come-a-long in place tensioning the main line.
I attached a shackle to this cable that I ran the main line cable through. I would ‘lock’ this off by placing a clamp just down stream of the shackle once tension has been applied to the main line. This photo shows the come-a-long in place tensioning the main line. The shackle is just hidden behind the handle.
The other end would be clamped up stream to provide another tension cycle.  This process was repeated until the line was fully tensioned.  In the case of the main line, once I did this the first time, I figured out I could just run the tail of the cable out to a hook on the truck and with the truck was able to pull the line to within 90% of its final tension in about 30 seconds.  This was fortunate as I took the main line down at least 6 times.
The other end would be clamped up stream to provide another tension cycle. This process was repeated until the line was fully tensioned. In the case of the main line, once I did this the first time, I figured out I could just run the tail of the cable out to a hook on the truck and with the truck was able to pull the line to within 90% of its final tension in about 30 seconds. This was fortunate as I took the main line down at least 6 times.
I attached all lines to the tarp by wrapping them around a 1x4 and then taking a second 1x4 and screweinng them together while sandwiching the out edge of the tarp (which has a chord sewn into the edge to provide strength)
I attached all lines to the tarp by wrapping them around a 1×4 and then taking a second 1×4 and screwing them together while sandwiching the outer edge of the tarp (which has a chord sewn into the edge to provide strength)
This photo starts to show the scale of this tarp when compared to a 2-Storey house in the background
This is a shot from across the street.
A closer view showing the attachment point.  The flap handing will be left as there was no where to attach the end to as this is over the driveway.  It will probably whipe up against the trucks as they go in and out so I will have to make sure it cannot catch on anything.
A closer view showing the attachment point. The flap hanging will be left as there was no where to attach the end to as this is over the driveway. It will probably wipe up against the trucks as they go in and out so I will have to make sure it cannot catch on anything.

Thanks for visiting.


Leave a Reply

Your email address will not be published. Required fields are marked *