Slab Happy - Revisited
Well, I am thrilled to advise I finally have a basement floor!
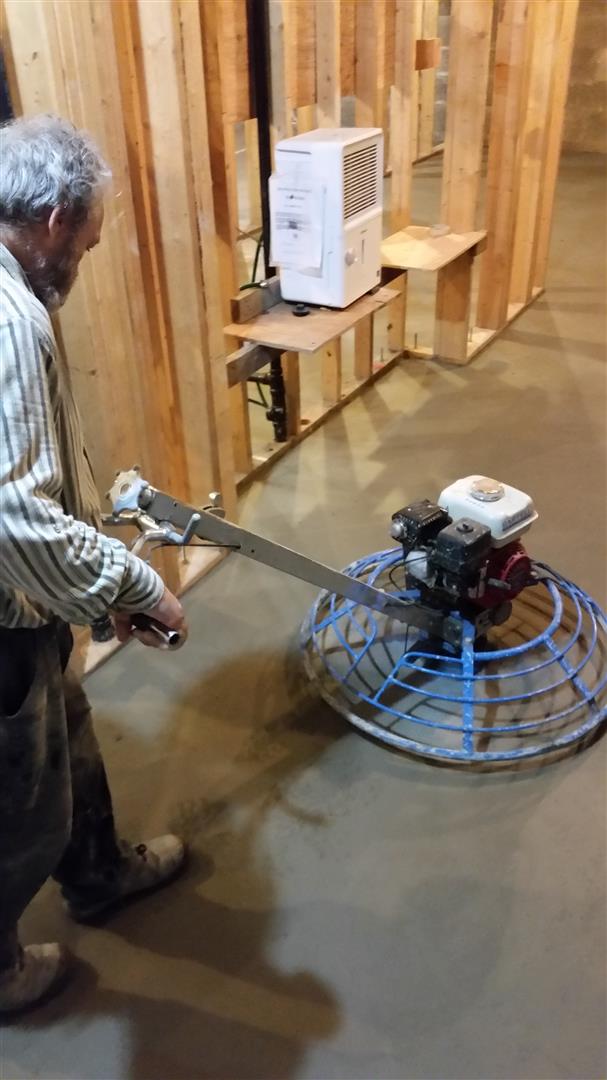
I poured the floor last Monday and it turned out phenomenal. John and his crew from High Def Concrete knocked it out of the park! I had asked for a machine finish, and by the time that John left that night at 9:30 PM the floor was as smooth as glass and should provide years of undamaged use (I will leave the concrete exposed in many parts of the basement).
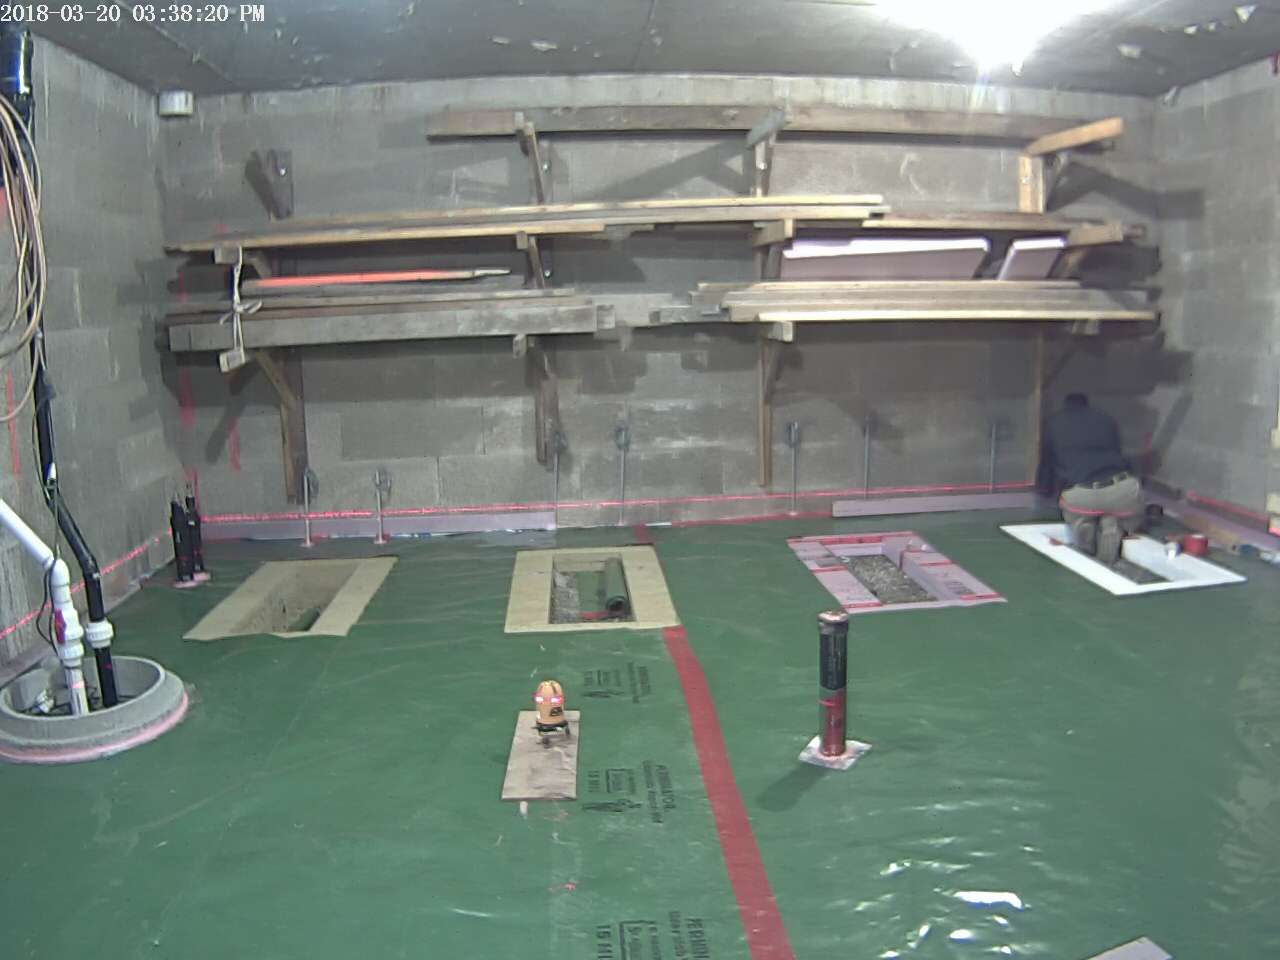
But lets back up a bit. When I last updated you, I had just finished the slab edge membrane attachment to the footings and was working on installing the RockWool ComfortBoard 110 Semi-Rigid mineral wool panels.
I can advise that this product stood up well to the rigours of prepping for the slab pour. I was able to walk on the product without significant compaction but did use plywood kneeling plates as the concentrated weight on my knees would leave a noticeable divot (as also occurred with the XPS and EPS panels I installed in the science lab). In areas that I was repeatedly accessing, I put down 2×6 runners to protect those pathways from over compression during the pour prep, and you would also want to do this if running a hard wheeled dolly or barrow over the area. There were also no issues that arose during the actual pour, I had calculated volume needed for an exact 4″ slab + an extra cubic metre + and extra 1/2 M3 that stays in the pumper truck hopper, and I was only left with the extra M3, meaning there was no significant compression of the insulation during the pour (and my takeoff skills were sharp!).
Compared to the rigid foams, the mineral wool is also easier to install because it is more forgiving due to its slight ability to compact. For instance if their was gravel chunks higher than the rest, they would just embed into the bottom surface of the insulation panel (a big deal when using rigid foam and 3/4″ crushed). This really helped to maintain the required elevations of the floor. It was also easier to fill irregular areas with the mineral wool as those areas could just be ‘stuffed’. The only down side is that in the confined space of the basement, the air quality got quite poor and I had to wear a mask, and even then my chest was not happy for a day or two after handling.
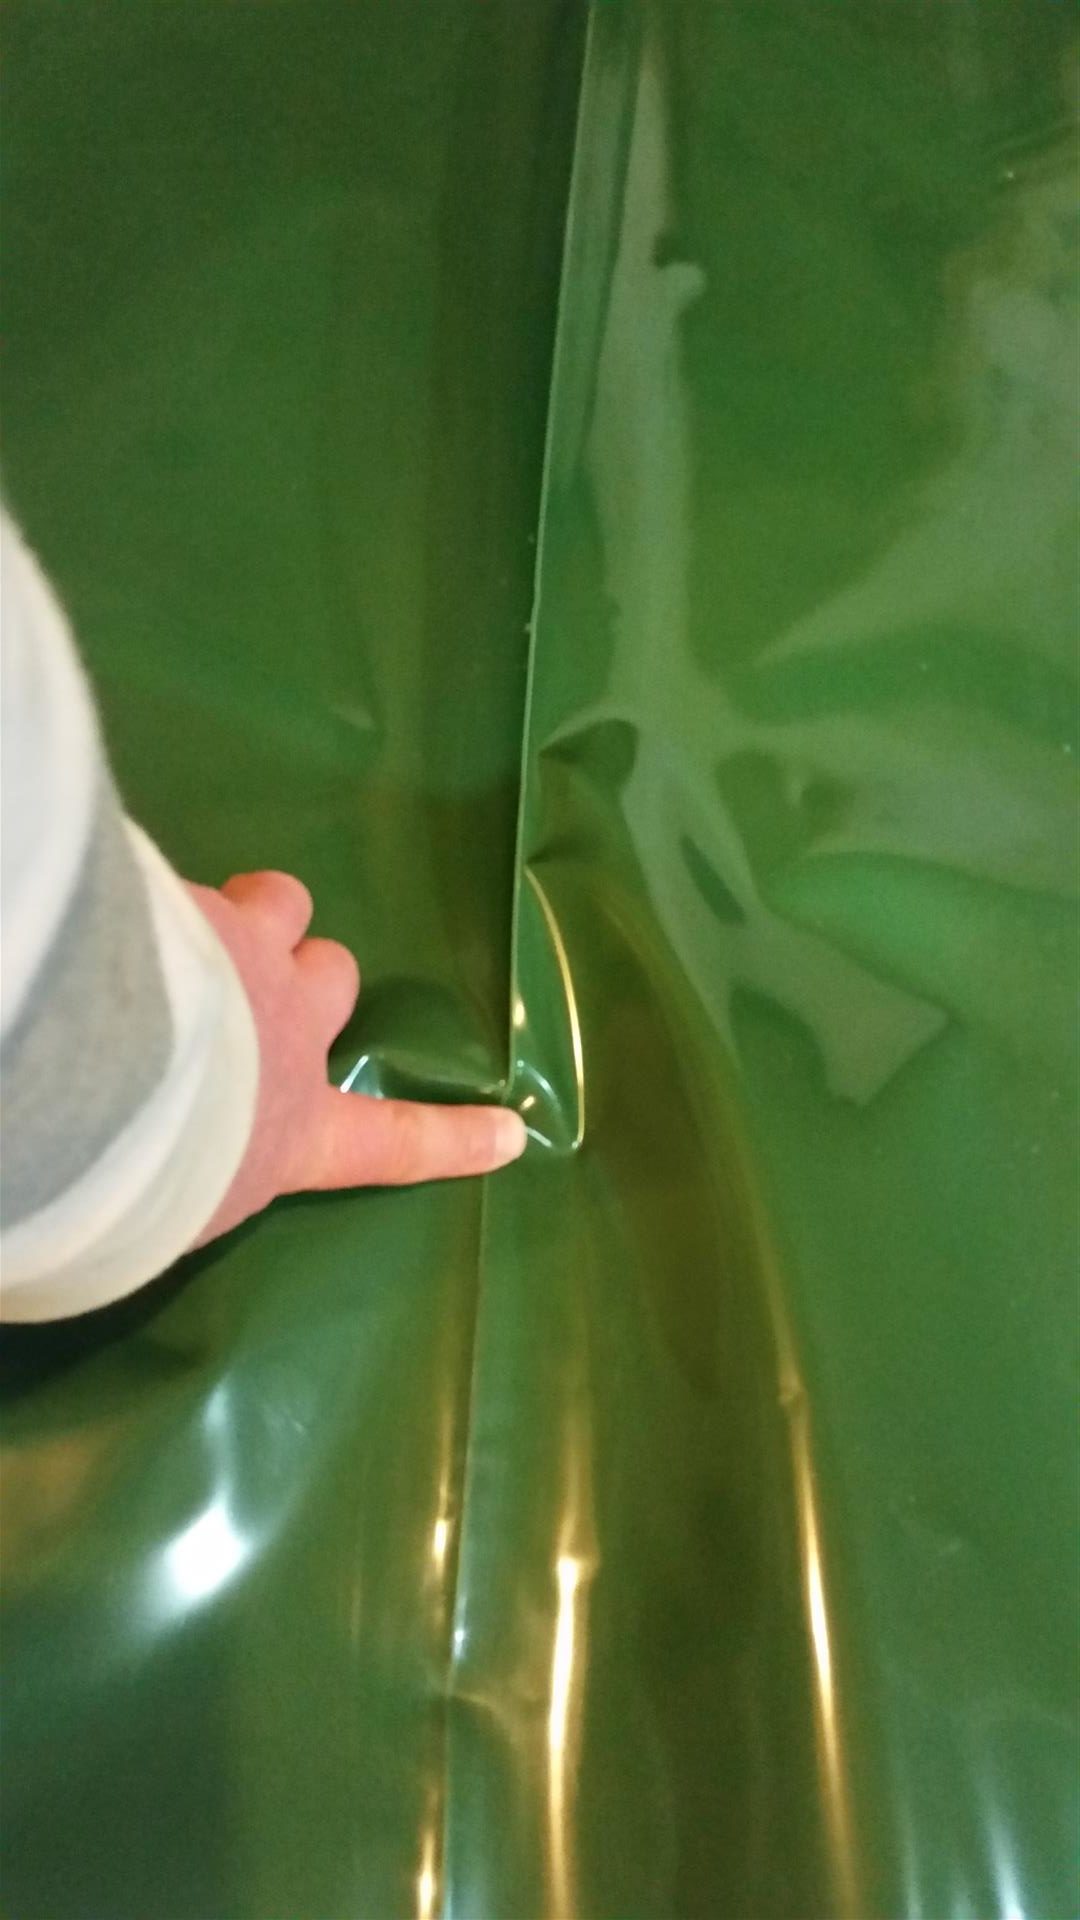
I also was impressed with the durability of the 15 Mil Perminator membrane I installed below the slab. It was fairly easy to install except that due to its thickness and rigidity, any creases folded into it at the factory were difficult to get rid of and therefore air seal around. But its thickness meant it stood up well to construction activity and resisted all tears and punctures.
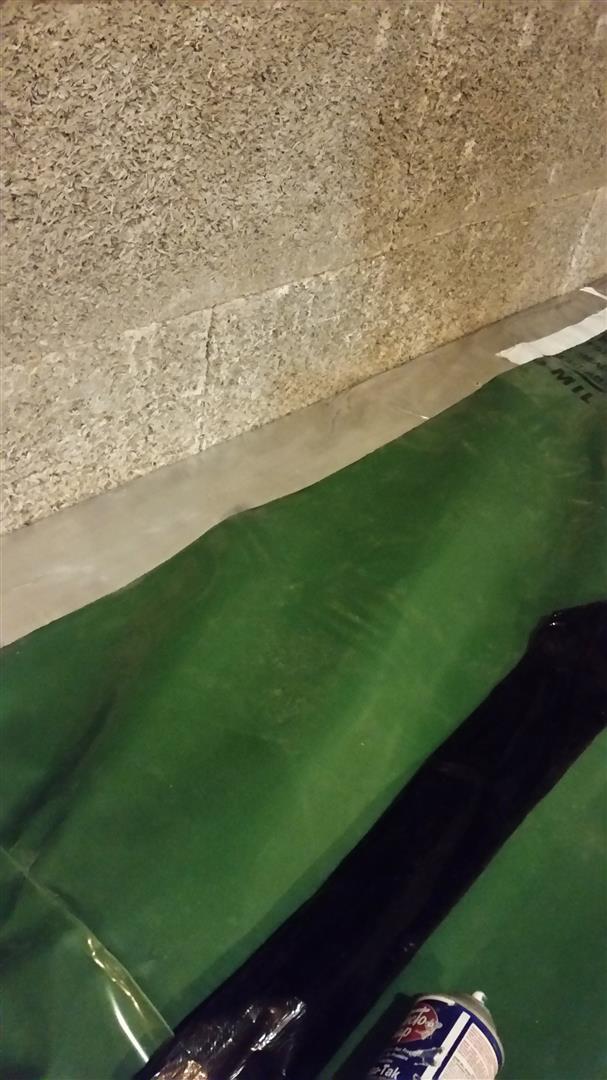
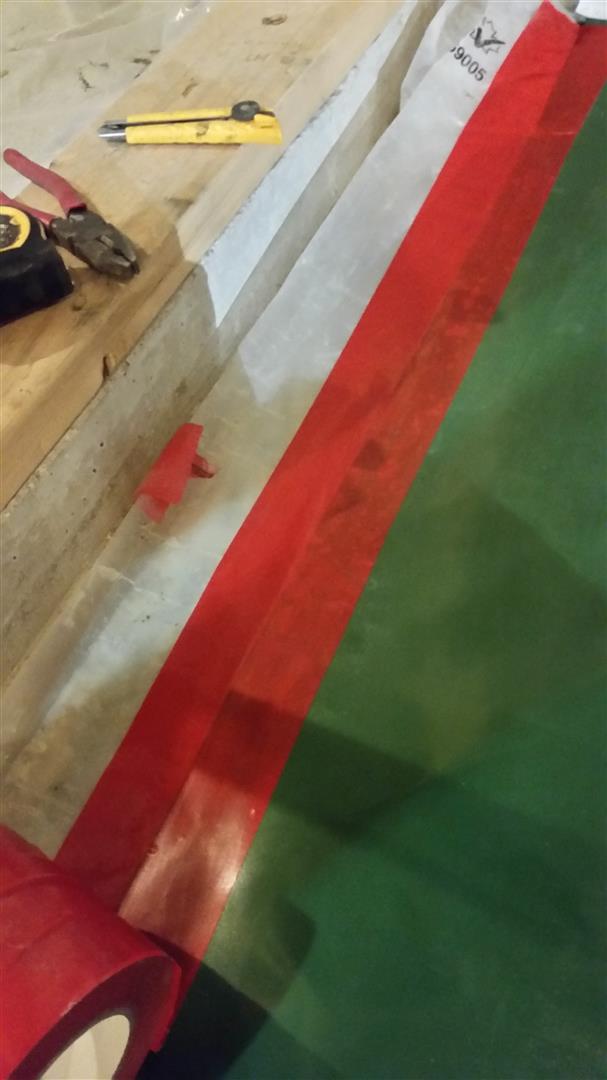
The only thing I would have changed if doing again is to have used the Perminator membrane around the internal footings instead of the VB Poly I did use. Back in Jan 2015, I had not yet researched what sub-slab membrane I was going to use. The poly flaps had been protected all this time with strips of plywood, but there were still a lot of holes that needed to be sealed up prior to the slab pour.
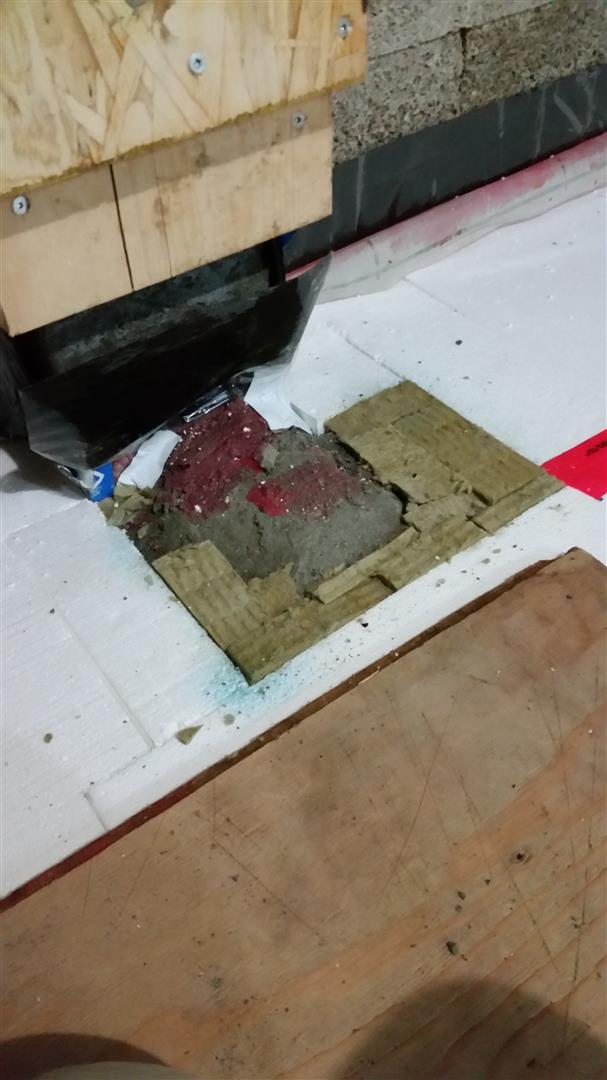
For any floor drain penetrations, I was able to cut a hole in the exact location by folding the membrane up against the drain and then marking with another loose piece of ABS.
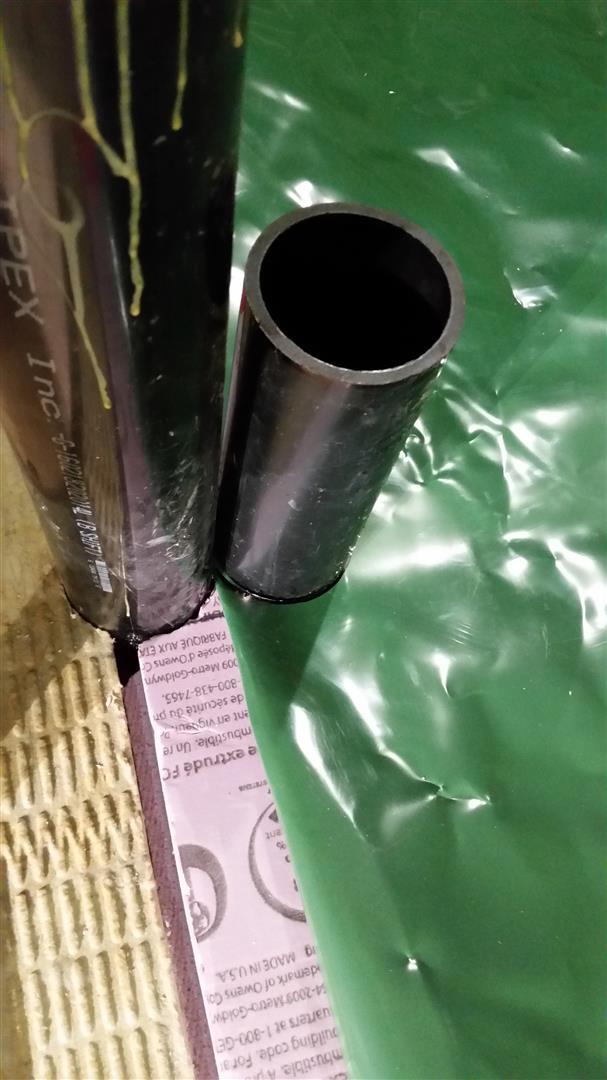
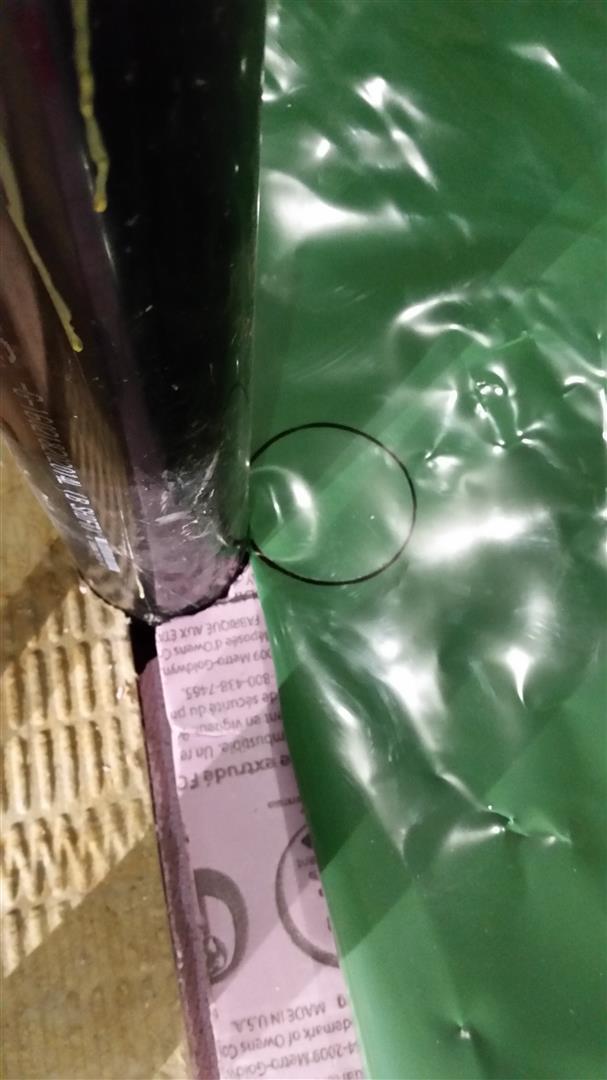
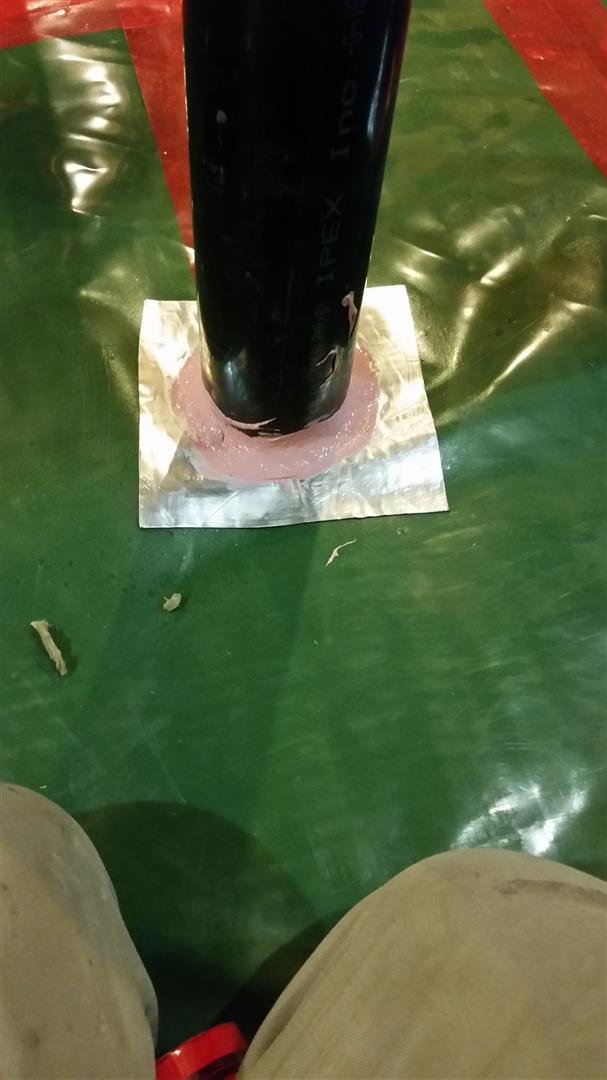
For pipes and other penetrations that you could not slip the membrane over, I just had to do a slit cut and then reseal. On all penetrations, I was concerned that the slight compression of the mineral wool, would just tear any taped seal I did around the penetration. So, I instead made a ring of membrane that I knew would stick well to the Perminator and then I used my favourite liquid flashing material: R-Guard Joint and Seam. This provided a very flexible, air and water tight interface, and was fast and easy to install.

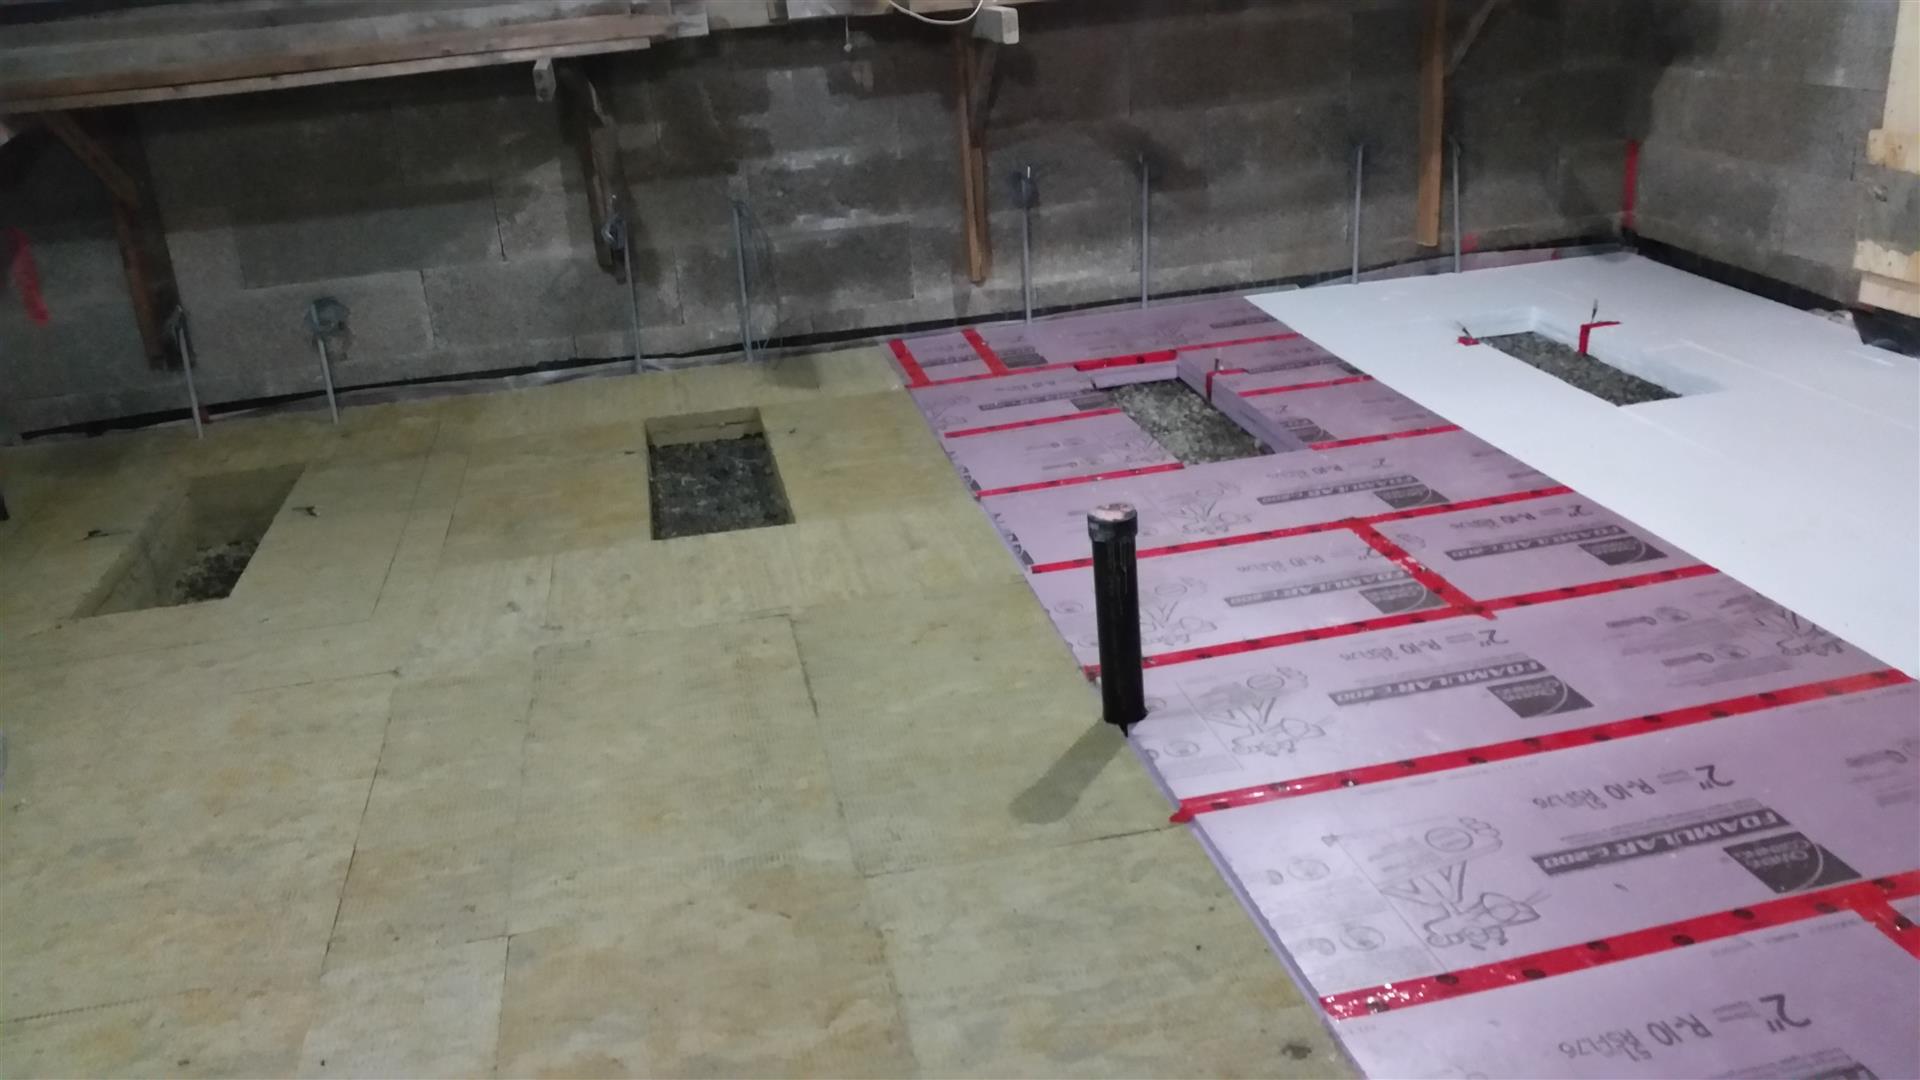

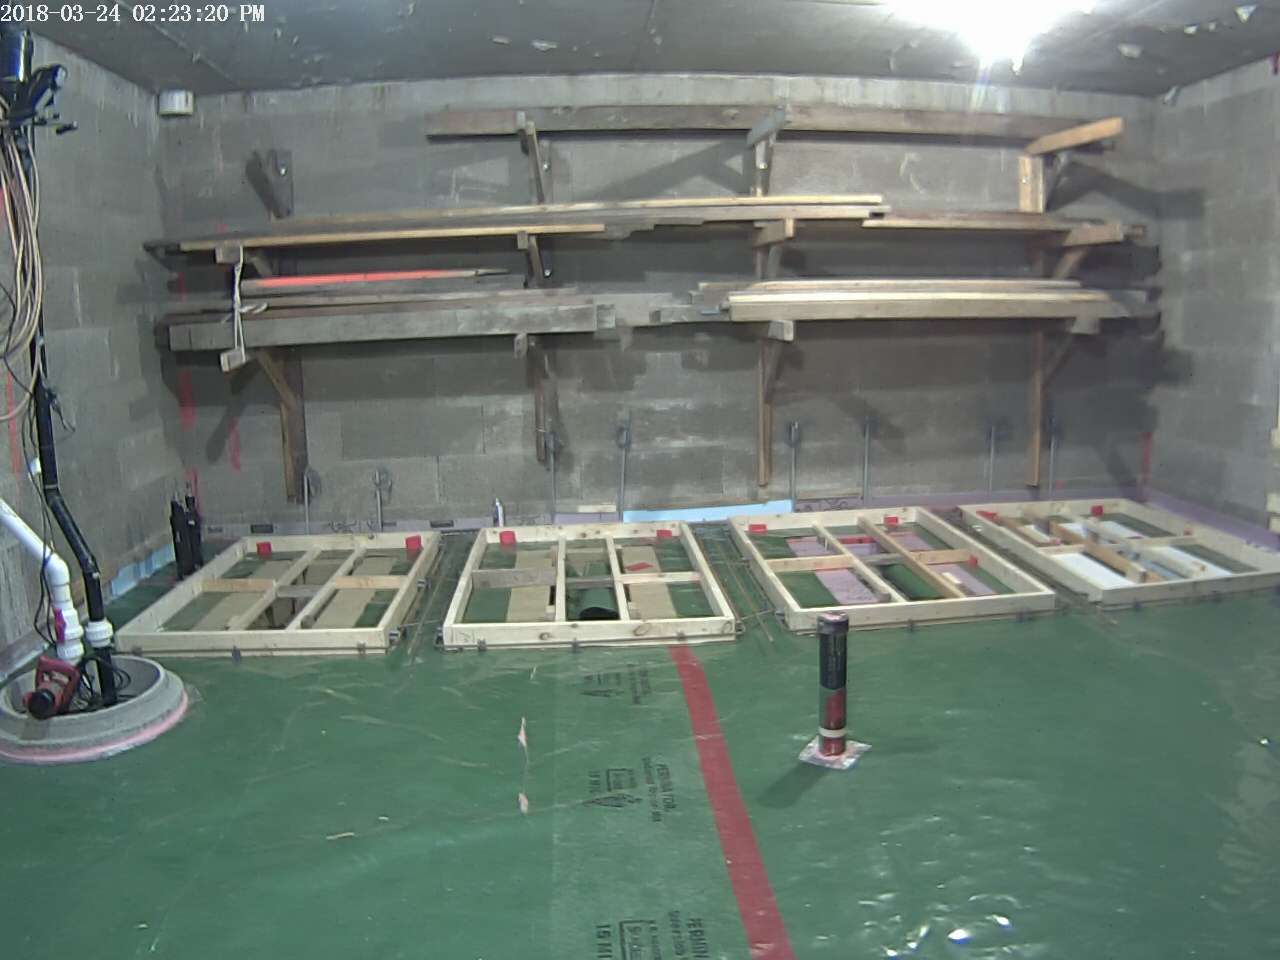
The last task was to install the slab edge insulation. Now slab edges are negligible down 12ft below grade except that the perimeter drainage system is constantly removing thermal energy from the perimeter of the foundation, so some insulation is still useful. You also want a bond break between the floor and foundation/footing to allow independent movement.

Now to the title of this entry – Slab Happy. This was not randomly chosen but represents an article written by Joseph Lstiburek at the Building Science Corporation. In his building science insight #59 Joe talks about the proper placement of the sub slab ‘vapour barrier’ SHOULD ALWAYS be placed between the insulation and the concrete slab, NEVER UNDER the insulation. Joe further previously elaborated on the issue in his article Concrete Floor Problems discussing the California practice of placing sand between the vapour barrier and concrete to the same end result.
Most builders reading this entry will have thought up to this point that I had put the Perminator membrane in the wrong location, and in fact my Municipal inspector confirmed that they “always” see the membrane installed under the insulation.
So why should it go above? Simple answer – Physics. You see, when the membrane is put below the insulation, it means that there is no barrier between the insulation and all that bulk water incorporated into the poured concrete. The insulation becomes 100% saturated. This is only part of the problem, the second part is that although it was wetted by liquid bulk water, its only drying capacity is by vapour transport up through the slab, and this is a very slow process retarded even further by the fact that as the interior of the dwelling becomes heated, the vapour pressure will always be pushing downwards. The insulation stays saturated for years, if it ever dries out, and wet insulation is pretty much useless insulation! So always put your membrane in contact with the concrete.
Now that this milestone is behind me, I will frame out the remaining walls in the basement before re-starting on the exterior of the dwelling.
Thanks for visiting.
“In any moment of decision, the best thing you can do is the right thing, the next best thing is the wrong thing, and the worst thing you can do is nothing.” —Theodore Roosevelt (1858-1919) 26th U.S. President
Hi Sean
That underslab barrier looks really durable! Might look into it as well, did you buy locally (if so what reseller)?
Also curious how come you didnt use light weight rebar throughout the slab (seems engineer standard drawings dont include any on my plan) but was thinking of adding especially for area where cars park for extra strength?
Cheers
Hi Phillip,
Yes I bought the Perminator locally from National Concrete Accessories. It is an excellent product with a great track record. One roll of the 15 Mil is $588 and the tape is $47 a roll. A roll is 12′ x 200′.
Very few people would consider putting rebar in a floor slab. It does not do much to prevent cracking and the slab just does not need the strength. Some put welded wire mesh in a slab which is meant to help with crack control. But it often gets tramped to the bottom of the slab and not pulled back up during the pour, so it does very little.
I instead opted to add micro-fibres to the mix to maximize the crack control. It adds another $19/M3 to the mix cost, but for the whole basement was only $300 which is cheaper than placing the welded wire mesh and will be a lot more effective at preventing even micro cracking.
I also went with a 30 Mpa mix which will again help minimize cracking and be much stronger (also thought it a good idea considering I was using insulation with some compression).
Finally, the best crack control is a mix with a low water ratio. And this means both what you ordered and also what the pumper does to the mix when on site. I was going through about 120ft of hose, so I added extra flow to the mix to create a 6″ slump. This helps grease it through the pump hose, make it much more likely the pumper will not add ‘extra’ water on site, and makes placement much easier.
The only down side is it can take a lot of time to set, so I also added some quick set so that there was a chance the placing crew could go home that night.
Yes, extra strength for garage is good. I had a suspended slab and also will have a car hoist. So I had lots of rebar in that slab (see https://www.theenclosure.ca/all-barred-up).
Cheers